Name or Rename PDF Files Based on Content Below a Search Term

In previous blog posts [see 1, 2], we showed how Win2PDF can name (or rename) PDF files based on data contained within a file. This feature has been especially useful for users needing to manipulate invoices, as this twitter user has noted:

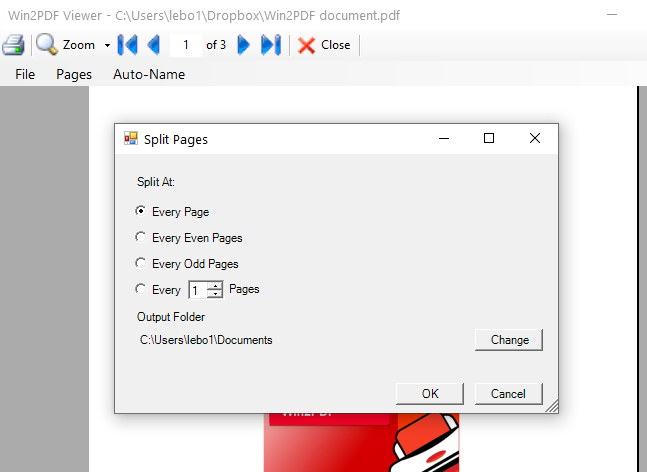
Brainsweat. Lots of it. We’ve been talking with a lot of users that are spending a lot of time trying to sort through massive numbers of PDF invoices and renaming them based on content, attaching them to emails, splitting them apart, etc.

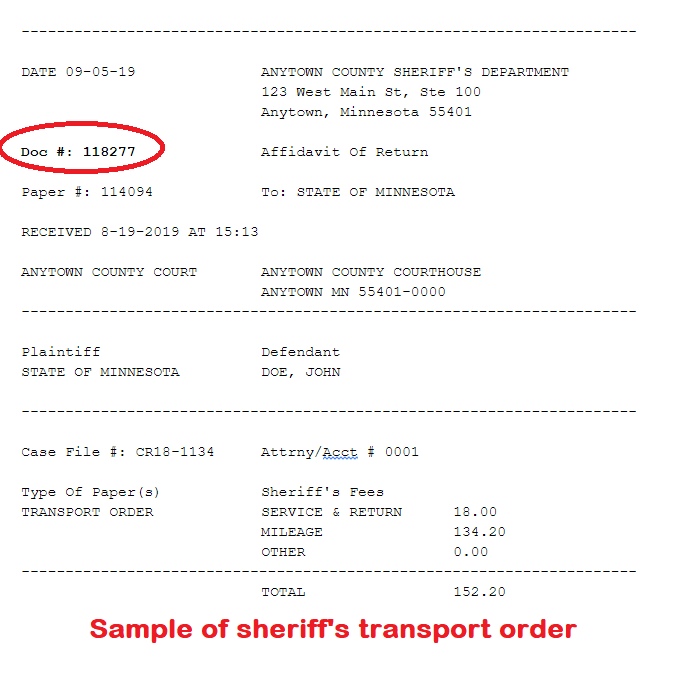
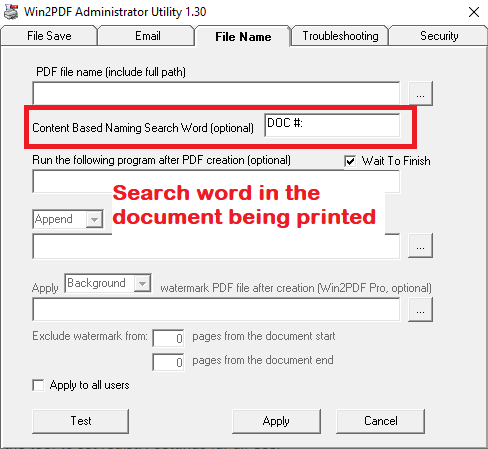
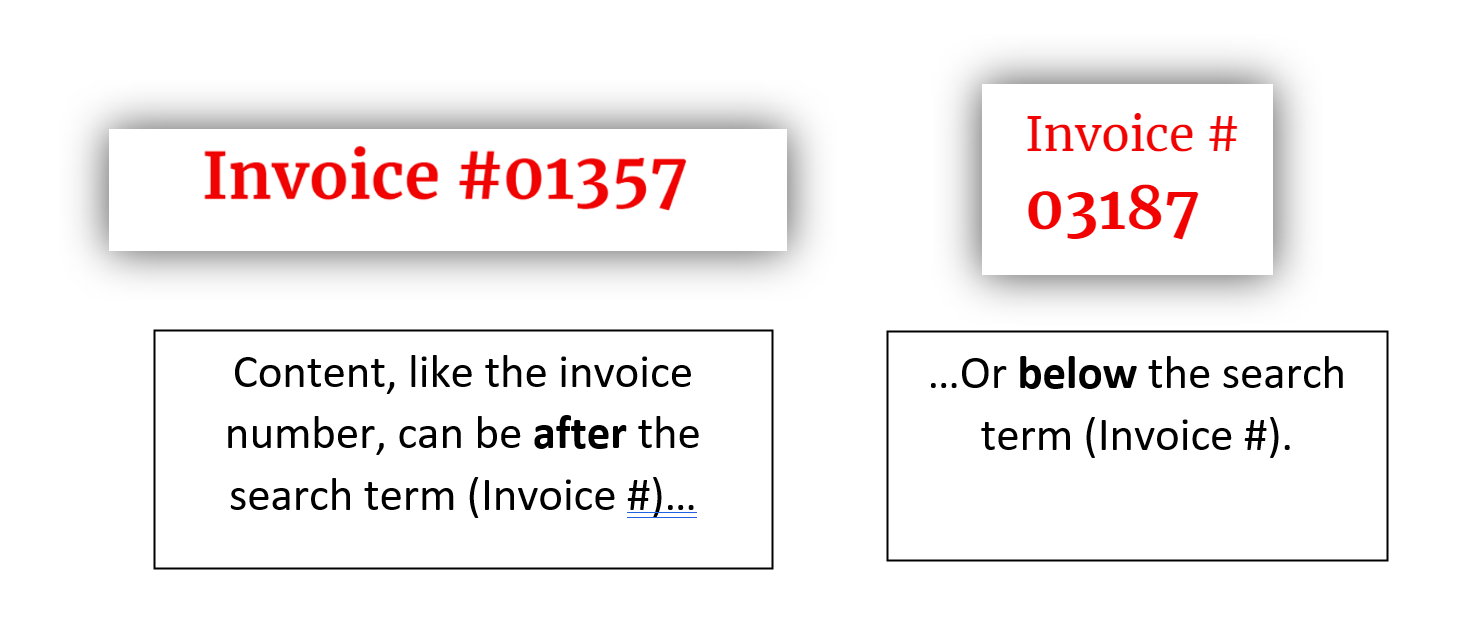
We now have a free update (Win2PDF 10.0.141) that expands on the capability to make this happen. Namely, it adds the capability to capture the search field below a search term. Previously it only allowed you to select text that followed after a search term. As many of you may know, it’s not uncommon for the invoice number to reside on a different line, so now both types of searches are possible, as shown below:

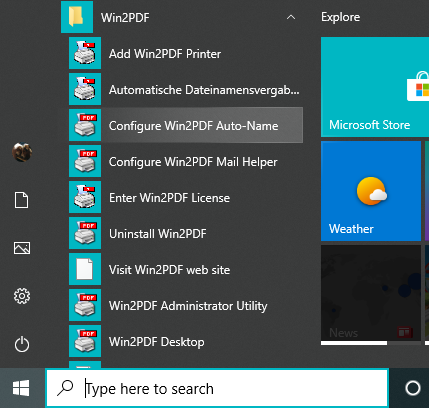
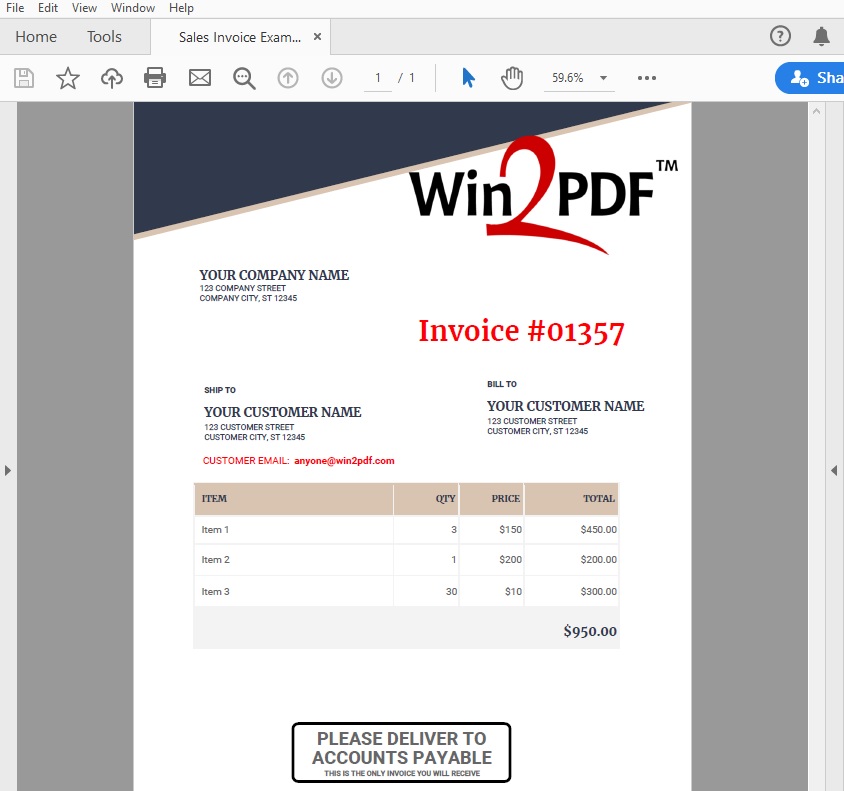
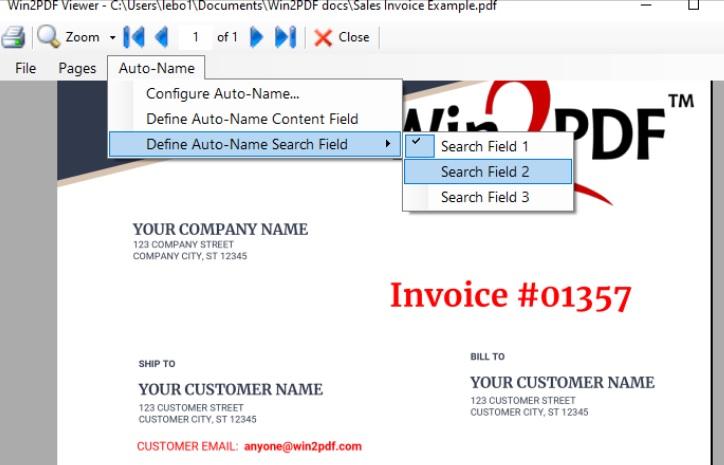
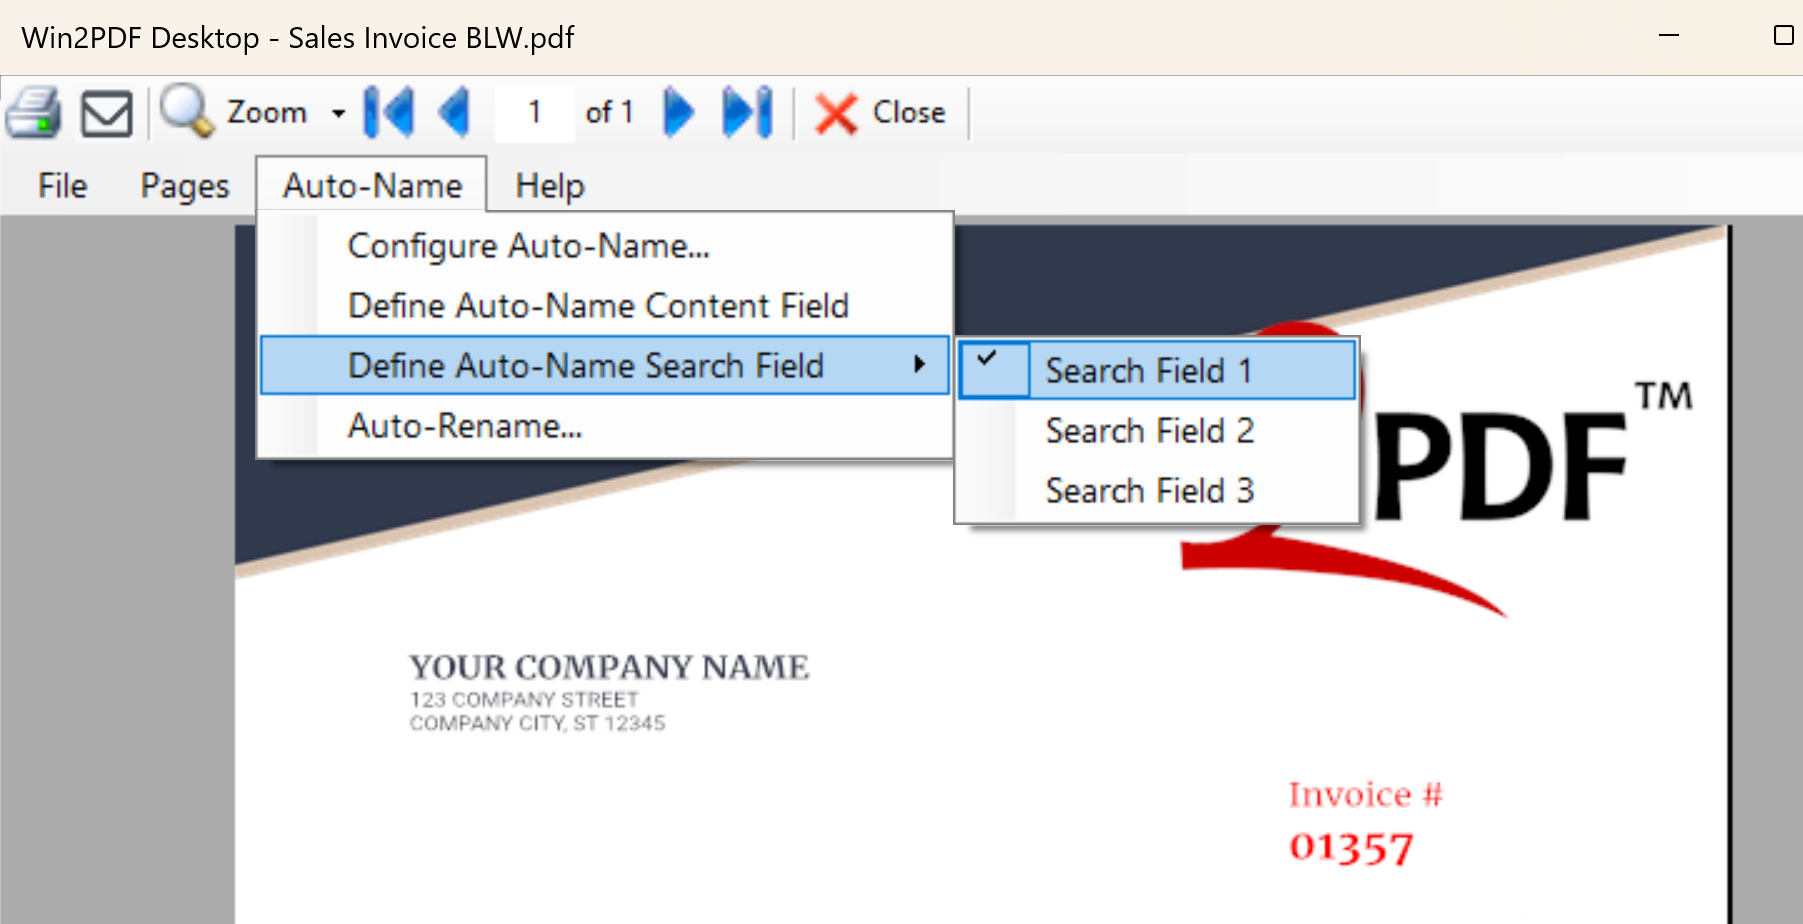
To use this feature, you’ll first need to open a sample PDF document in the Win2PDF Desktop App to define the Auto-Name Search Field.

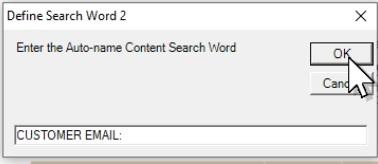
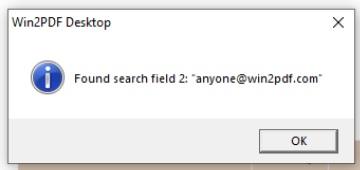
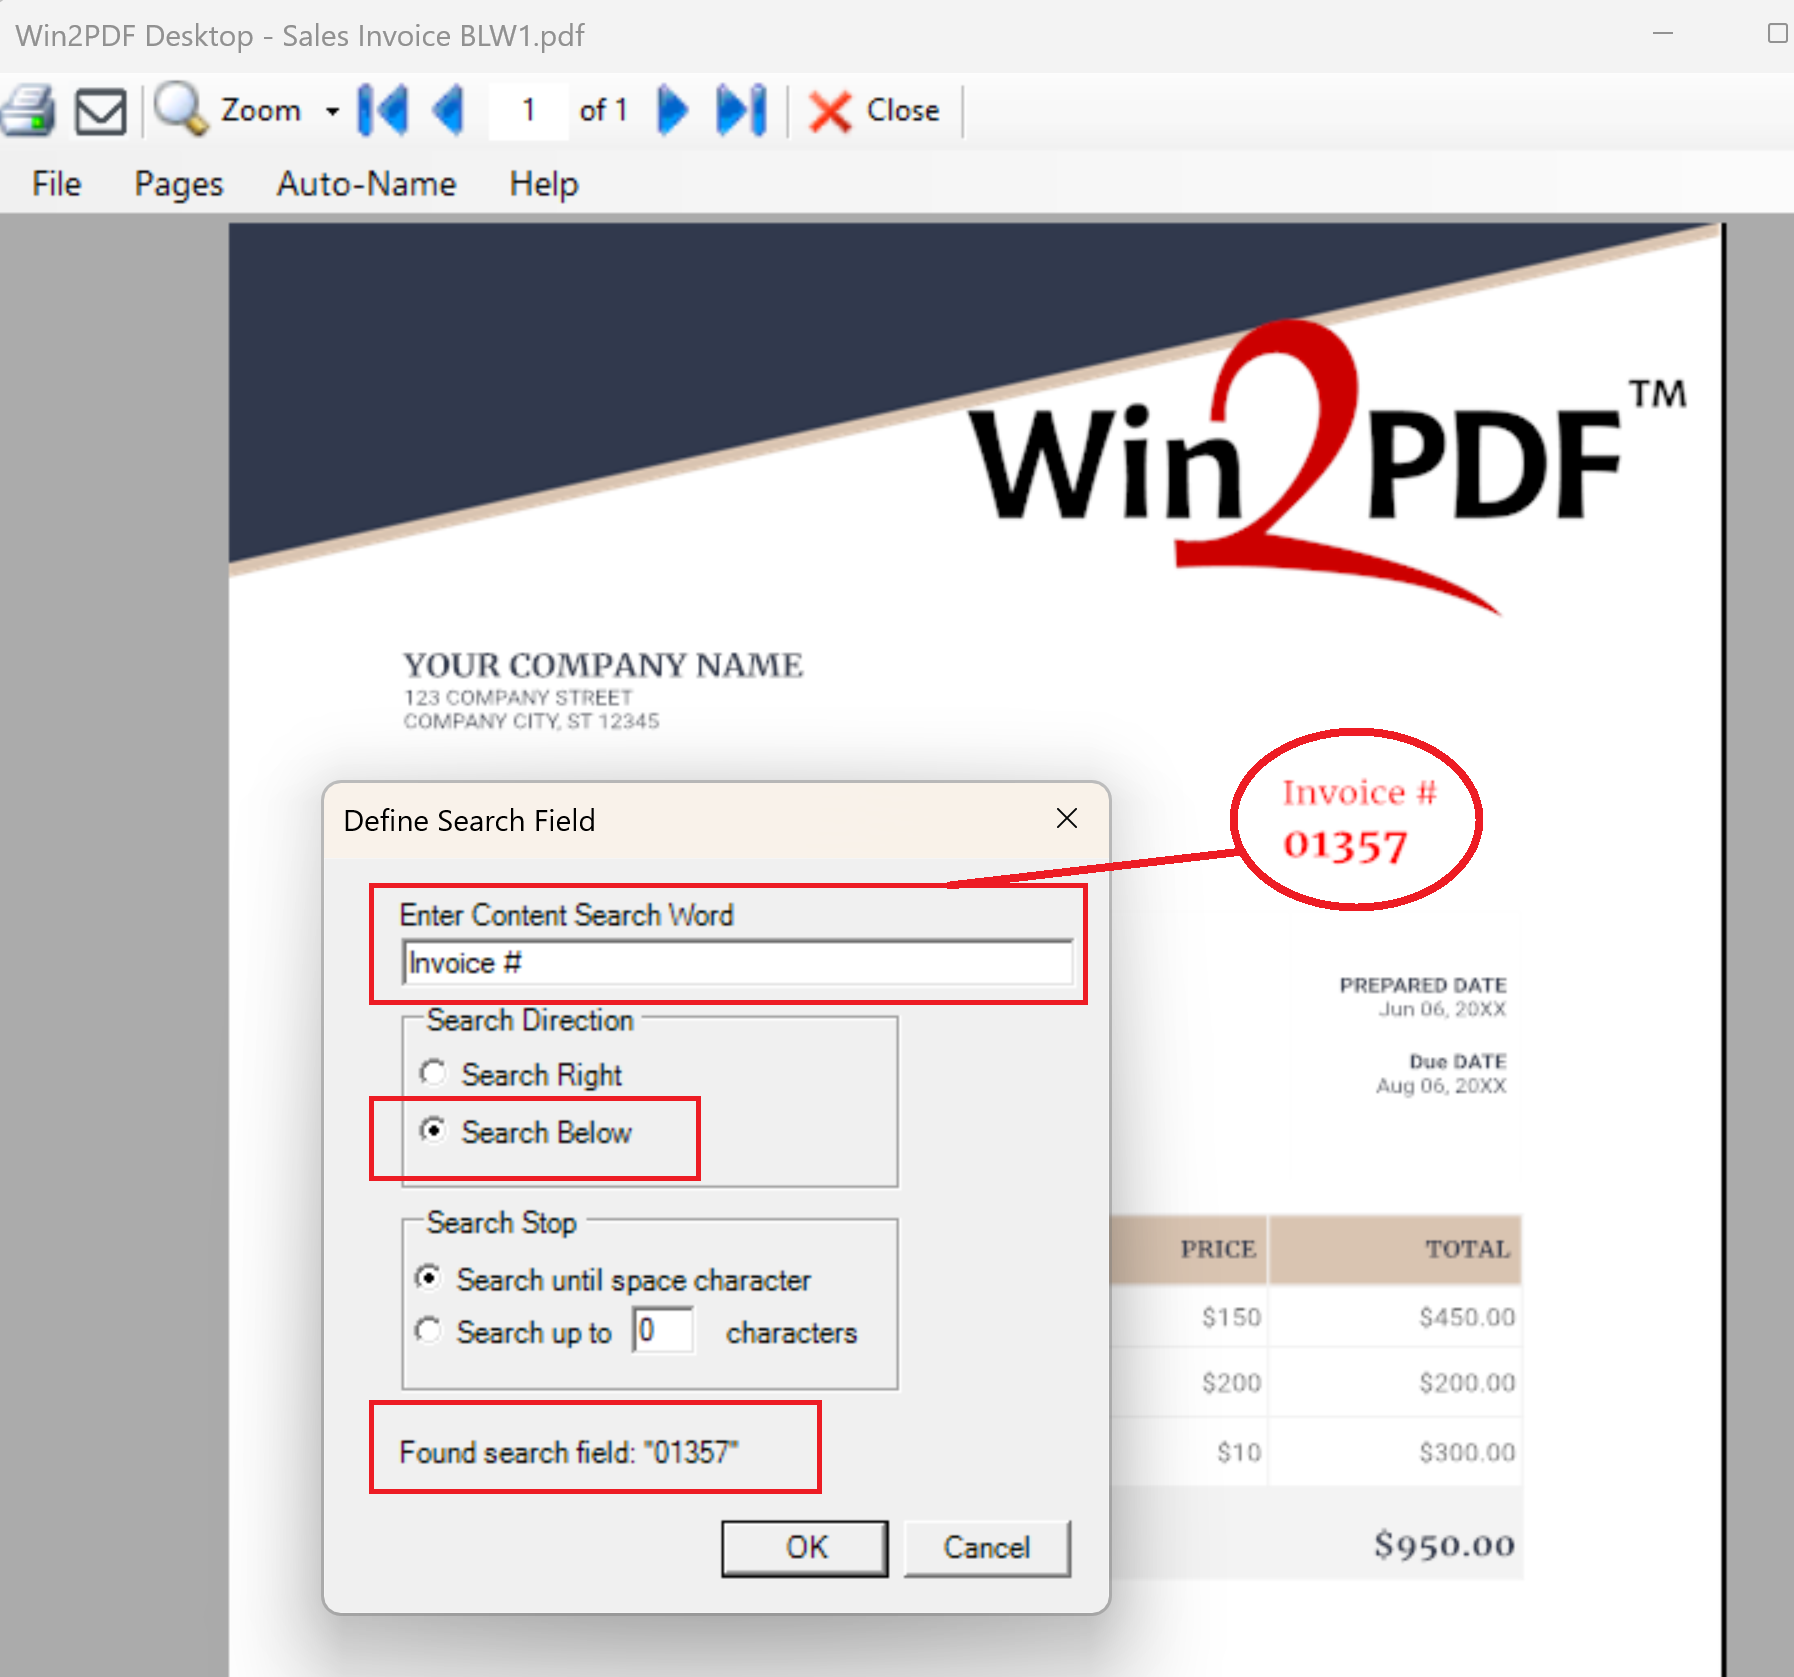
Then, based on the example file shown above, you’d enter in the Content Search Word of “Invoice #”, choose the search direction to be “Search Below”, and it will show you what the found search field is:

After you have defined this search field, you can do a few things.

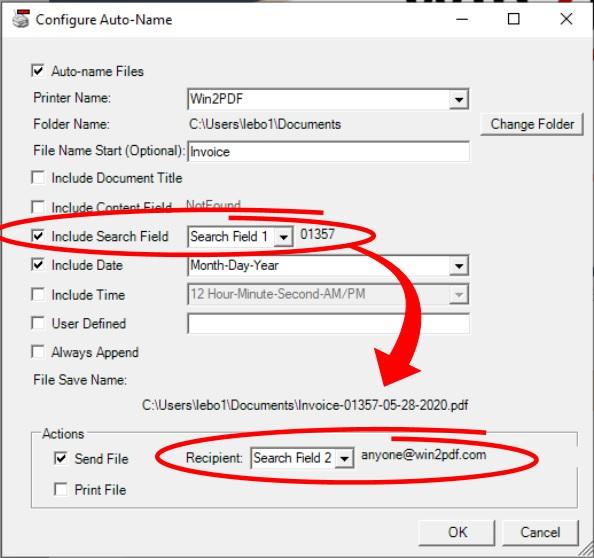
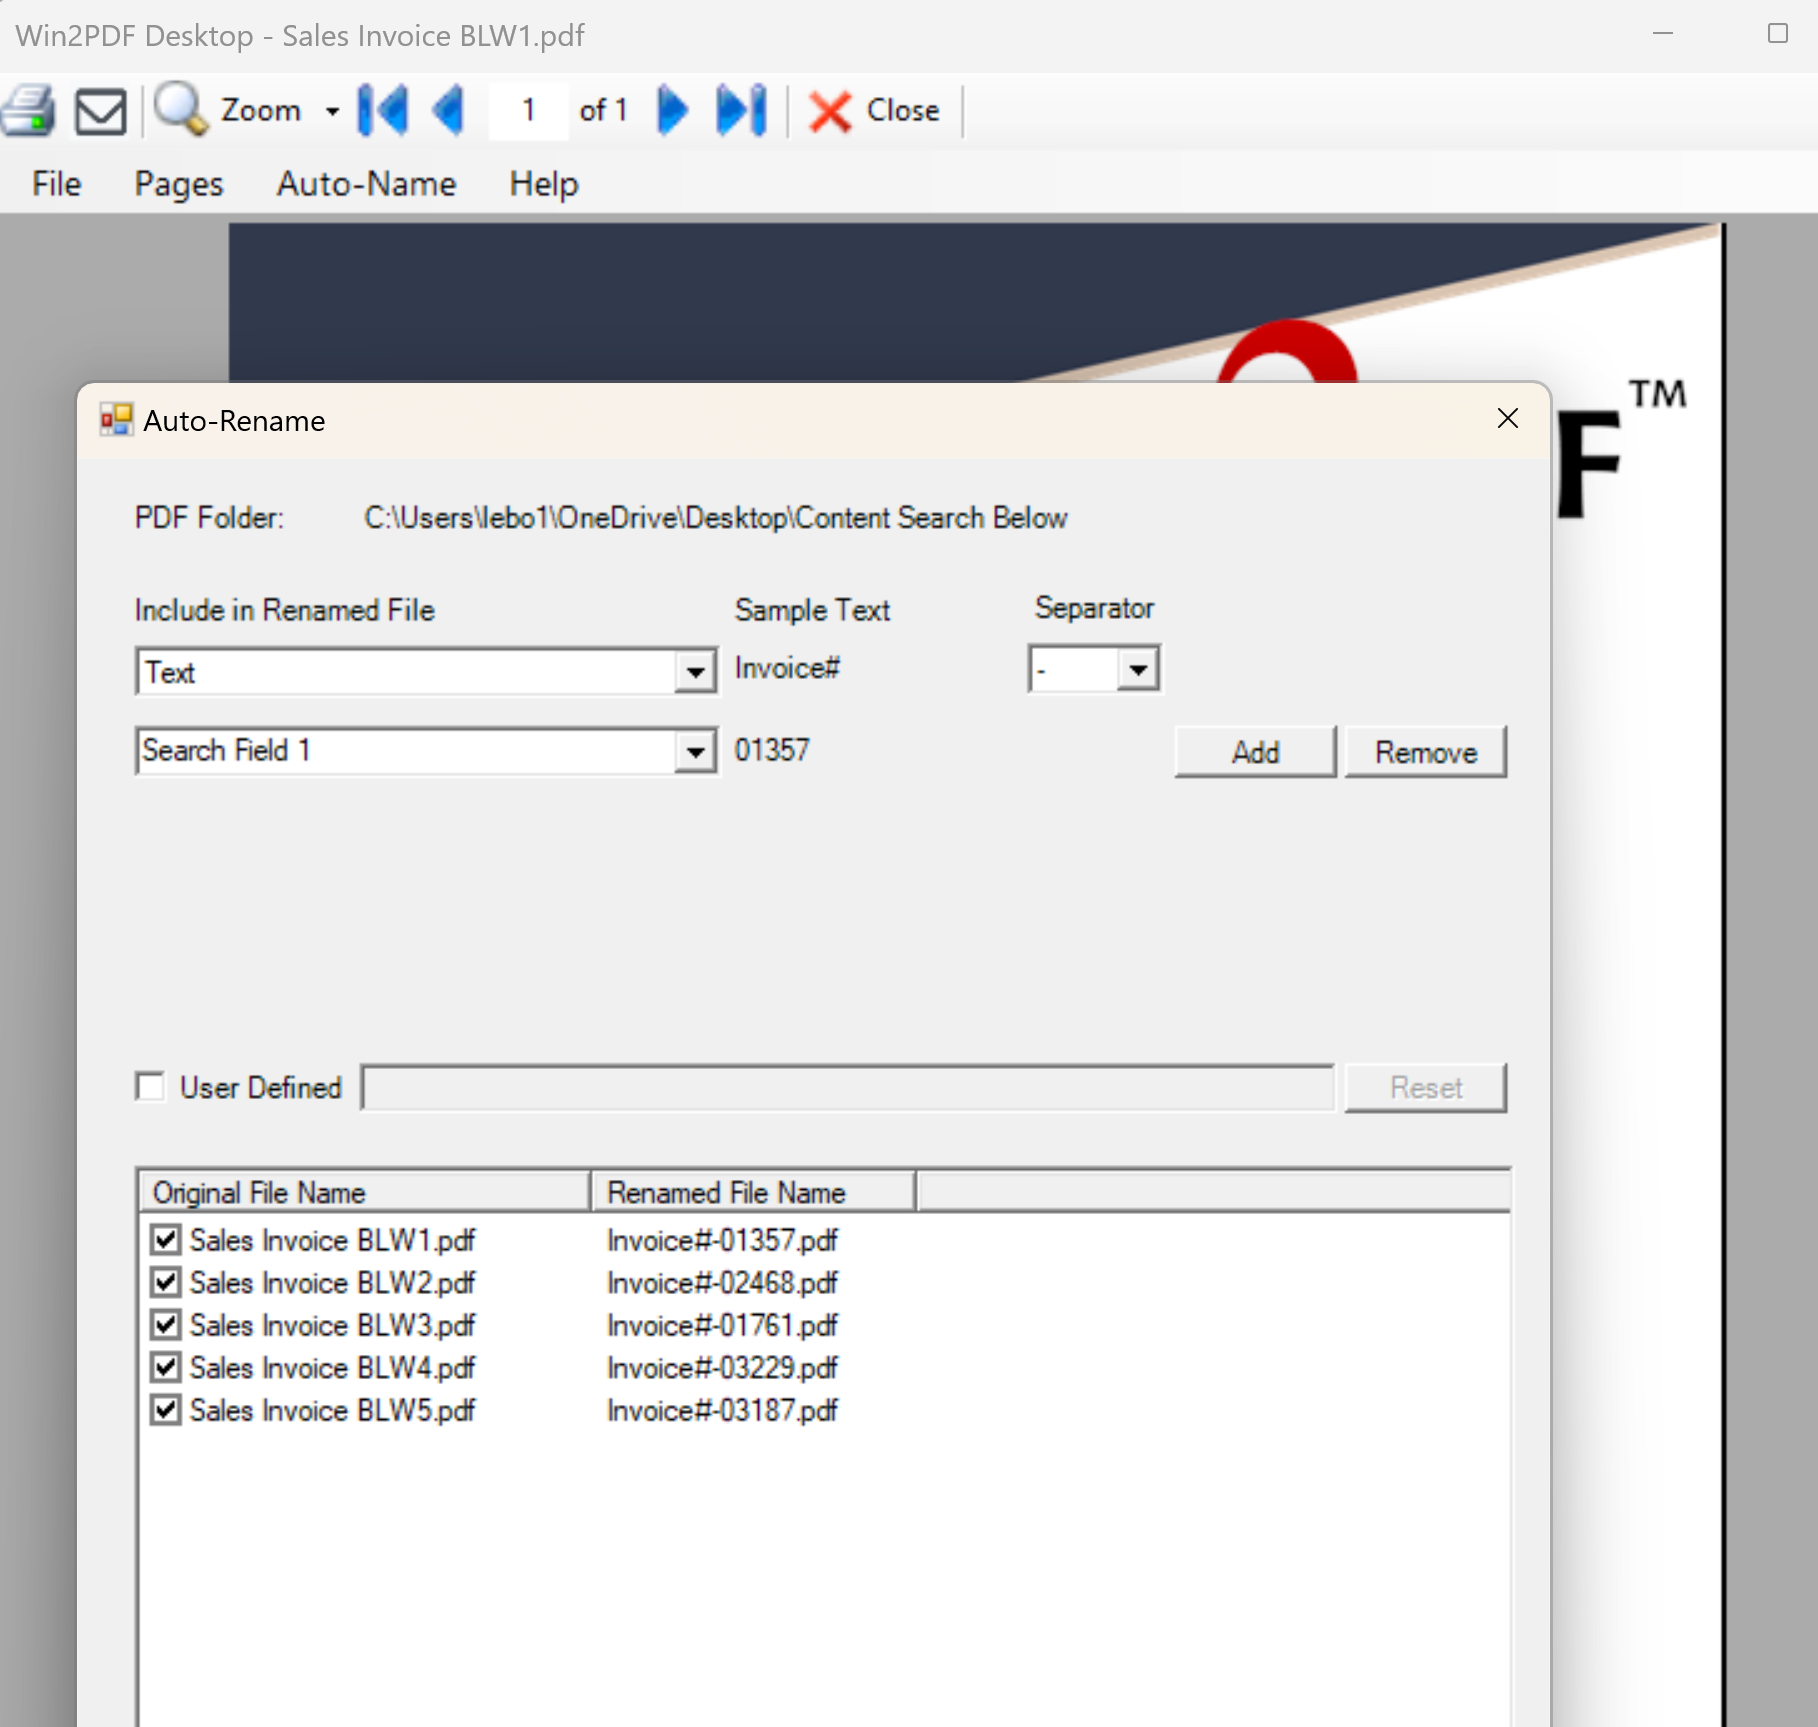
One, you can use this term to rename a batch of PDF files if they already exist. You simply need to select the Auto-Rename menu option from the Win2PDF Desktop App, and then choose your Auto-Name variables including the “Search Field 1” text as shown below.

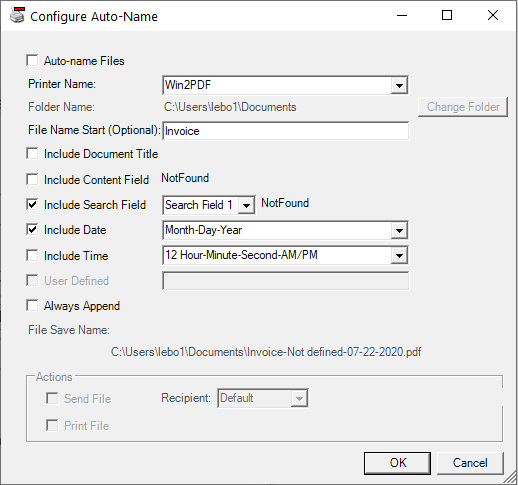
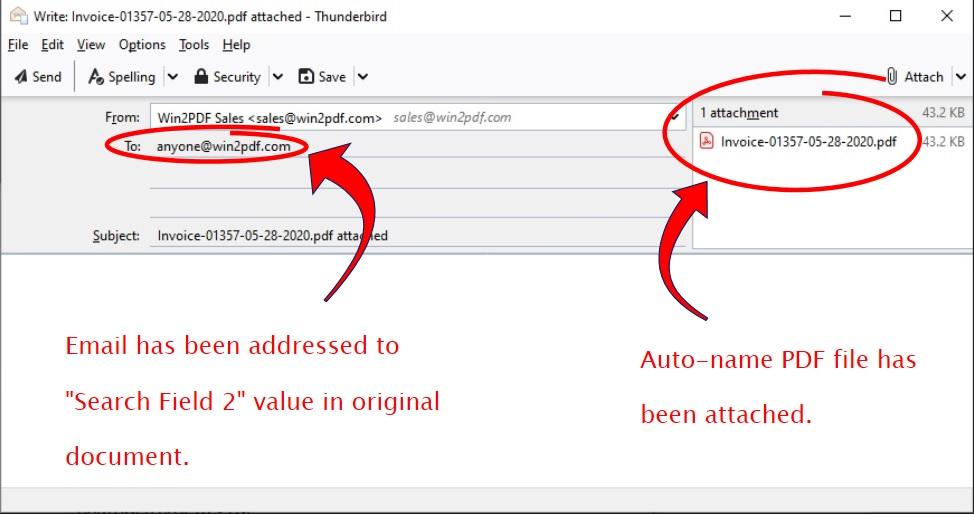
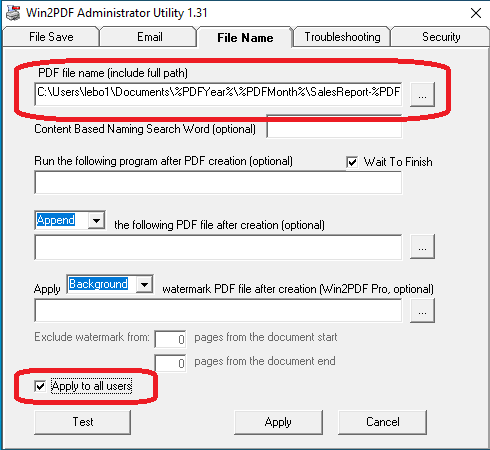
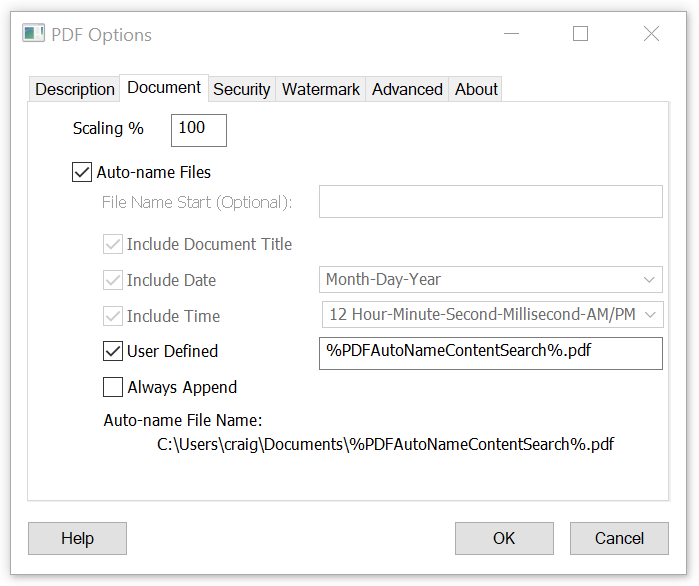
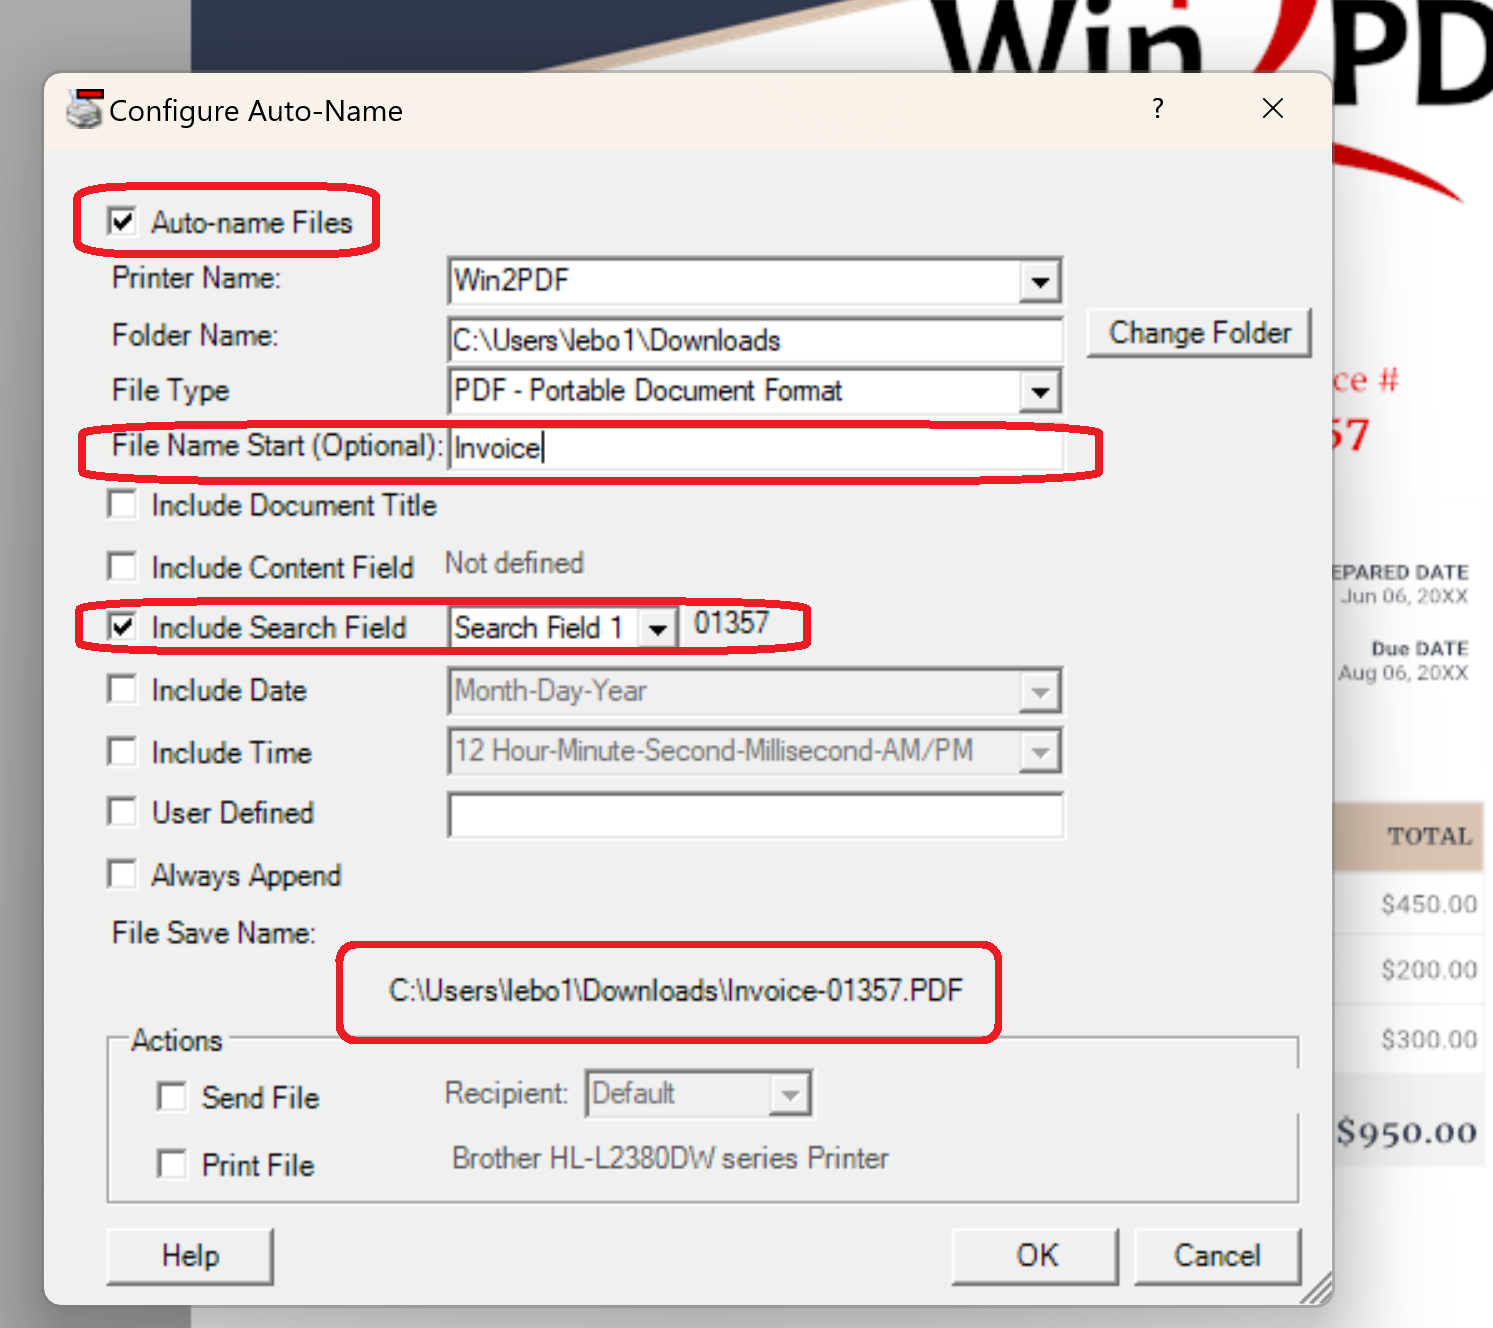
Two, instead of renaming existing PDF files, you can set your current printing method to use this Auto-Name method for new PDF files. You’ll just need to go to the Configure Win2PDF Auto-Name Settings page to set up how you’d like the PDF files to be named.

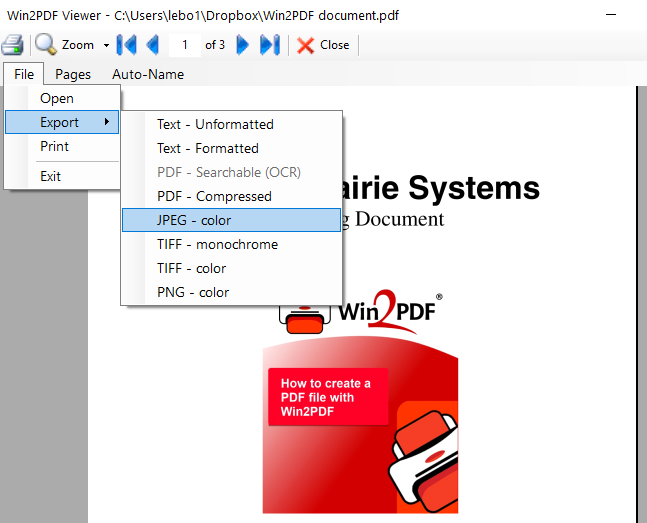
And three, you can use this feature via the command line interface for more advanced users. Previously we used the command line command “getcontentsearch” to find search text that immediately follows the search word. Now we’ve added the “getcontentsearchbelow” command, which finds the search text that is directly below the search word.

Hopefully, this is one additional feature to reduce the amount of brainsweat required for managing your invoices.

Win2PDF Release 10.0.72 Now Available

A new version of Win2PDF (a free update to existing Win2PDF 7 or Win2PDF 10 users) is available now at the Win2PDF download page. In addition to bug fixes and stability improvements, it adds several new features to Auto-Naming PDF files, command-line options, and the Win2PDF Desktop App. Win2PDF 10.0.72 includes the following new features:

  • Adds a Configure Win2PDF Auto-Name shortcut to the start menu to make configuring the Auto-name features easier.

  • Adds Send File and Print File actions to the Configure Win2PDF Auto-Name menu to automatically email or print a PDF. See How to Automatically name and send PDF files by email for an example of automatically naming and sending invoices to email recipients based on the contents of the PDF.

  • Performance and stability improvements

Again, if you have a license for Win2PDF 7 or Win2PDF 10, you can download this new version at no charge.

How to automatically name and send PDF files by email

Here is a more advanced example of using our new content-based naming feature in Win2PDF.

Suppose you want to name a PDF file based on some value within the PDF file, and then email the PDF file to an email address that also resides within the PDF file. This could be useful if a customer wanted to send out invoices to customers based on an email field in the invoice, or to send a report unique to an individual client based on their specific information.

The latest version of Win2PDF 10.0.71 includes new features that allows you to search for up to three different values within the PDF file, and then use those values for Auto-naming and for sending the email.

Let’s show this feature using the following example: Here is a sample invoice from an ERP system. It includes both an invoice number (which we’ll use for the naming of the PDF file) and it contains an email address for each invoice (which we’ll use for addressing the email).

We’ll start by opening the sample file of the invoice in the Win2PDF Desktop app. Once opened, you can use the Auto-Name ➜ Define Auto-Name Search Field menu to define up to 3 search fields.

We’ll define two of the search words as follows:

“Search Field 1” = “Invoice #:”
“Search Field 2” = “CUSTOMER EMAIL:”

When you select the Define Auto-Name Search Field, you’ll get a window where you can enter the text you wish to search for (see image below). The value immediately following this search field will be used in the configuration screen.

After you have defined the search fields, Win2PDF will display the values of the search in the current document as a confirmation.

Using our sample document as a reference, the values (the text immediately following) for the search fields are:

“Search Field 1” value = “01357”
“Search Field 2” value = “[email protected]

These values can and likely will change for each document being printed.

Next, when you go to the Auto-Name ➜ Configure Auto-Name… menu, these two search fields will the be used for the file name, and for the email recipient.

Now when you print an invoice to Win2PDF from the ERP system, the files will be automatically named and attached to a new email message as shown below.

You could take this one step further and set up these PDF files to be sent automatically using our Win2PDF Mail Helper add-on application.

There are many options available for naming and emailing PDF files automatically — more than we can reasonably cover in this post. So, if this does sound useful and you need help configuring this for your own reporting applications, let us know and we’d be happy to assist you setting this up for your needs.

Content-Based File Naming with Win2PDF

One new capability of the Win2PDF Auto-name feature is the ability to define and save PDF files based on defined content that resides “within” the document to be printed.

For example, suppose you have a reporting application that spits out a report, and you want to name this report based on the document number, or invoice number, or customer name, or some other value that exists inside of the report.

There are a couple of different ways to set the Content-Based File Naming within Win2PDF.

The first method is to use a search word.  Using this option, you would define a word to search for in the document (like document # or invoice # or customer name), and then the software would use the following word or set of characters to be used in the file name of the PDF file.

The second method is to use a defined content field.  Using this option, you would define a particular fixed location on the page where the content field always exists, and this would be used in the file name of the PDF file.  The following animation shows the basic process, but more detailed instructions can be found at the content field section of our online user guide.

Content based naming 1

How would you know which method to use?  Well, the search word option works when you know the content field value always follows a particular word, but the exact position on the page or length of this value may be variable.  The content field option works when the content field value always exists at the exact same location on the page.

Grabbing the name from a printed purchase order may use the search word option, since the length of the purchase order number may change from customer to customer.  On the other hand, grabbing a Tax ID number from an IRS form may use the content field option, since the number and location on the form will always be fixed.

As more customers are working to digitize their reporting functions (without any user interaction), we feel like this content-based file naming will become an increasingly popular tool for automating reports.

Using Auto-name to Save Reports to PDF

As the Coronavirus problem persists and more and more employees work from home, we’re getting questions from customers who are trying to adapt reporting applications to generate PDFs. Specifically, they are looking at ways of automatically saving these PDF reports without any user intervention.

The easiest way to do this is to enable our Auto-name Files feature. It can be found by clicking on the PDF Options… button on the main Win2PDF file save window as shown below.

Here are a few tips on using the Auto-name Files feature:

  • There are a variety of predefined options to use which allow you to include the document title, date, and time in the naming of the file. However, there is also a User Defined option which gives you much more flexibility. You can use any number of variables to make a customized file name based on document titles, as well as the time and date.
  • Not only can you use these User Defined variables to customize the file name, but you can also customize the folder(s) you are trying to save to. For example, if you used the following variables as the User Defined name:
%PDFYear%\%PDFMonth%\SalesReport-%PDFMonth%-%PDFDay%-%PDFYear%.pdf

You’d end up with the following results whenever you saved the PDF file.

[Default Save-to folder] \ [Current year] \ [Current Month] \ SalesReport-MM-DD-YYYY.pdf

In other words, folders will automatically be created (if they are not already present) for the year and month, and the appropriate sales report for the day will be placed in each location.

  • You can also create multiple Win2PDF printers and set auto-name for specific departments/people. For example, suppose you want to keep the normal Win2PDF printer for use with day-to-day PDF creation, but you want to make a copy named “Reports from Win2PDF” that will be used to generate PDF files from a specific application (without any user interaction). You’d simply need to
    1. Add a copy of the Win2PDF Printer and name it “ Reports to Win2PDF”
    2. Turn on the Auto-name feature (as discussed earlier in this post) for this new copy of Win2PDF
    3. You can repeat steps 1-2 to create any number of specialized Win2PDF printers that save PDF files automatically, with names and locations defined by an application, department, location, etc.
  • You can also apply Auto-Name settings to all users. To do this:
    1. Configure Auto-Name in PDF Options…
    2. Open the Win2PDF Admin Utility. The file name definition shows up on the File Name tab.

    1. Check Apply to all users
    2. Click Apply, and Auto-Name will apply to all users

The Auto-name feature is very powerful.  If you have reports you want generated on a regular basis, and you want to define your file names and eliminate any input from the user, use these tips and let us know if you have any questions.

Content-based File Naming with Win2PDF

*** NEW FEATURE ALERT ***

In our latest Win2PDF 10.0.58 update we added a new feature for content-based file naming. It allows a PDF file to be named based on a certain word or set of characters that reside inside of the document being printed.

Here is the customer situation that prompted the new feature:

A county sheriff’s department wanted to generate PDF files from a legacy AS/400 application. A secretary named the PDF files based on a document number that was listed in the original document, and because she did so manually it was time-consuming and error-prone.

An example transport order from the sheriff’s department looked like this:

sheriff1

With the content-based file naming feature in Win2PDF, however, this process is automated. It allows Win2PDF to search the text of a document being printed, find a target search word, and use the following word as the PDF file name. It requires that PDF files contain text with a common search word that exists in all PDF files. (*Note: The “word” can be numbers or any character string that has a space before and after the “word”).

In the sheriff’s example, the content search word is specified as “DOC #:” in the Win2PDF Admin Utility.

sheriff2

Then, in the Document section of the Win2PDF file save options, the “User Defined” field was enabled with “%PDFAutoNameContentSearch%.pdf” as the file name.

win2pdf-auto-name-content-based-naming

The result? When each file is printed, Win2PDF searches for the document number in the original file, and then automatically names the PDF file with this number. No possibility of manual errors or extra time involved.  In this case, the file was automatically named “118277.pdf” when the file was printed.

Again, this was a relatively simple modification that we were able to do for customer that had a particular need and had no ability to change the original AS/400 program printing the documents.

If you have a similar need, let us know and we may be able to help.

Win2PDF for the Enterprise: Customization

Generally, Win2PDF has two main types of users.  The first is the individual user who simply wants to use Win2PDF as a desktop printer to interactively convert a variety of documents to PDF files.  The second type of user is an enterprise user in a company or larger organization.  Often, these users need Win2PDF for a specific application, process, or to generate PDF files in a consistent way across their team or department.

gear-icon-svg-2 (2)Based on the support requests we receive, many of these enterprise users don’t realize the extent to which Win2PDF can be customized for their specific organization’s needs. “I didn’t know Win2PDF could do that?” is something we hear all too frequently.

Just consider a few examples that an administrator or manager of a larger group of users may wish to use:

  • Create a dedicated copy of the Win2PDF printer that prints and names PDF files automatically when used from a specific application, and save them in a specific network folder.
  • Have all PDF files automatically sent as e-mail attachments after they have been created.
  • For all PDF files generated, preset a Master Password that only the system administrator knows. [requires Win2PDF Pro]
  • Force certain default settings and disable certain interface fields that you don’t want users changing (i.e., “always save the file as a PDF/A file, in a specific location, and don’t allow the user to email or print that to a paper printer when it is being created”)

Many of these things can be enabled directly by the user or administrator with our free Admin Utility or free Mail Helper utility, or by using the Auto-name feature.  Other things may require some level of customization in the Win2PDF setup program (particularly for large deployments).

If you are a manager of a enterprise group of users, let us know if there are particular things you want to do.  In most cases, we’ve probably already had a similar request and can direct you to what options are available.

Start Organizing Next Year’s Tax Documents – Part II

As a followup to last week’s post, one of our readers suggested another way of using Win2PDF to create a single tax-related archival PDF file.  Here’s what she suggested:

  1. Create a copy of the Win2PDF printer that is dedicated for saving tax-related documents.  Call it something like, “Win2PDF – Tax Archive
  2. Change the Auto-name settings on this printer with the following options.
    • Set the file name to something like “Tax Archive.pdf
    • Check the option to include date and set it to “Year Only
    • Check the append option
  3. Whenever you have a tax-related document you wish to preserve (like an email confirmation for an online donation, or a medical receipt), print this document to your “Win2PDF – Tax Archive” printer.

The document you print will automatically be appended to this 2019 Tax Archive.pdf file.  When the new year arrives, it will create and start writing to 2020 Tax Archive.pdf.  And that’s it.  You’ll have one single PDF file to review before you do next year’s taxes.

Print to PDF – A Win2PDF Tutorial

Recent posts have focused on some of the new features in our Win2PDF 10 update.  Now, we’ve created a tutorial that illustrates how you can use these new features to create a copy of the Win2PDF printer that is dedicated to a particular use.  In our example, we’ll save encrypted business receipts as PDF files to a specific folder without any user prompting.

This is one example — you can use the same basic principles to set up multiple versions of Win2PDF that are streamlined for specific uses.  It’s an easy way to quickly back up files to a specific folder with minimal user interaction.

Watch the following tutorial and then experiment on your own.

If you have any questions, let us know at our Win2PDF Technical Support page and we’ll help you out.

New Auto-name features in Win2PDF 10

One of the most significant improvements to Win2PDF 10 is the enhanced Auto-name options.  The Auto-name feature allows you to save a PDF file without being prompted for the file name.  You can simply print any document and the file will automatically be saved in a location of your choosing, with a file name that you’ve customized.  This Win2PDF 10 update improves the user-defined options that are available to use for the file name.

Here is a brief video that shows how to use this new feature.

For a complete description of the Auto-name feature, visit the Win2PDF online support guide sections on How to Automatically Name PDF Files.