
Have you ever had this problem: You have a large number of PDF files that aren’t named descriptively, so you’d like to rename them in a batch process. And further, you want to rename the files based on a specific piece of data that is contained within the PDF file, like a customer name or an invoice/document number?
Well, now you can! We’re in the process of rolling out a new feature called Win2PDF Auto-Rename that will address this issue. The updated setup program for this version is currently available on our helpdesk download page.
Please note: For the moment, this preview feature is visible in all Win2PDF versions, but it will only work as a Win2PDF Pro feature. Standard edition users will see this feature in the preview, but will not be able to complete the rename function. If you would like a 30-day Win2PDF Pro Trial license, contact us.
Let’s look at an example. Suppose we have a reporting system that outputs invoice files with names like “file1.pdf”, “file2.pdf”, “file3.pdf”, etc. What we’d like to do is to search through each PDF file and find the invoice number, or the customer name, or some other field of data to use as the file name. Here’s a short screencast that shows how it works:
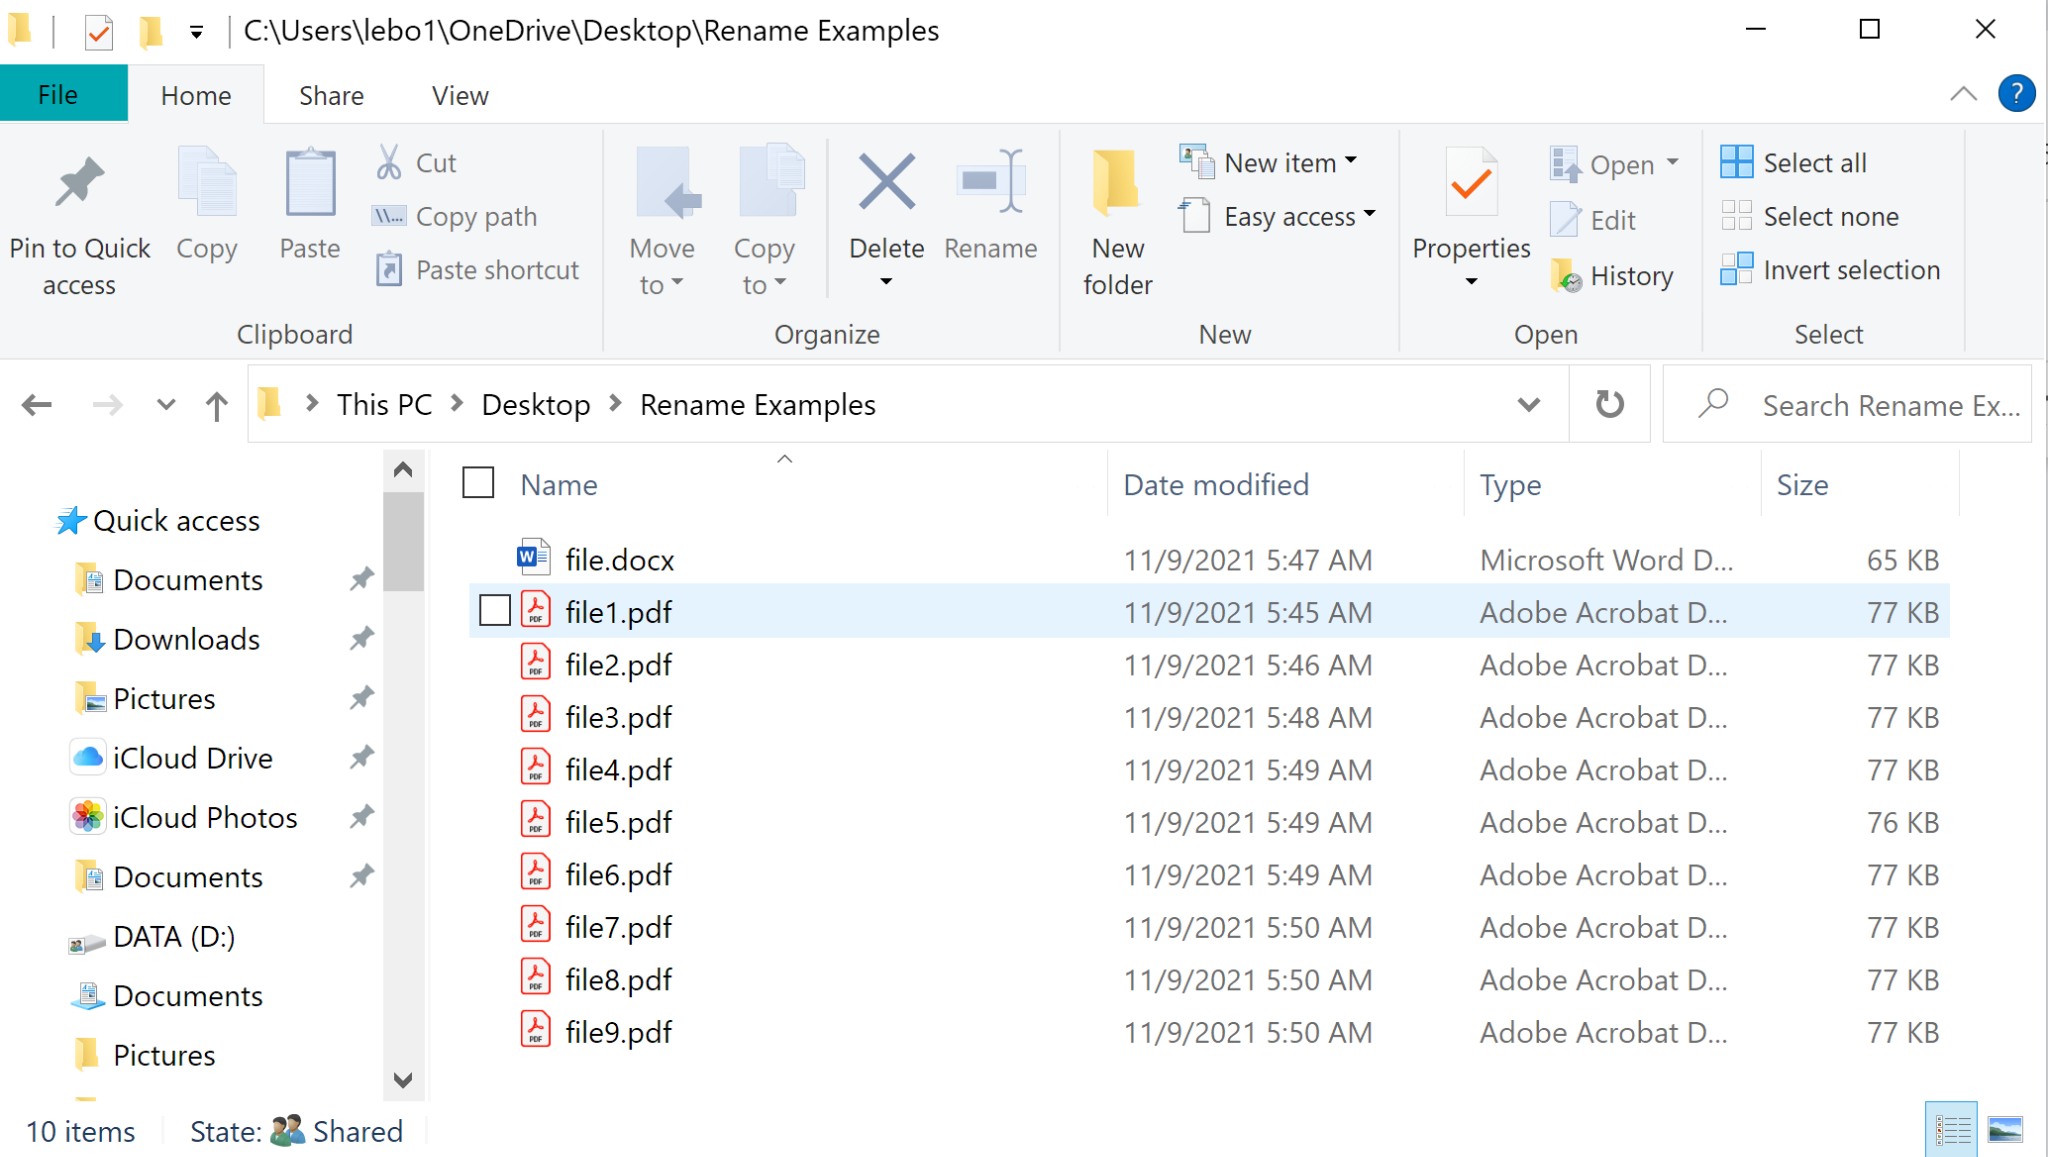
Let’s also walk through this example step-by-step. Suppose our starting folder of files looks something non-informative like this:
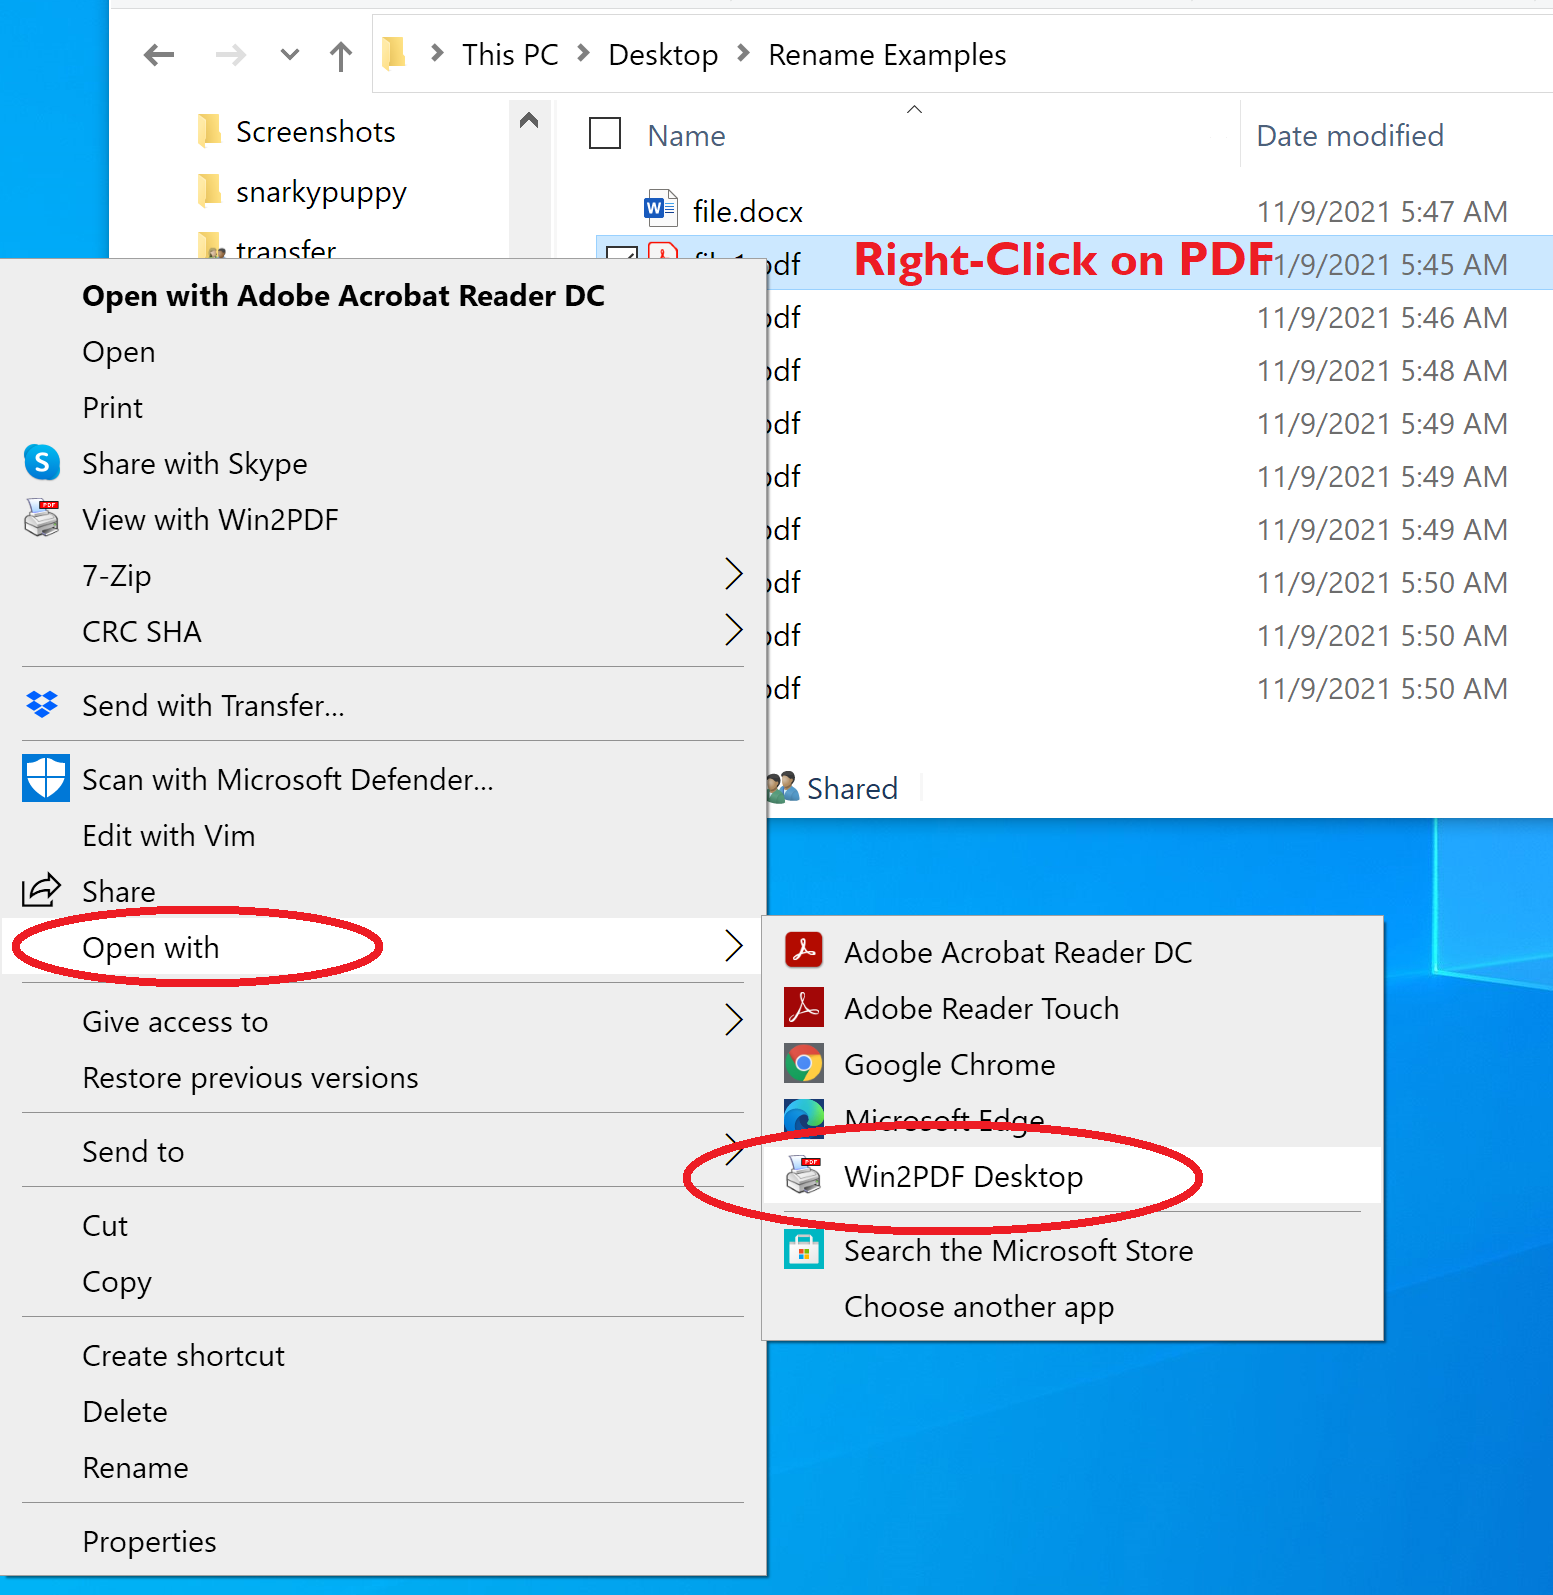
In our example, the files are invoices, and what we really want to do is rename each invoice to the Invoice # that is found within each file. To do this, we first right-click on one of the PDF files and choose Open with -> Win2PDF Desktop to load the file in the Win2PDF Desktop App. For the time being, all the files you wish to rename must be located in this same folder.
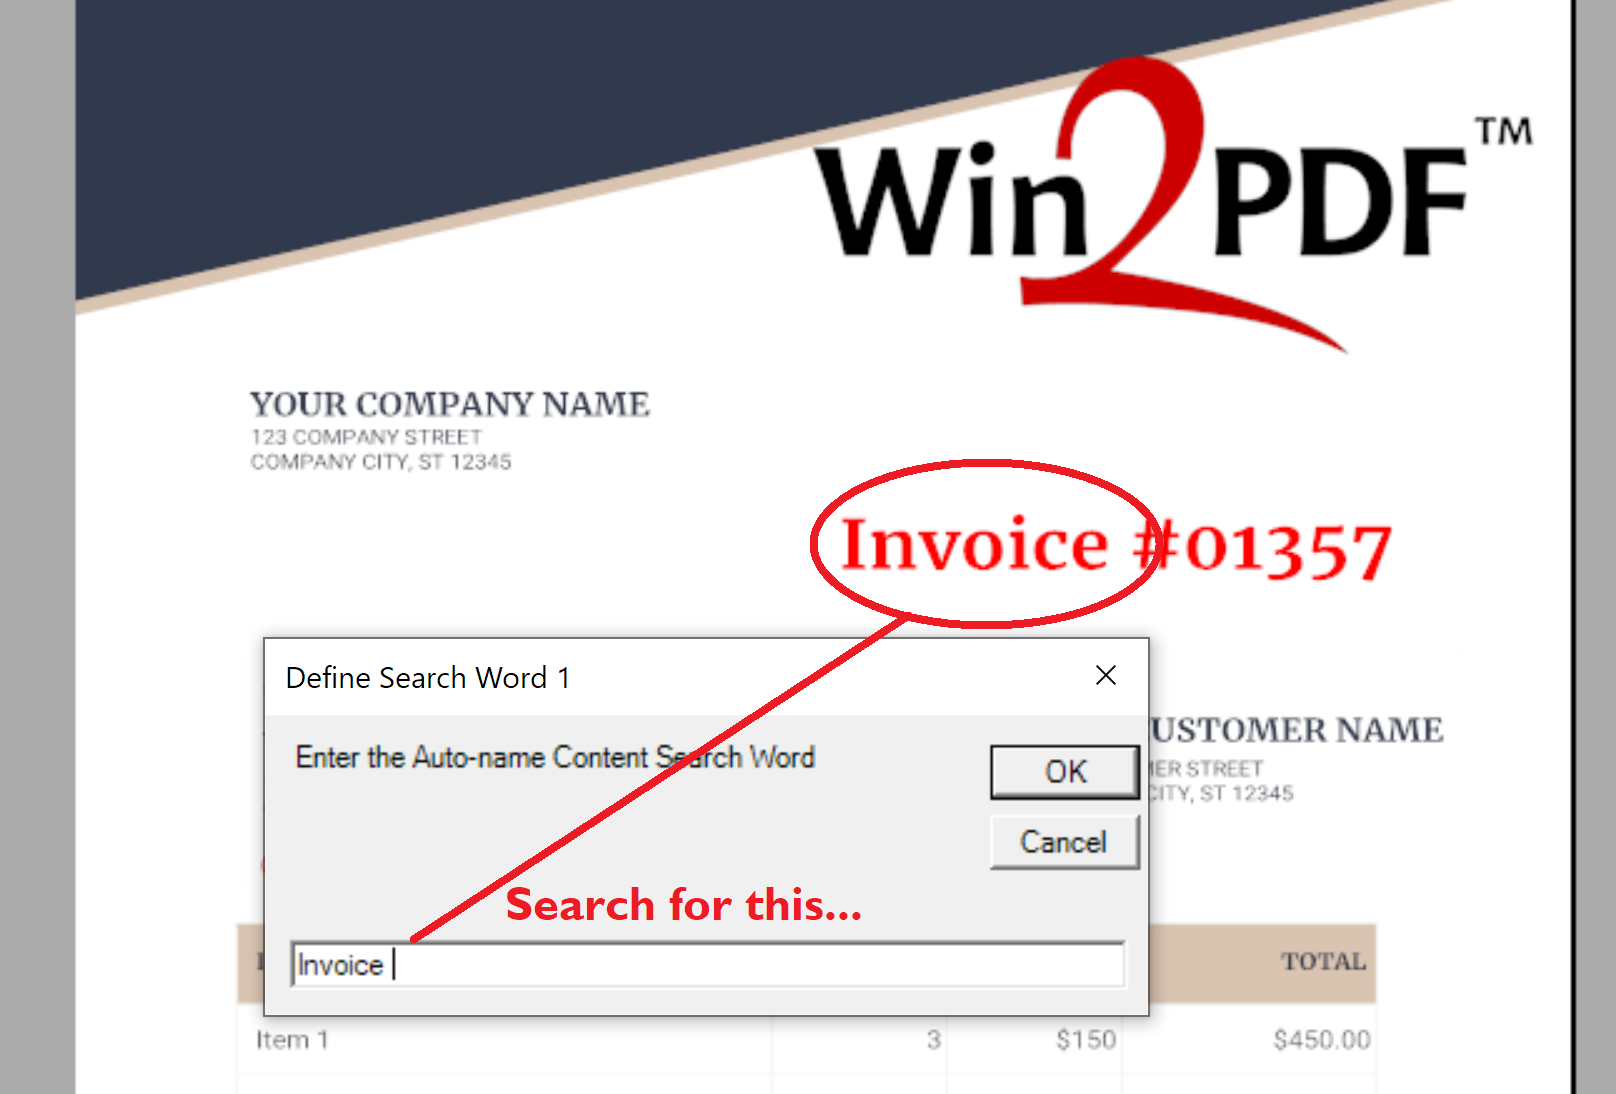
Next, after the file has been opened in Win2PDF Desktop, we’ll need to define the search field in the PDF file.

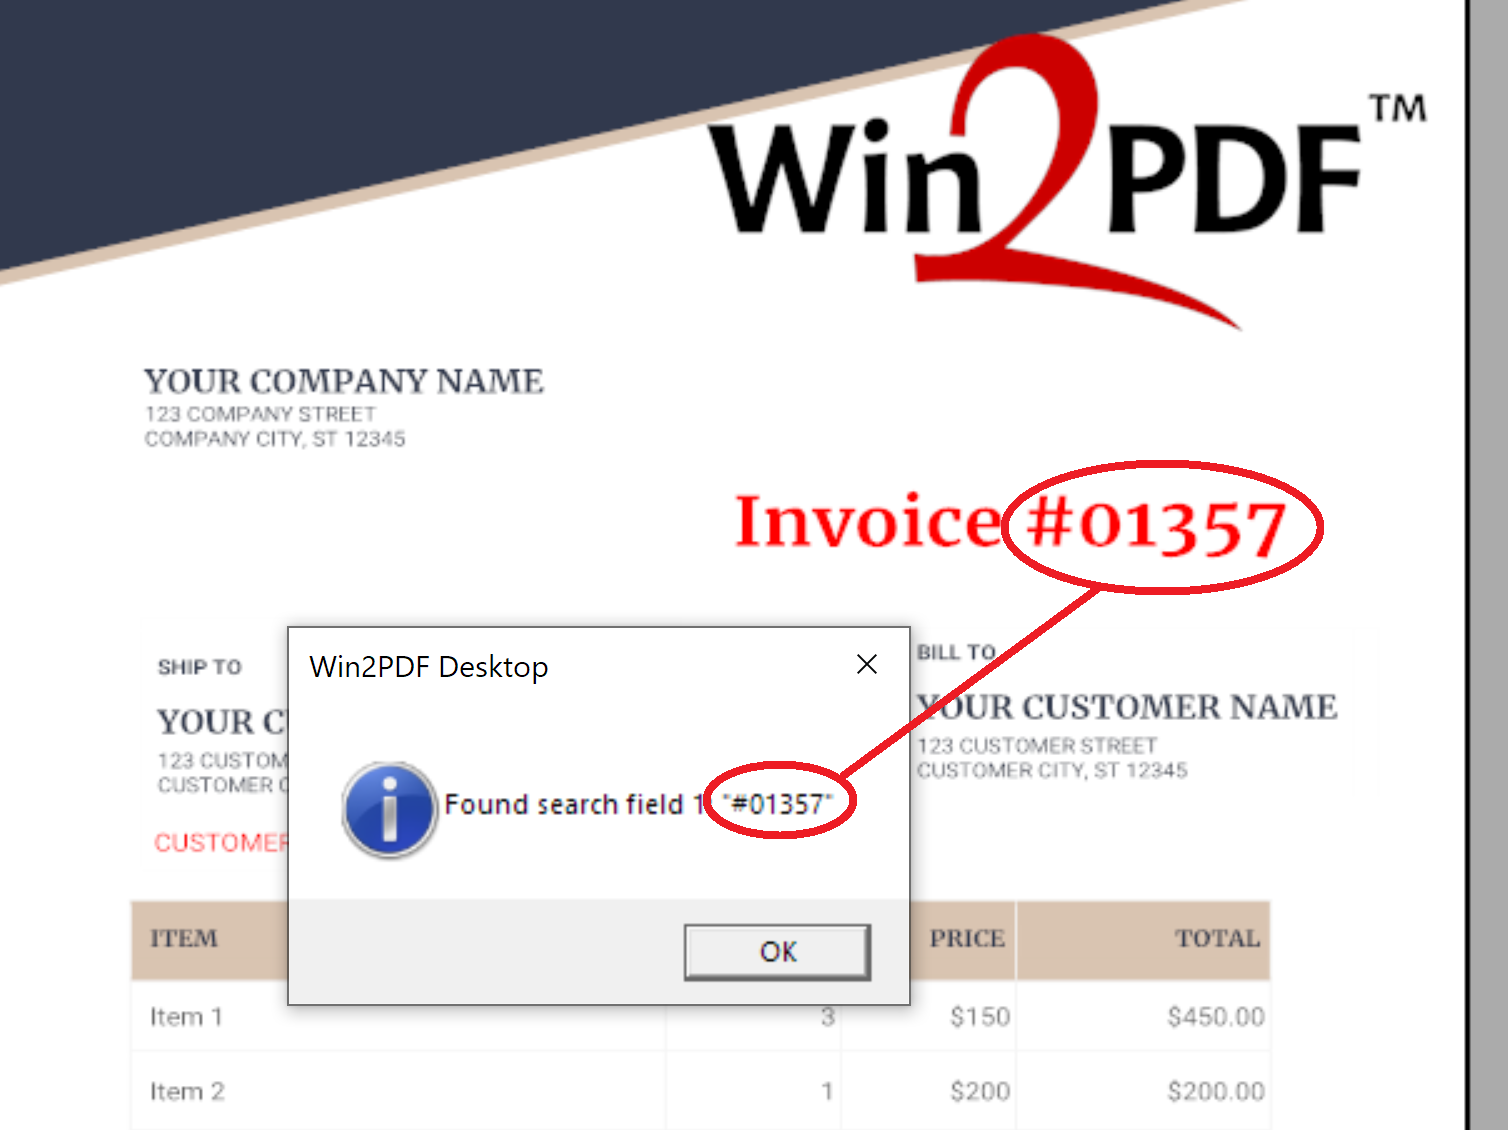
When we select Define Auto-Name Search Field, Win2PDF will search for this text (in our case “Invoice “). Then, it will capture the next string of characters (which is the invoice number) to use for our rename operation. After the selection has been made, you’ll see a confirmation window showing the field data that was extracted.
Now that this has been defined, our last step is to go to the Auto-Name -> Auto-Rename screen to change the file name options.
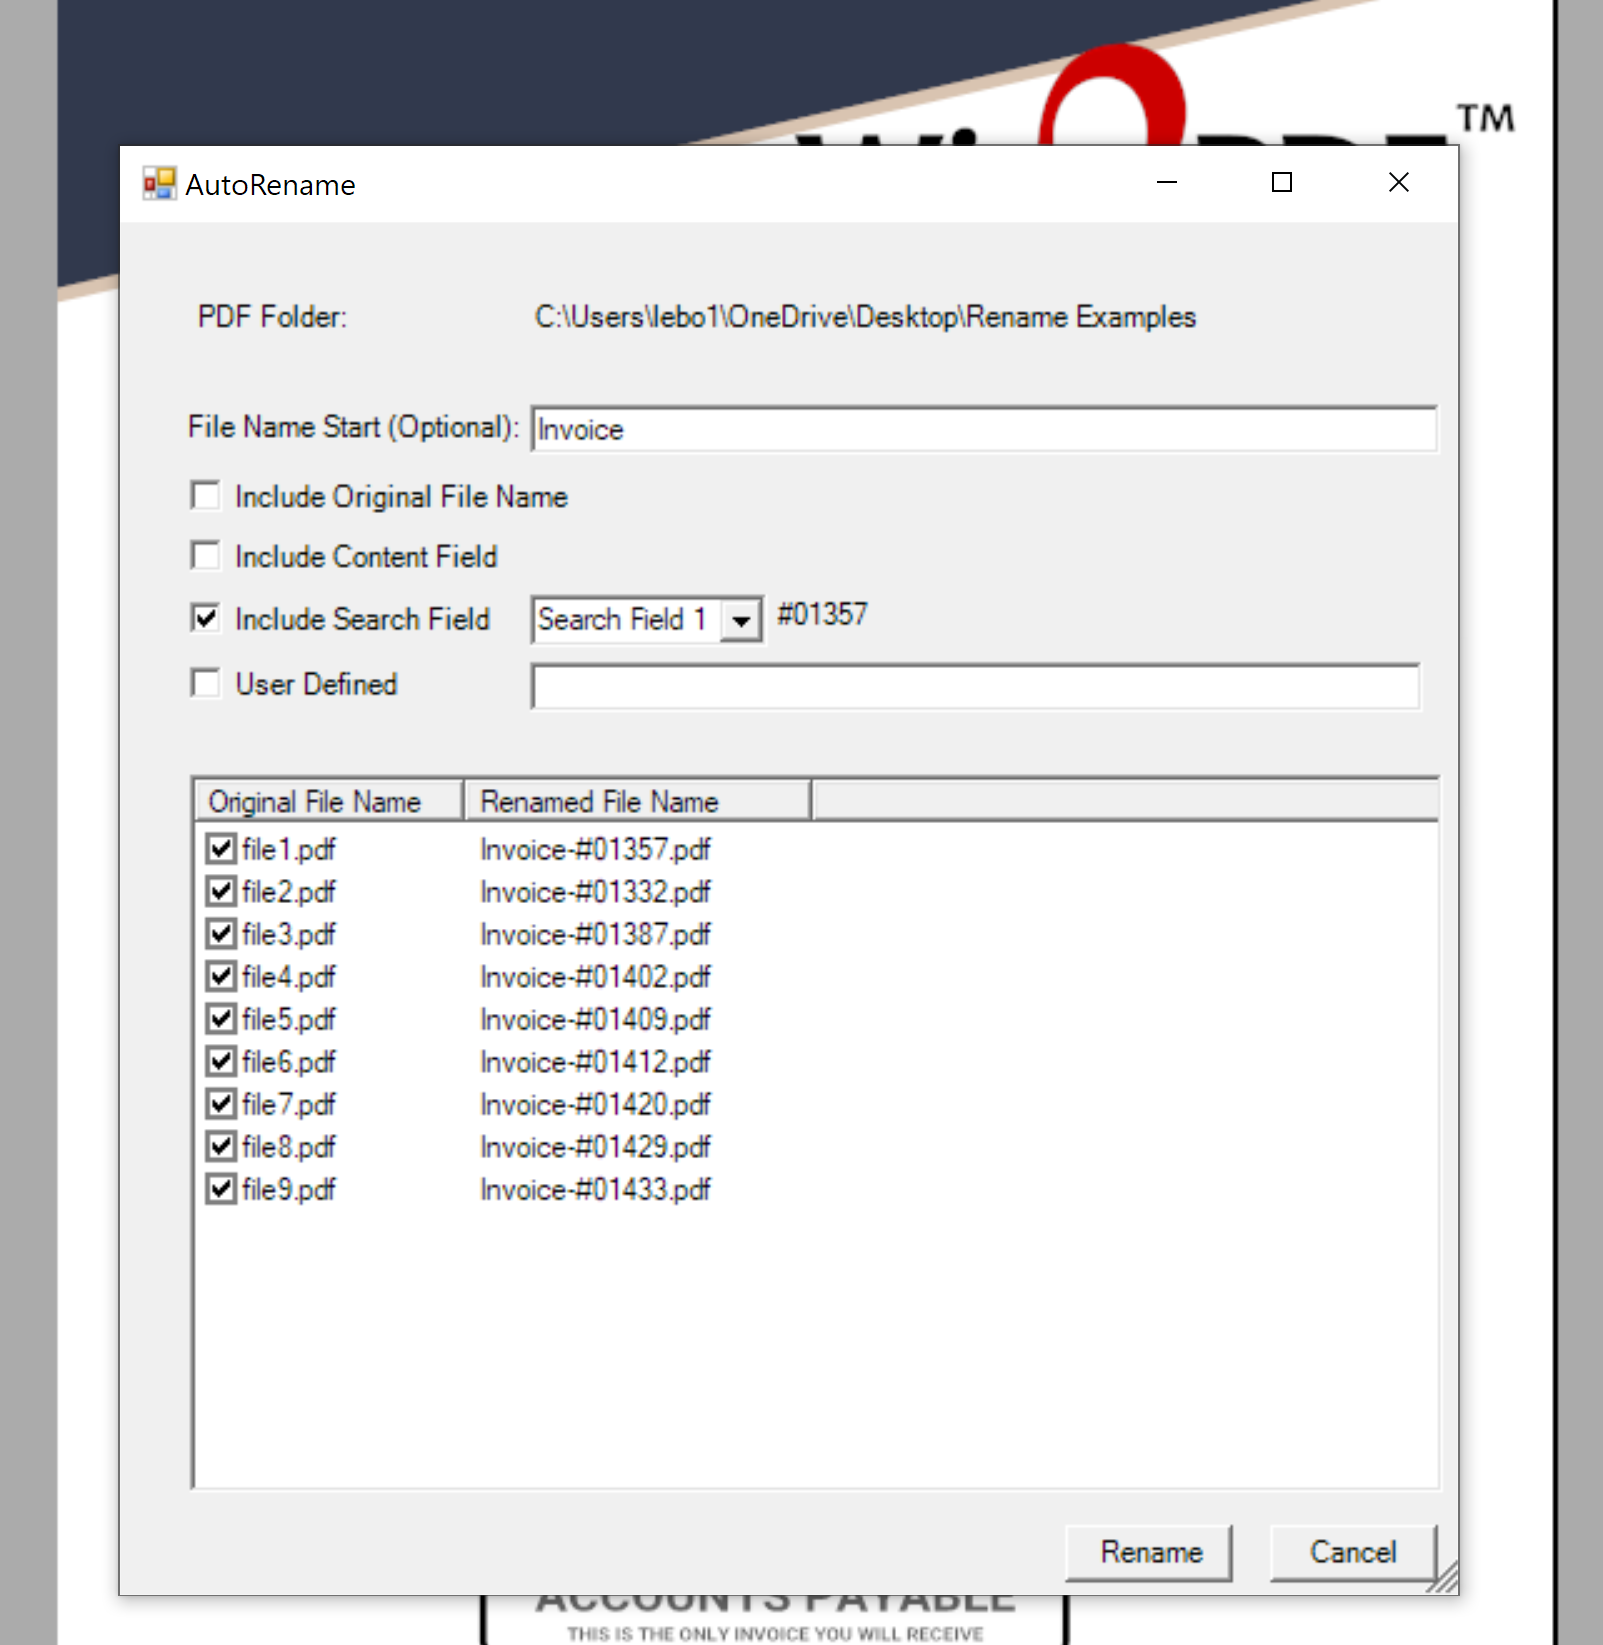
And that’s exactly the output we want. You’ll see there are currently other options available as well, such as using a content field to find the data for the file name. And you can include a variety of user-defined terms as well if you want to include date and/or time stamps as well. More options may be included in future revisions based on user feedback.
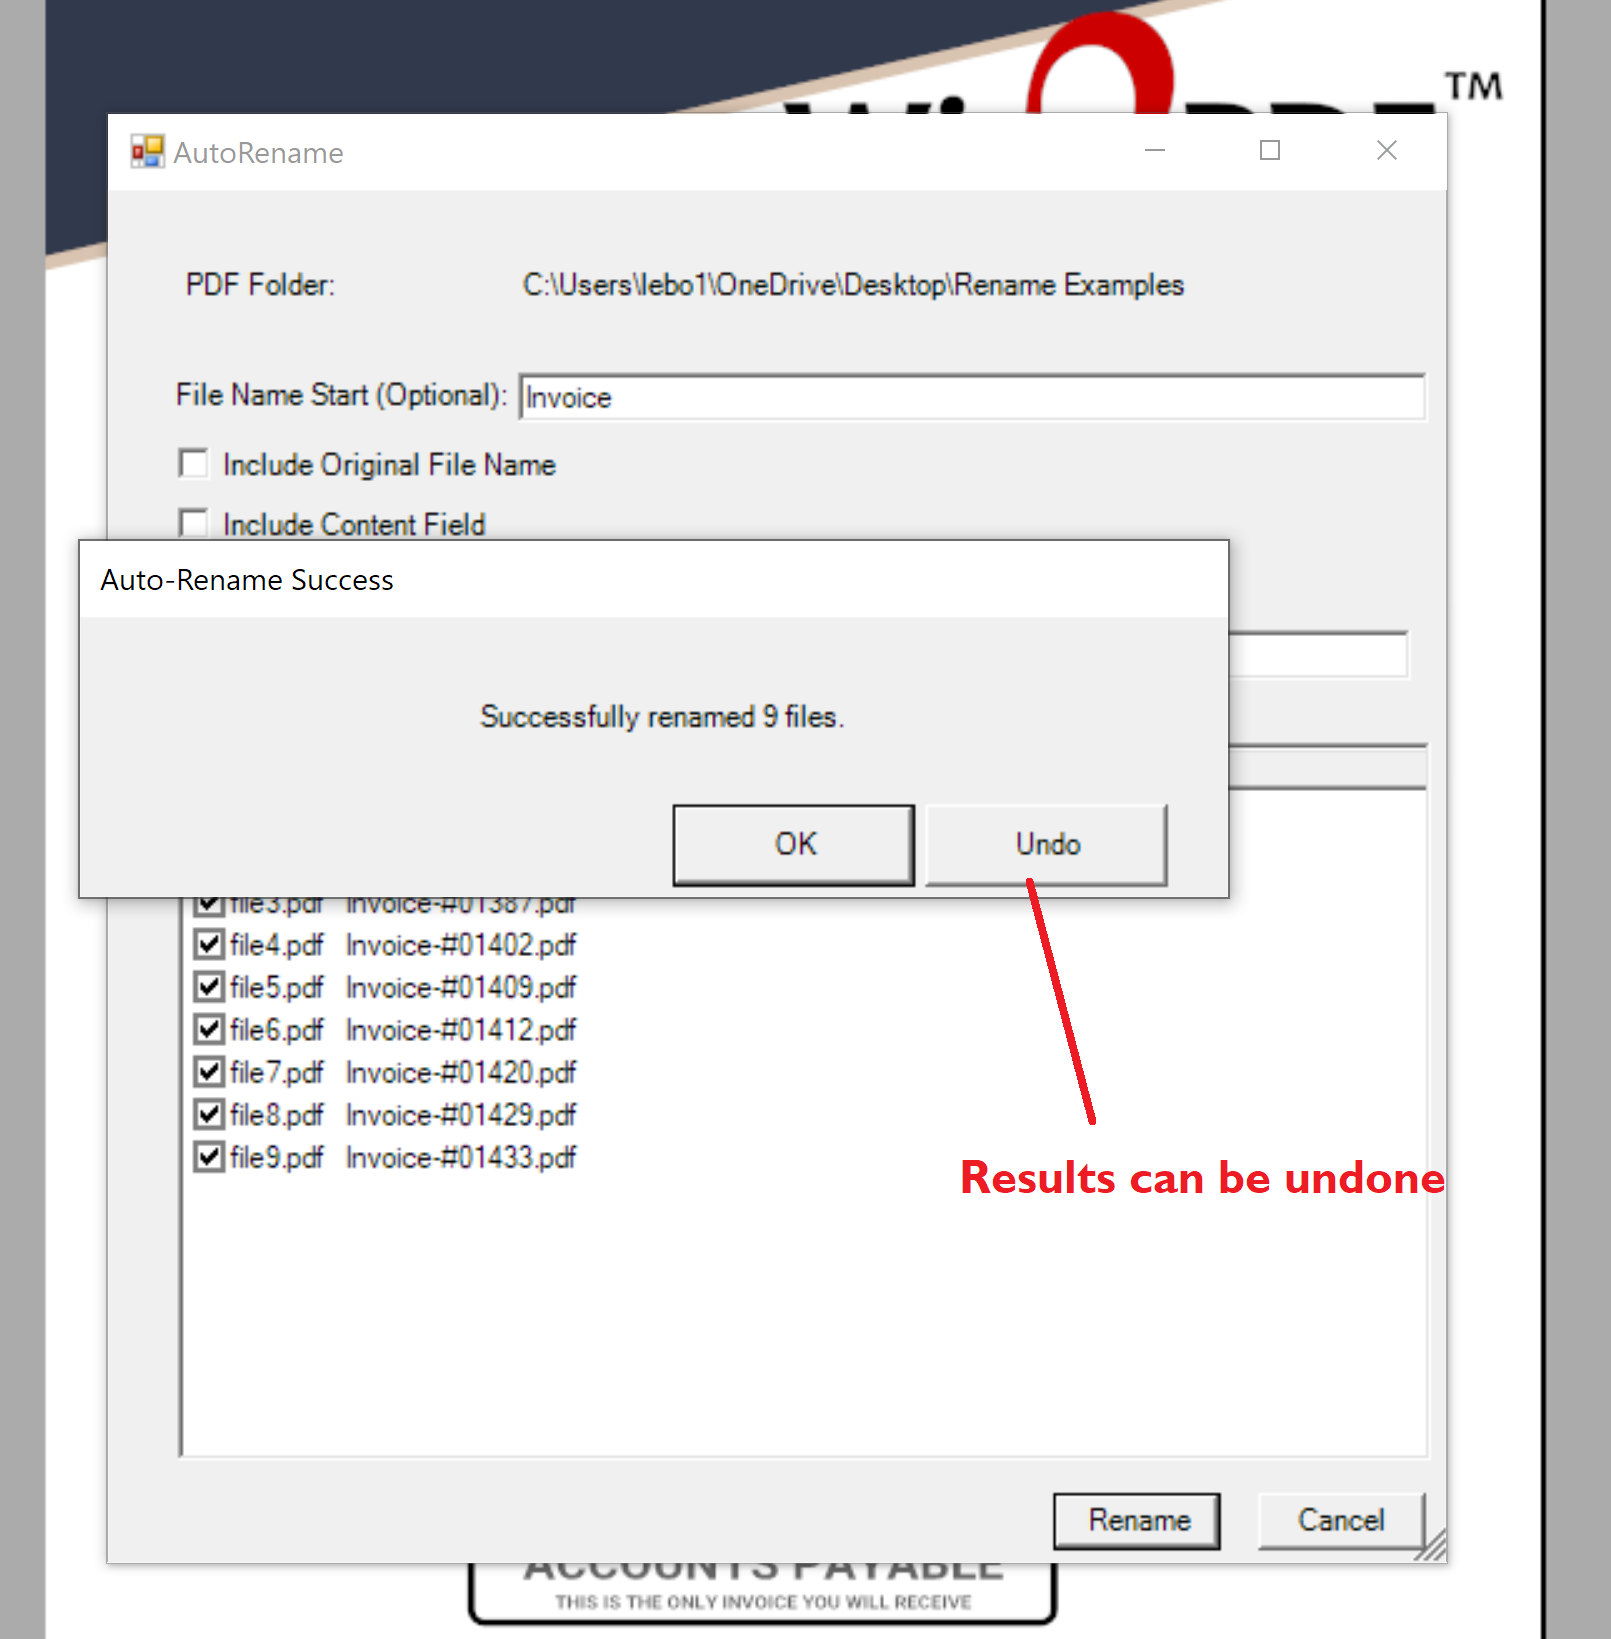
When we select the Rename button, it will show us a confirm window and it gives us the opportunity to Undo the changes if we want to make any changes.
For now, this is a working preview of this feature and we’re looking for real-world examples to help us refine the interface and functionality.
Have a scenario we should consider? Let us know!
