
What do you do when you need to convert a PDF document into multiple images (1 per page), but with a very specific file name format? Consider this recent customer situation:
The customer had a PDF product manual (i.e., ‘Widget Manual.pdf’) and wanted to convert each page of the manual to a JPG image file. And, each JPG file needed to be named in a format that included its corresponding page number and with a uniform file name length (e.g., “Widget_Page001.jpg”).
While they were able to convert the PDF file to JPG (using the File ➔ Export ➔ JPEG option in Win2PDF Desktop), they weren’t able to control how the resulting file names would be formatted.
Rather than add complexity to the Win2PDF Desktop interface, we suggested using the free Microsoft PowerRename utility.
You can use this same methodology for other situations as well, so we can generalize the procedure. Here’s how:
Step 1) Download and install Microsoft PowerToys.
The easiest way is to just search for this app in the Microsoft Store and click Install.

Make sure you have the latest version of PowerToys installed, as older versions may not support regular expressions which will be necessary in our example.
Step 2) Save the multi page PDF file to a series of JPG files
The easiest way to convert the PDF to JPG is to use the Win2PDF Desktop Export feature, as shown here:
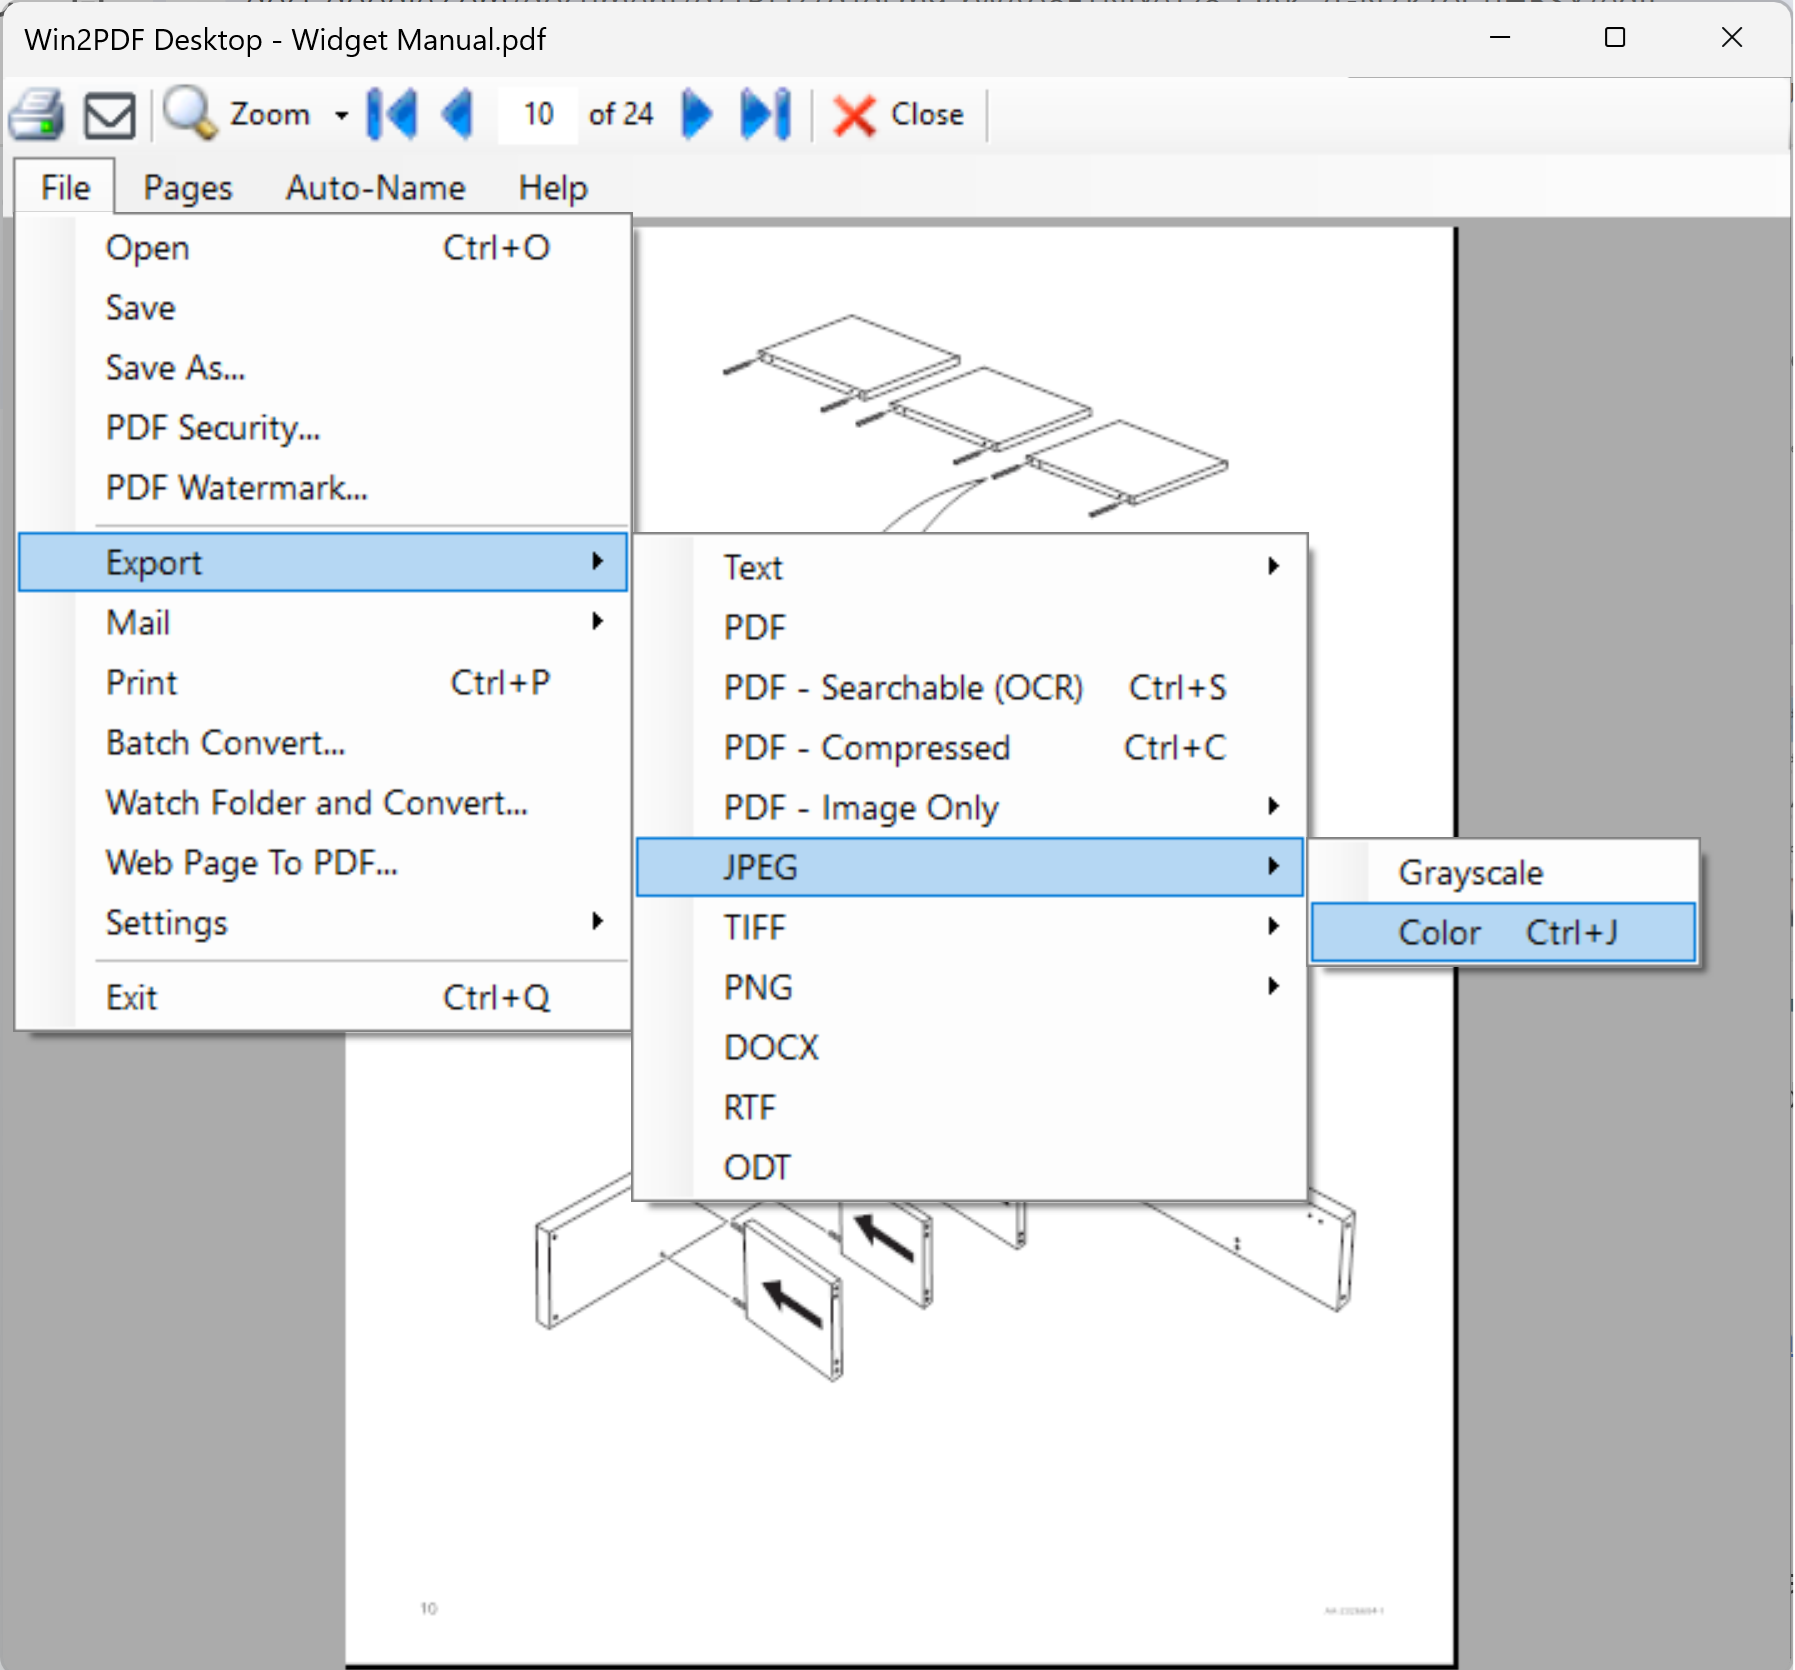
When exporting, the base file name defaults to the name of the PDF file, which can be changed if needed.
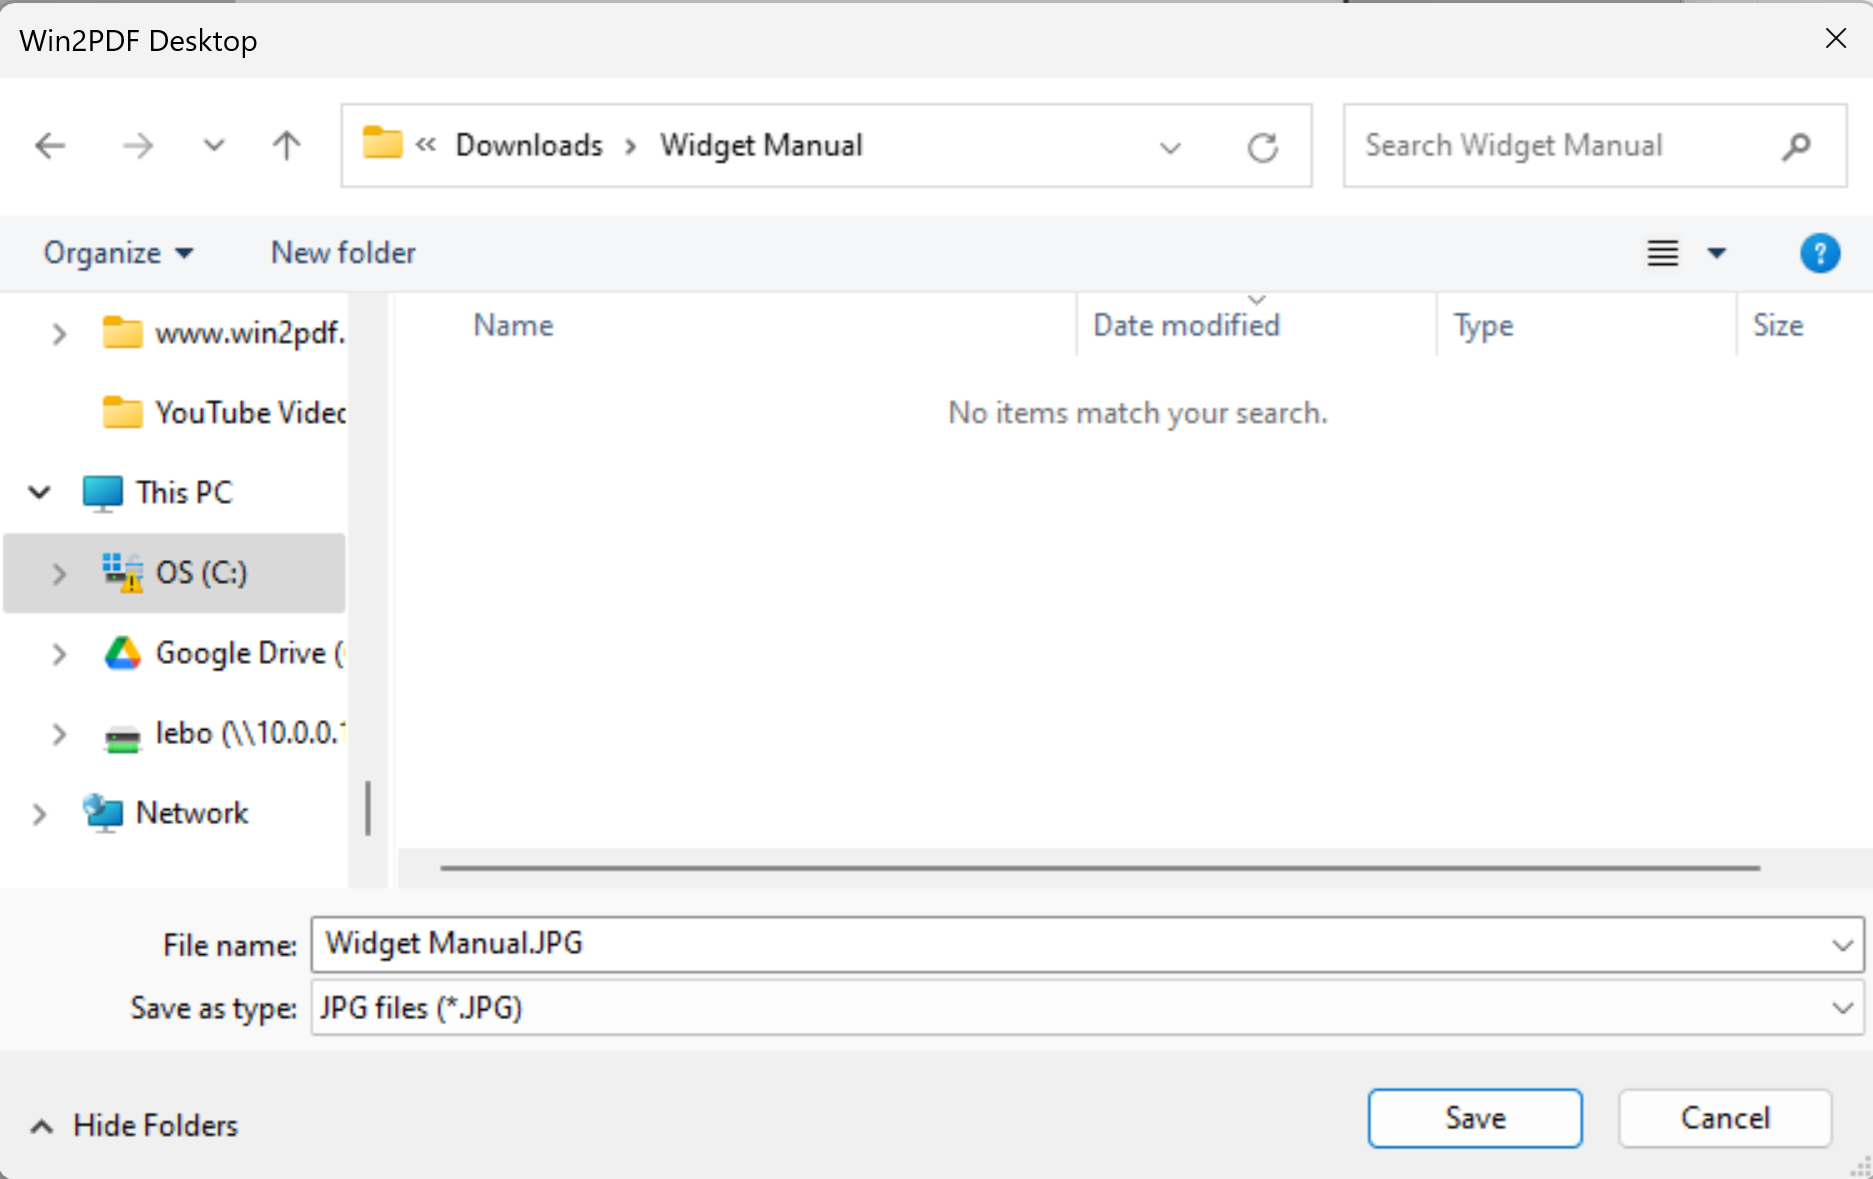
Upon file Save, multiple JPG files are created.
Win2PDF Desktop creates one JPG file for each page in the PDF and names them with the base name of the PDF file and increments of 1 (with preceding/following ‘.’characters). So, this is what you get:
Widget Manual.pdf ➔ Widget Manual.1.jpg, Widget Manual.2.jpg, Widget Manual.3.jpg, …
What you need, however, is to have it look like this:
Widget Manual.pdf ➔ Widget_Page001.jpg, Widget_Page002.jpg, Widget_Page003.jpg, …
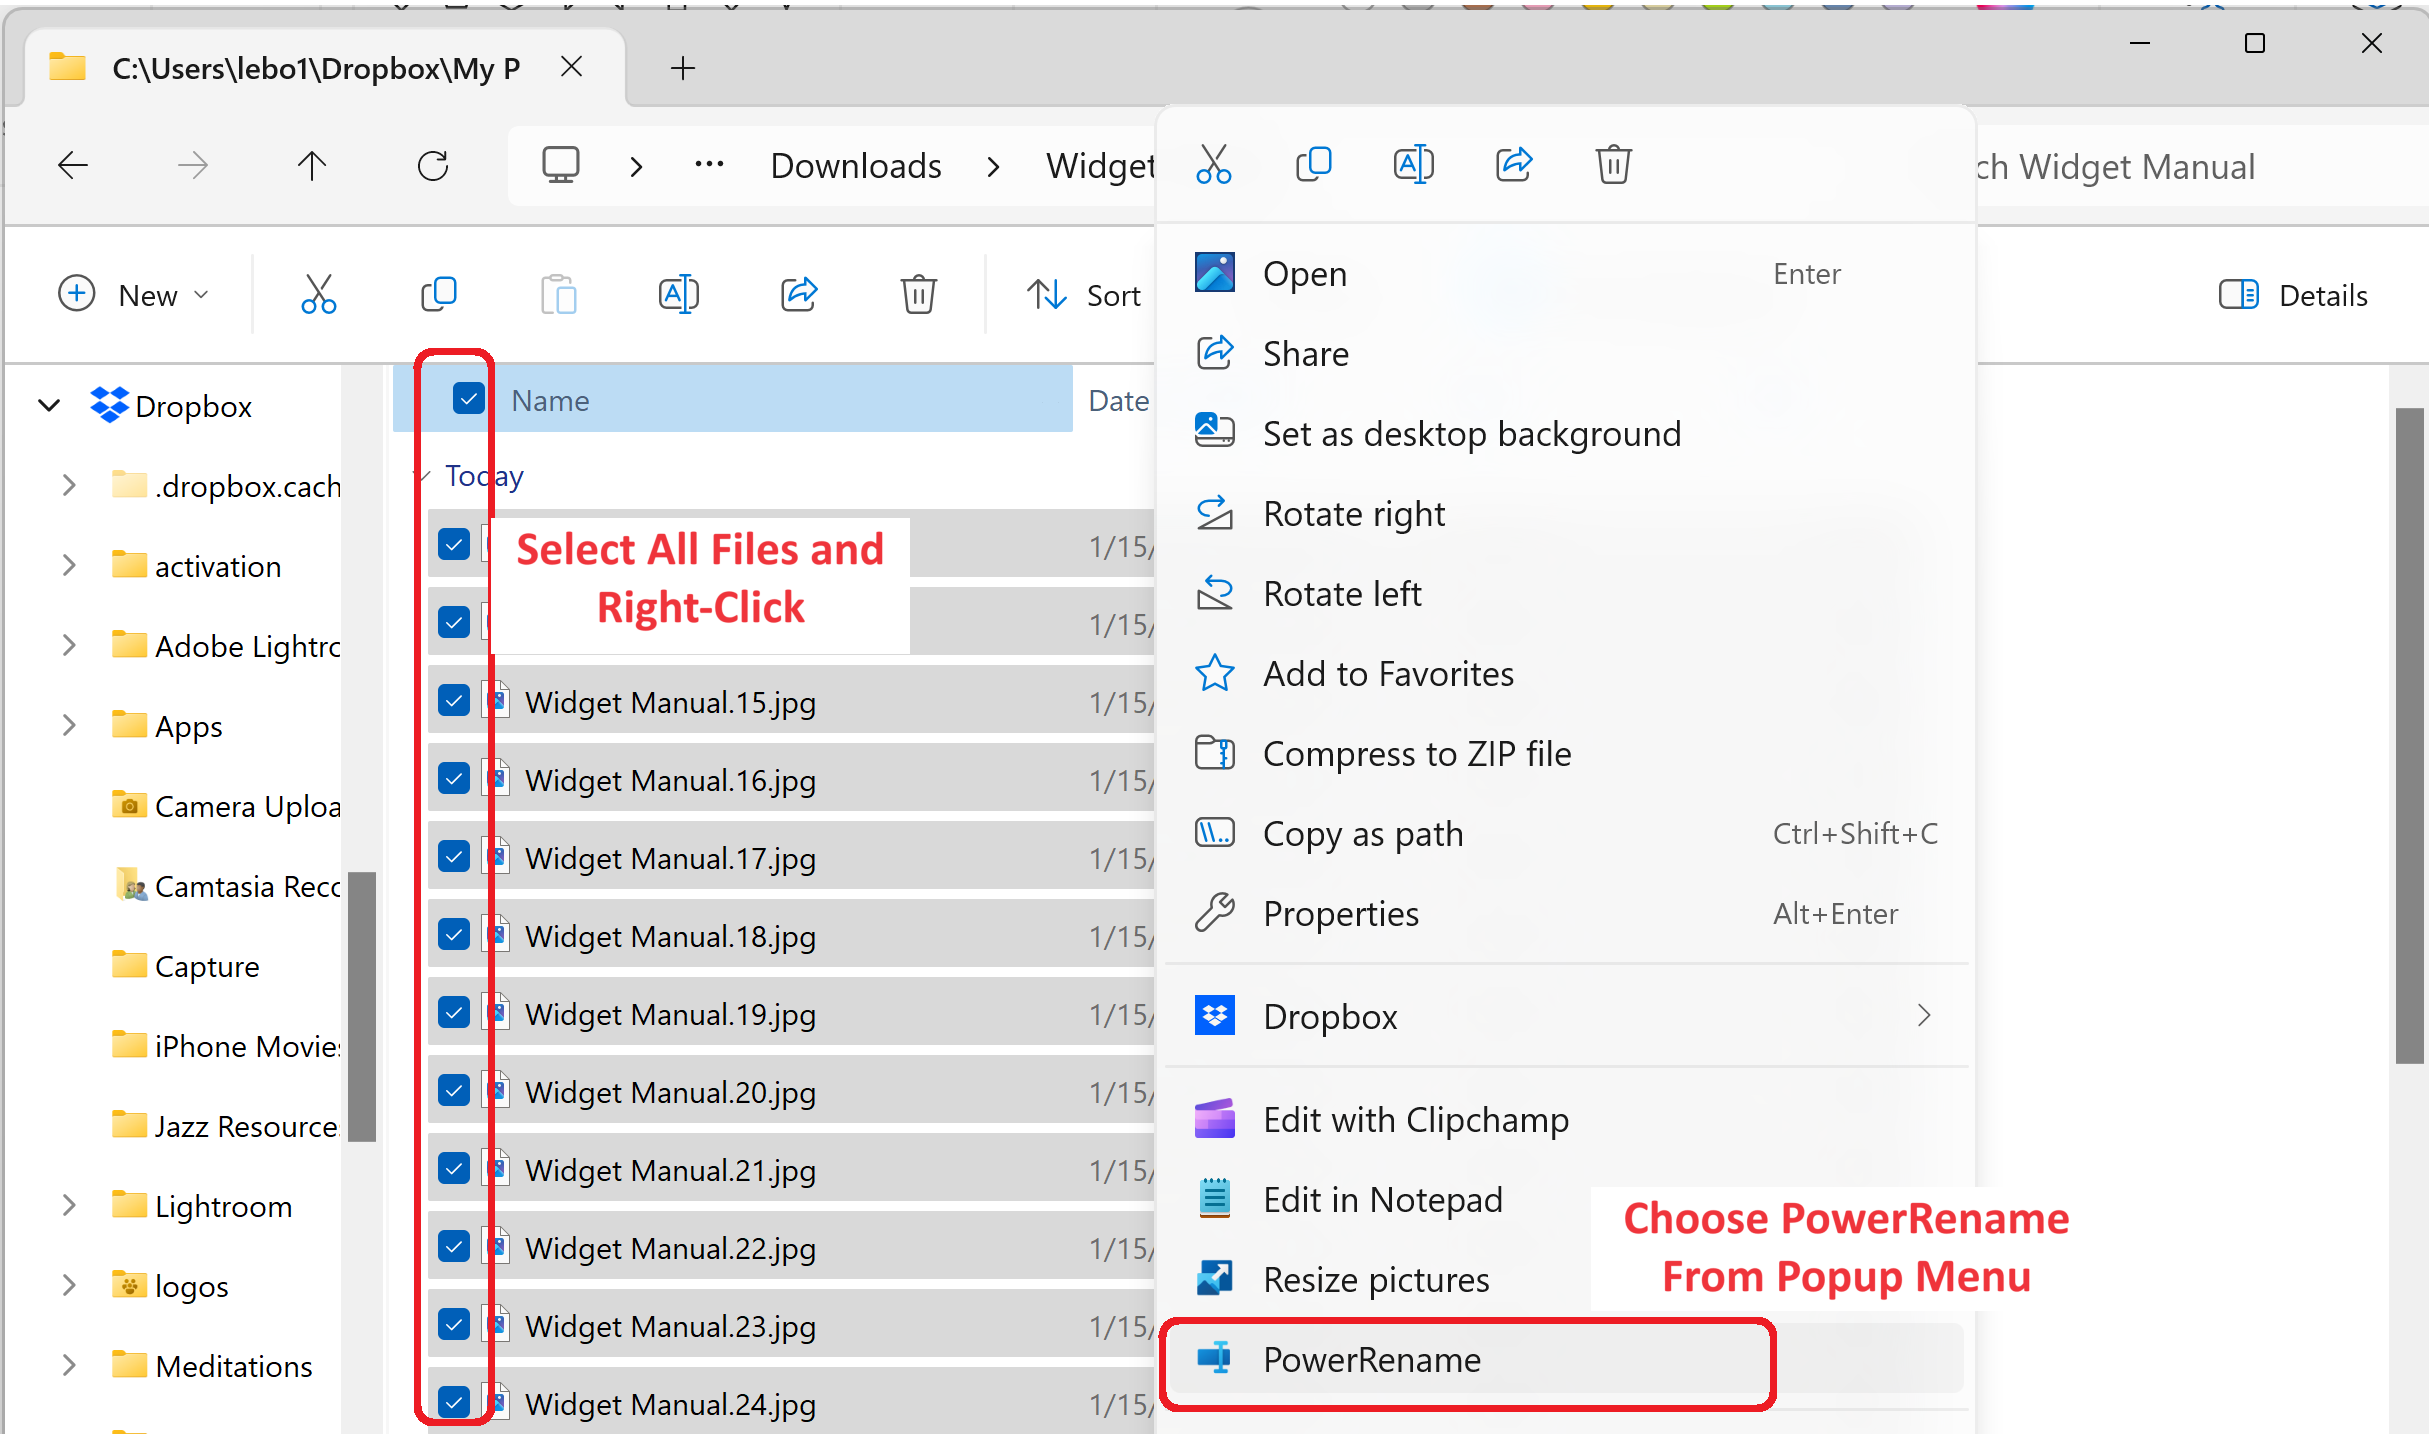
Step 3) Select the JPG files and open PowerRename
After the files have been converted to JPG, you can select all of them in Windows explorer and right-click to choose PowerRename.
Step 4) Search and replace text using a regular expression
This step shows how regular expressions can be used to augment the file name. In many cases, a simple “search and replace” will be sufficient. But, since the customer in our example wants each JPG file to be a page number in a specific format (3 digits long padded with zeros), we can use the regular expression shown below to accomplish our goal.
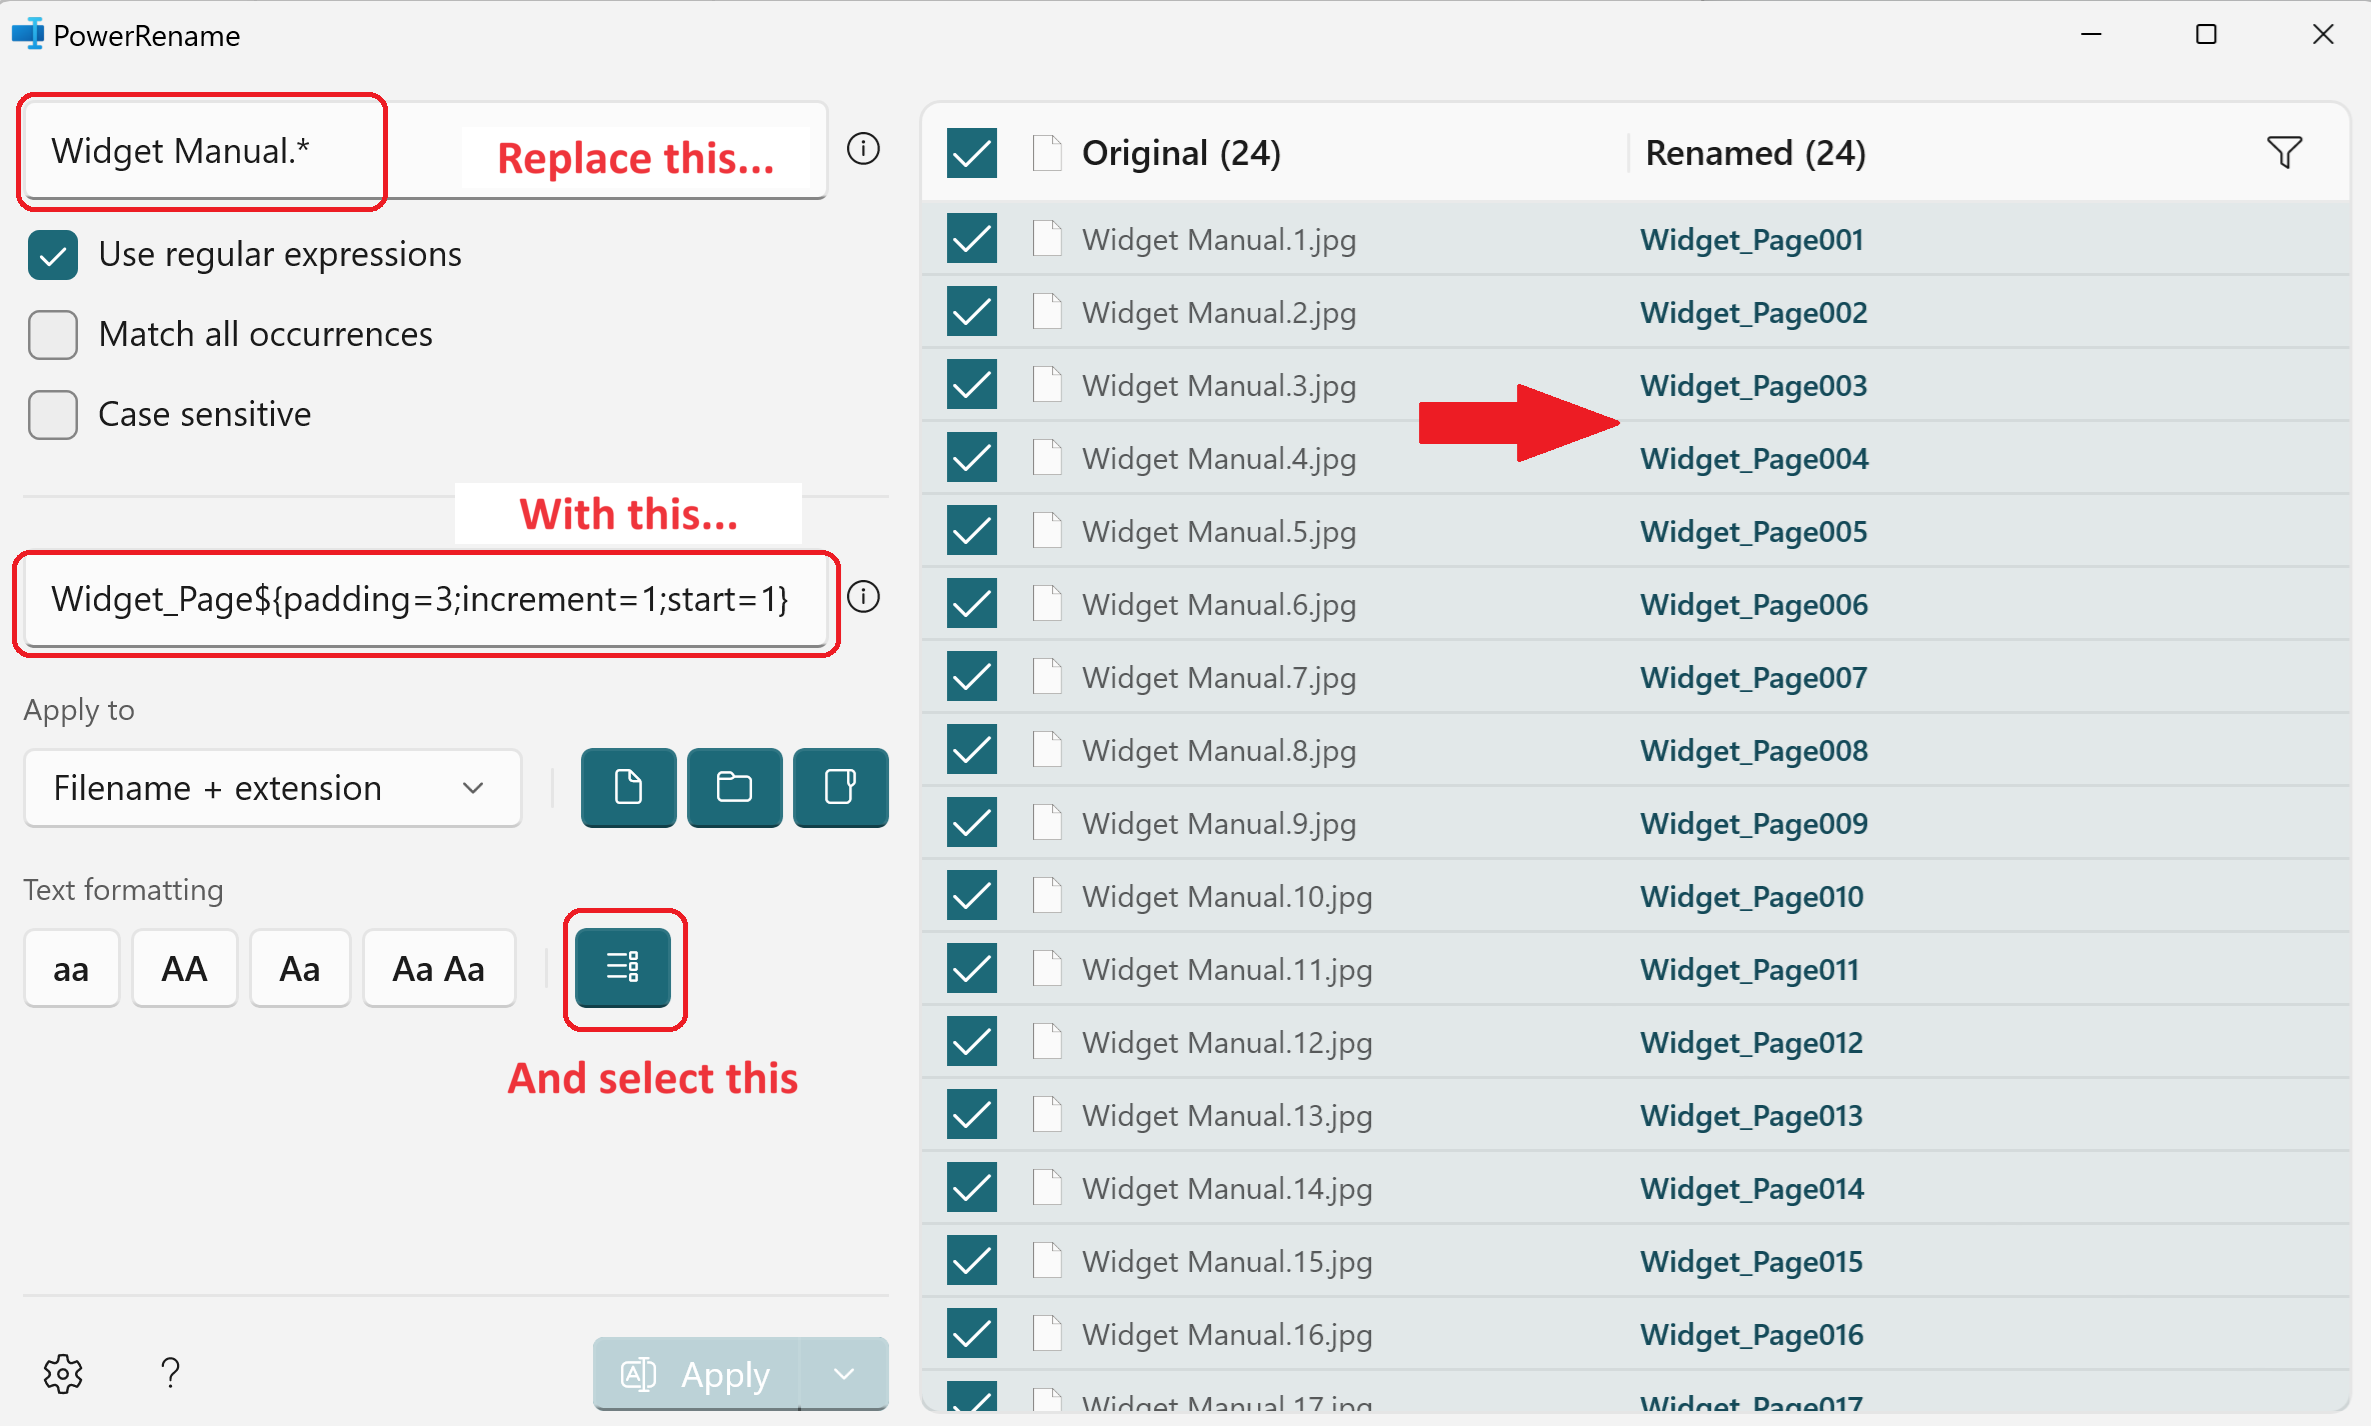
Note: the icon for Enumerate items under Text formatting must be selected.
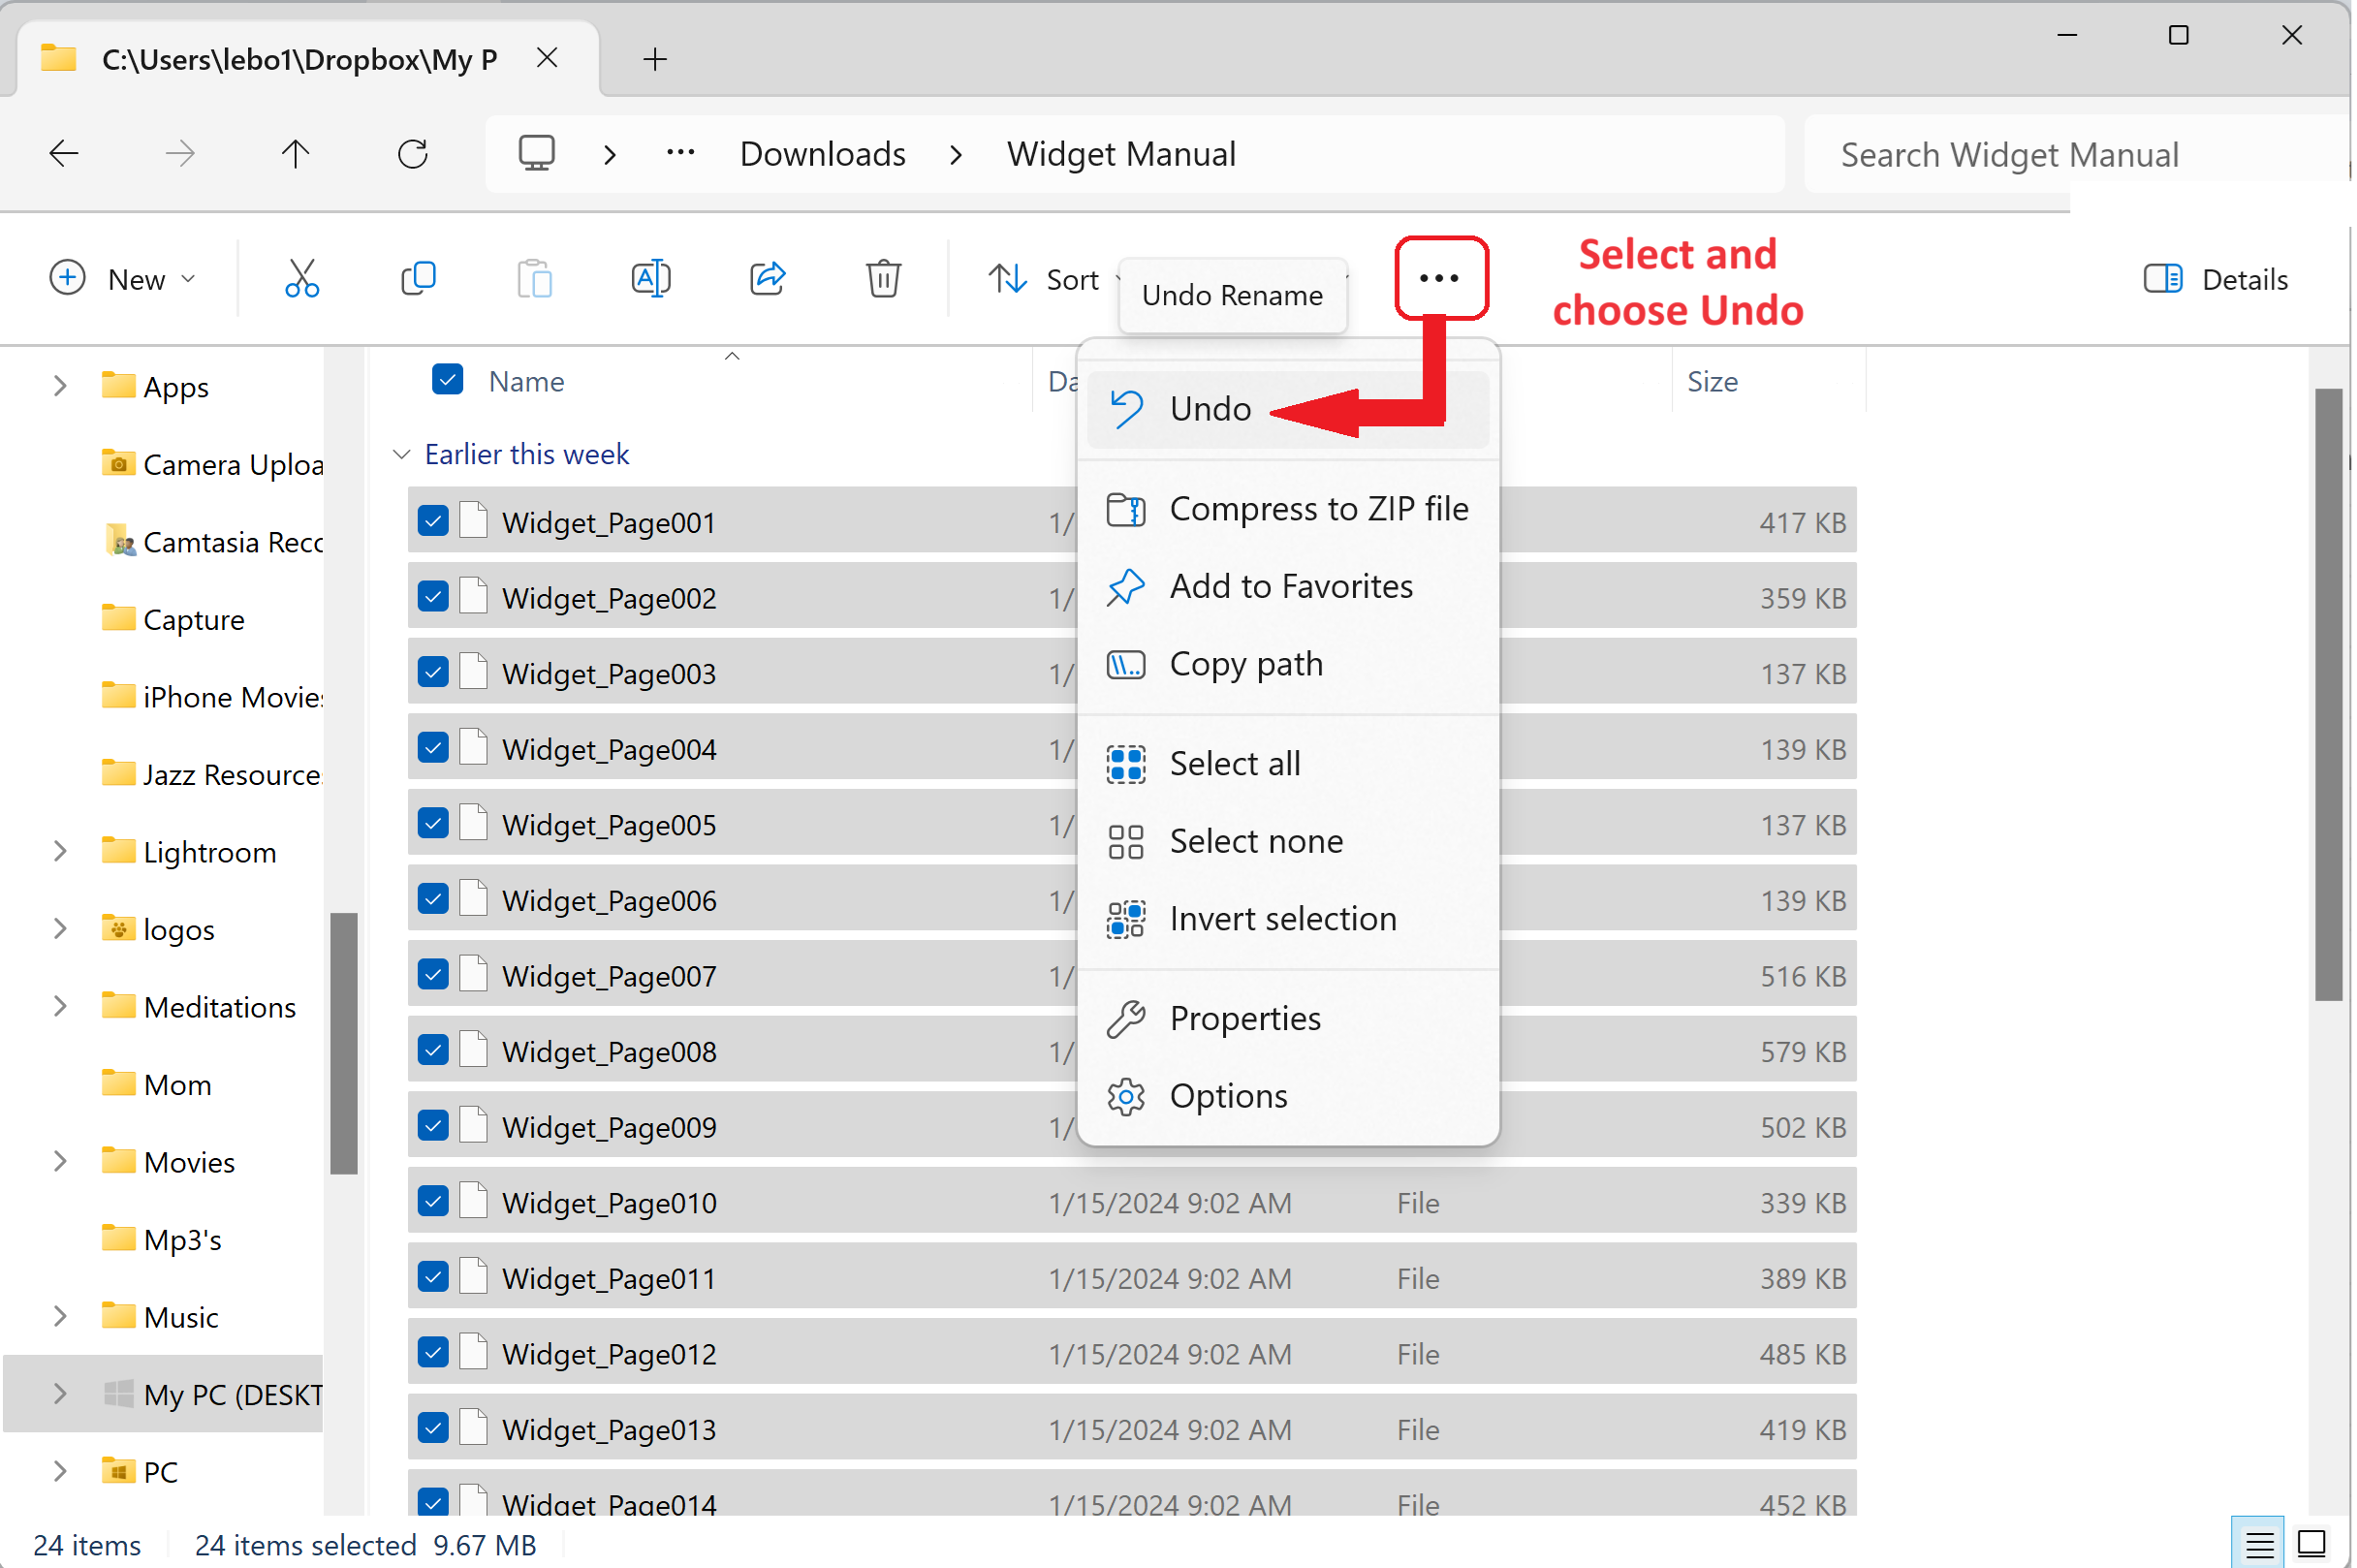
You’ll see a preview of the file name conversions on the screen, and when it looks correct you can select Apply. And that’s it! If you make a mistake after you’ve applied the rename, you can go back to Windows explorer and select the “…” option shown below and choose Undo.
This is obviously a very specific example but it shows how it can be done. We highlighted this example using a regular expression because it is such a powerful and expansive tool that most programmers are familiar with.
If you’re renaming PDF files, the Win2PDF Pro Auto-rename feature is an easier to use solution that also supports renaming based on the content of the PDF.
If you need assistance with renaming files with specific criteria, let us know. Just as in the case of this customer, we can usually help, even if it requires finding a solution from another source.
