It’s hard to believe, but Windows XP was released over 20 years ago in August of 2001. [Fun fact: the first release of Win2PDF was released 16 months earlier]. Even though Microsoft retired XP in 2009, ended extended support in 2014, and discontinued all security updates in 2019, we still find customers who are using this operating system, typically for older legacy software that cannot be updated.
Many of these legacy applications generate reports or forms, and there is still a need to save these files as PDF. While Adobe Acrobat officially ended their support of Windows XP in 2014, Win2PDF still supports Windows XP, even with our most current Win2PDF 10 software. This includes all of the features currently available, including the ability to auto-name PDF files.
Remember: If you do have an older Windows XP application and need PDF software, Win2PDF is still available.
In a recent blog post, we introduced the Auto-Rename feature. Based on user feedback and internal testing, we’ve made some changes to the interface and improved the functionality of this feature. The latest update to this preview can be installed to existing Win2PDF Pro users by applying the 10.0.120 Win2PDF Pro Service Pack which is available at our support download page.
[Note: This feature is only available in the Win2PDF Pro version of the software. If you do not have Win2PDF Pro but would like to try this feature, you can request a 30-day trial license.]
Here’s a quick YouTube example of what this process looks like with the updated interface:
And here’s the process of using the feature broken down step-by-step.
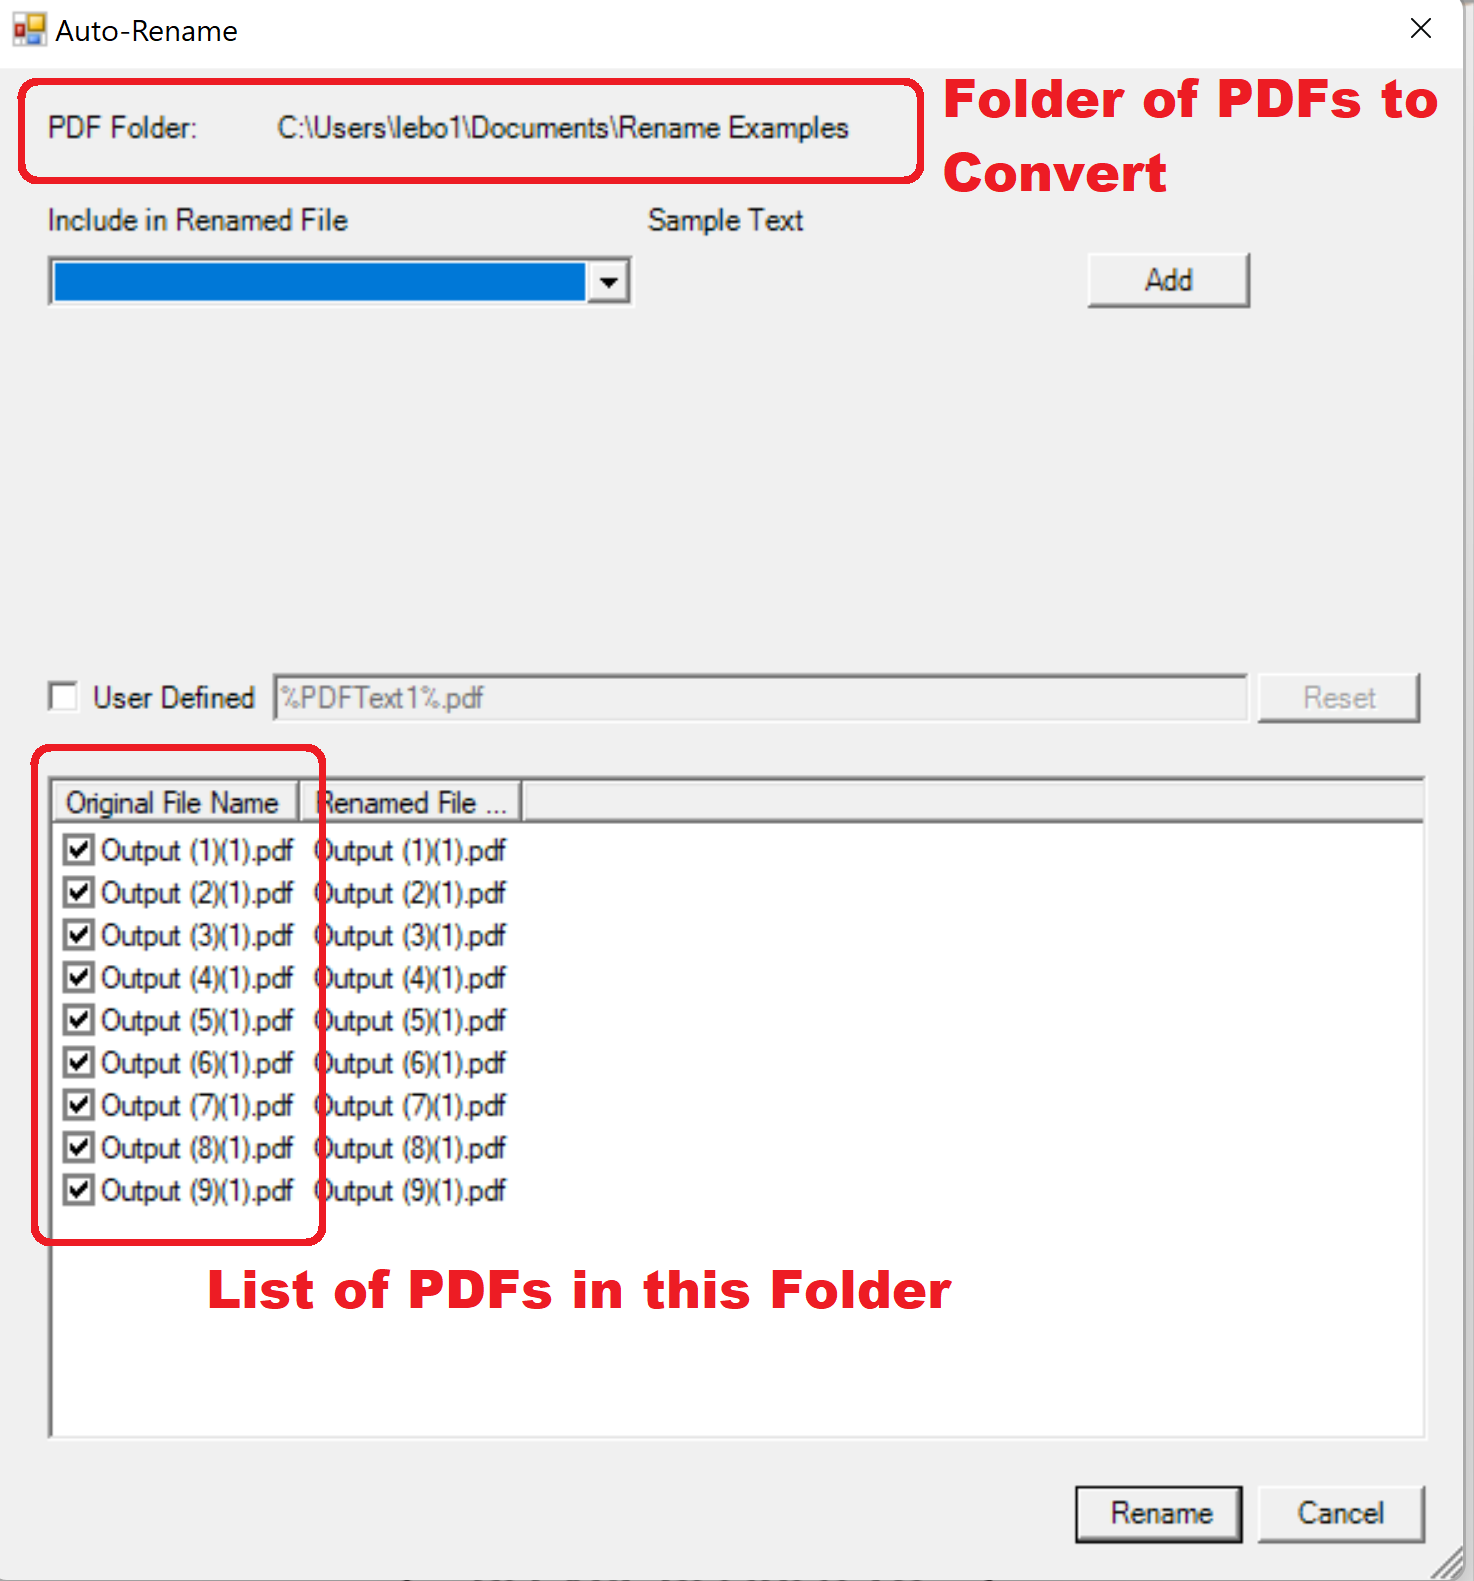
To start using this feature, you’ll first open a PDF file by either by right-clicking a PDF file from Windows Explorer and choosing Open with -> Win2PDF Desktop, or by starting the Win2PDF Desktop App from the Windows Start menu and choosing File -> Open… to select a PDF file. The Auto-Rename feature will apply to all PDF files in this folder.Then select Auto-Rename… from the Auto-Name menu. You’ll see all of the PDF files in your folder appear in the Auto-Rename window along with several options.
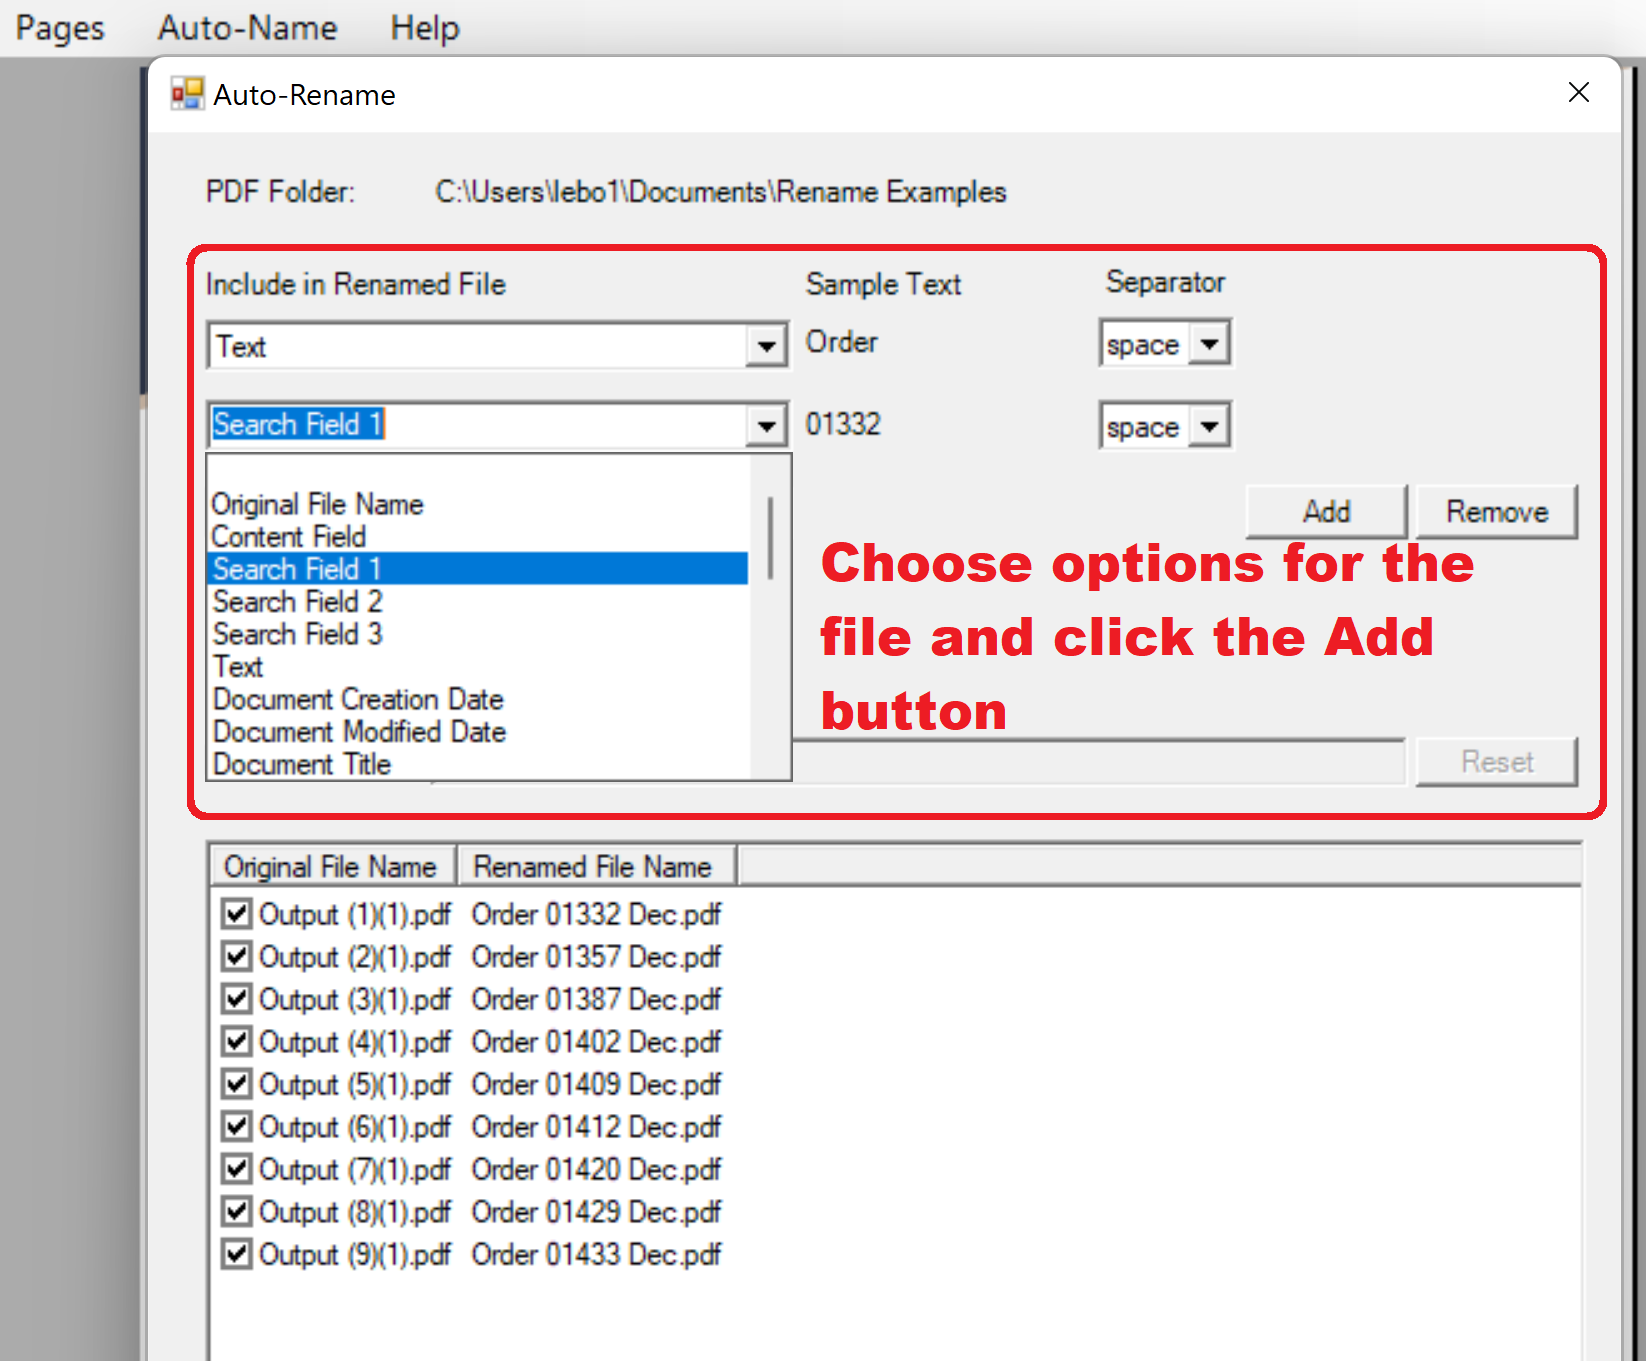
Next, you’ll choose the rename options that you want to use for the renamed files. You can stack or add up to 5 options to Include for the new file name.
As you add options for the renamed file, you’ll see a preview of the file renaming in the lower part of the window. You can make changes to the options until you get the desired final file name.
As an example, let’s consider a folder of PDF invoices generated automatically with a generic name like “output(x).pdf”. If you want to rename these to something more meaningful, especially if there is textual information in the PDF file you want to include for the name, we can do that quite easily by selecting different options in the Auto-Rename window.
If we examine this example window (shown above), we’ll see that we were able to change the “Output(x).pdf” files to ones composed of:
A starting text of “Order”
A separator character of [space] inserted before next option
A Content Search field that captured the invoice number in each PDF file*
A separator character of [space] inserted before next option
The current Month (Dec)
* Note: Defining the search term works the same as before, as was documented in the previous blog post.
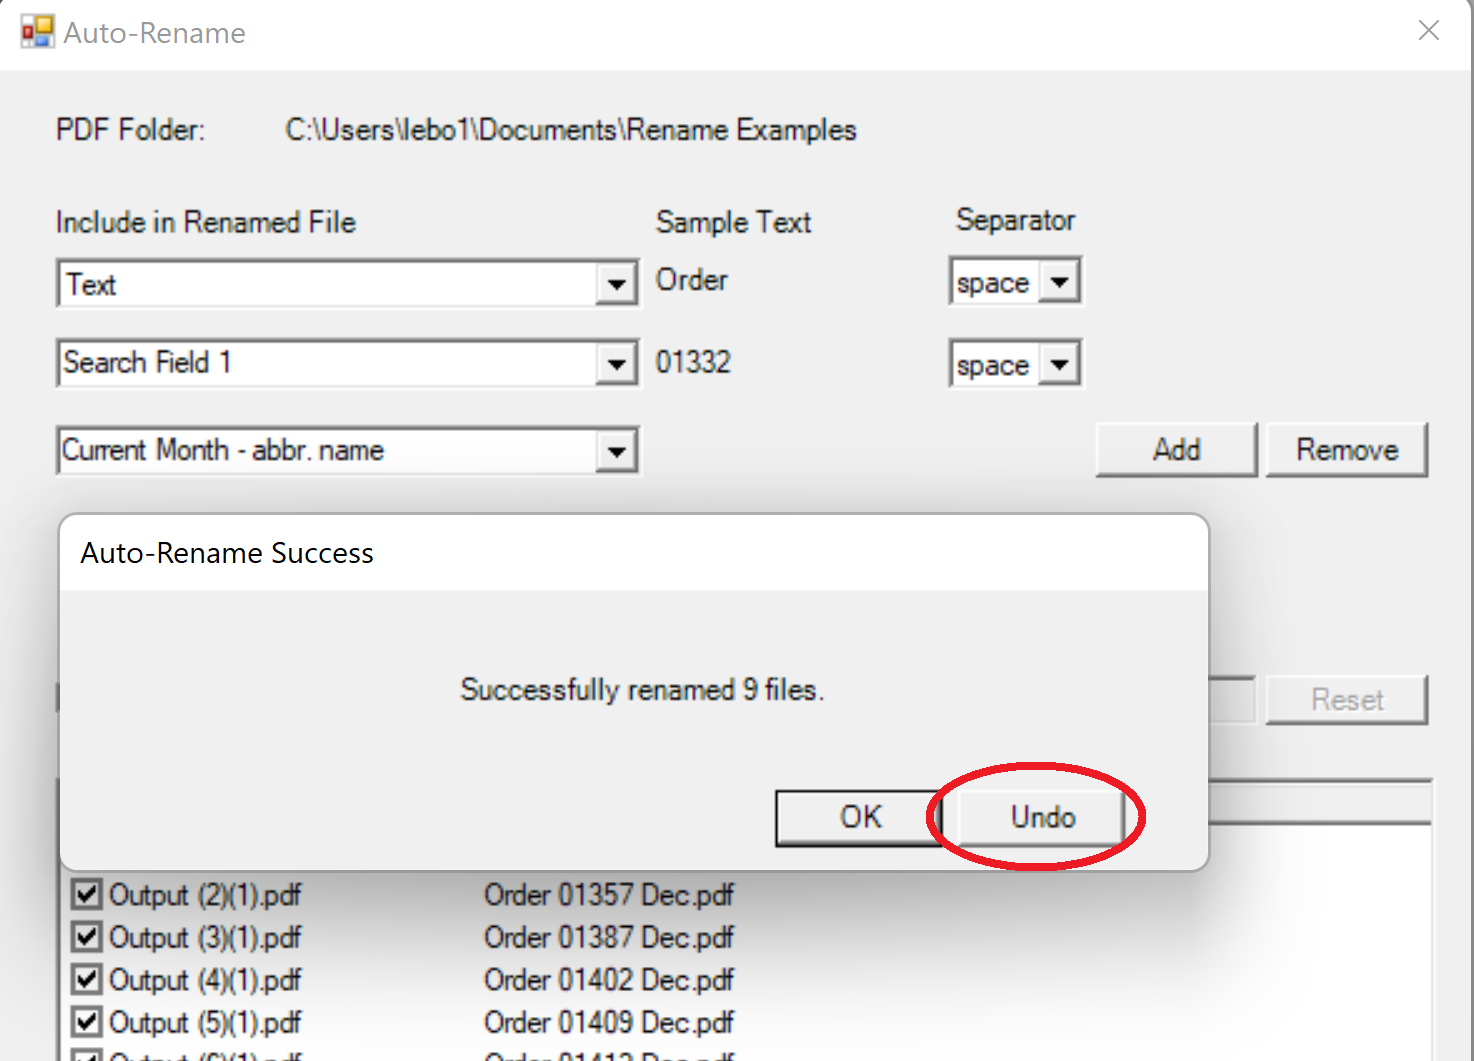
Also note that there are a variety of separator characters that you can have inserted between the various rename options, or you can have “none”.
And finally, once you rename the files, it will also give you a chance to Undo the changes before leaving the Auto-Rename window.
Initial feedback has been very positive with these changes, but we’re interested in any additional feedback or suggestions. Let us know by sending an email to [email protected].
Win2PDF.com has offered a free online HTML to PDF converter for some time, but it has limitations. It only works with public web pages, not private pages on an intranet or local HTML files. It also can’t be automated.
If you try our latest free update — Win2PDF 10.0.114 — there’s a new feature to the Win2DPF Desktop App’s command line options — HTML to PDF. With this option, you can convert a local HTML file or a web URL directly to a PDF file.
From a Command Prompt window, just issue the command:
win2pdfd.exe html2pdf "sourcehtml" "destpdf"
The “sourcehtml” can be a specific local HTML file or a web URL. If the file name or path contains spaces, make sure to include double quotes (“”) around the complete source file name or URL. The URL can be specified as “https://www.example.com” or “www.example.com”.
Using this option from the command line allows users to automate batch conversion of HTML files to PDF using custom scripts or Microsoft Power Automate Desktop flows. Combined with other Win2PDF command line features, developers can build powerful automated solutions based on HTML reports.