We recently had a specific customer request that started with,
“I need to convert a large number of PDF files into PNG image files. My original PDF files have transparent backgrounds. However, after using the Win2PDF Convert To Format command line, I get PNG files with white backgrounds. But I don’t want to change the background; I want the PNG files to have transparent background layers just like the PDF.
Could you please help me to solve that problem?”
It’s not uncommon to get some variation of this type of question. Frequently we can offer some advice or workaround that the customer may not be aware of. In other cases, we can research the feature request and add it into our main Win2PDF software. In this case we were able to implement this feature quickly and solve the customer’s problem.
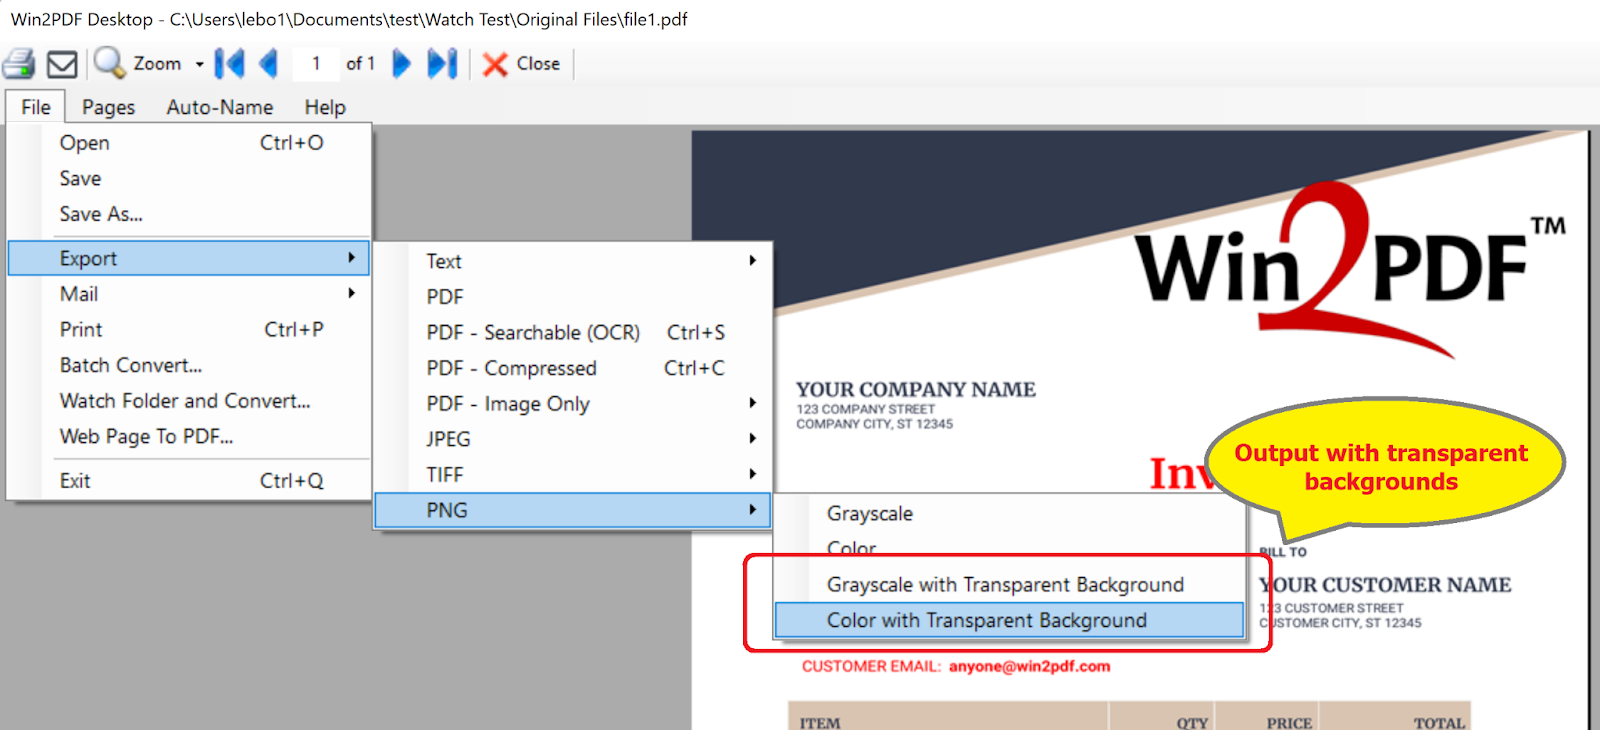
The Win2PDF 10.0.129 update now includes support for the PNG and TIFF Background Transparency formats when converting from PDF files that have transparent backgrounds. It can be accessed in a few different ways:
- To convert a individual PDF file to a PNG or TIFF with a transparent background, you can open the PDF file in Win2PDF Desktop App and then Export as shown below.
- To convert a group of PDF files with transparent background layers, you can use the Win2PDF Convert To Format command line from a command window to convert the files to PNG or TIFF with transparency preserved. This is documented in the WIn2PDF online help.
- Command line PDF to TIFF (background transparency)
- Command line PDF to PNG (background transparency)
- And lastly it is available as new output options in the Win2PDF Pro Batch Convert feature.
One thing we urge customers to do is not assume that Win2PDF can’t do something if it’s not readily apparent. Sometimes, just reaching out with your questions to [email protected] (or through our online support portal) will allow us to give you that “missing thing” you need for your PDF solution.