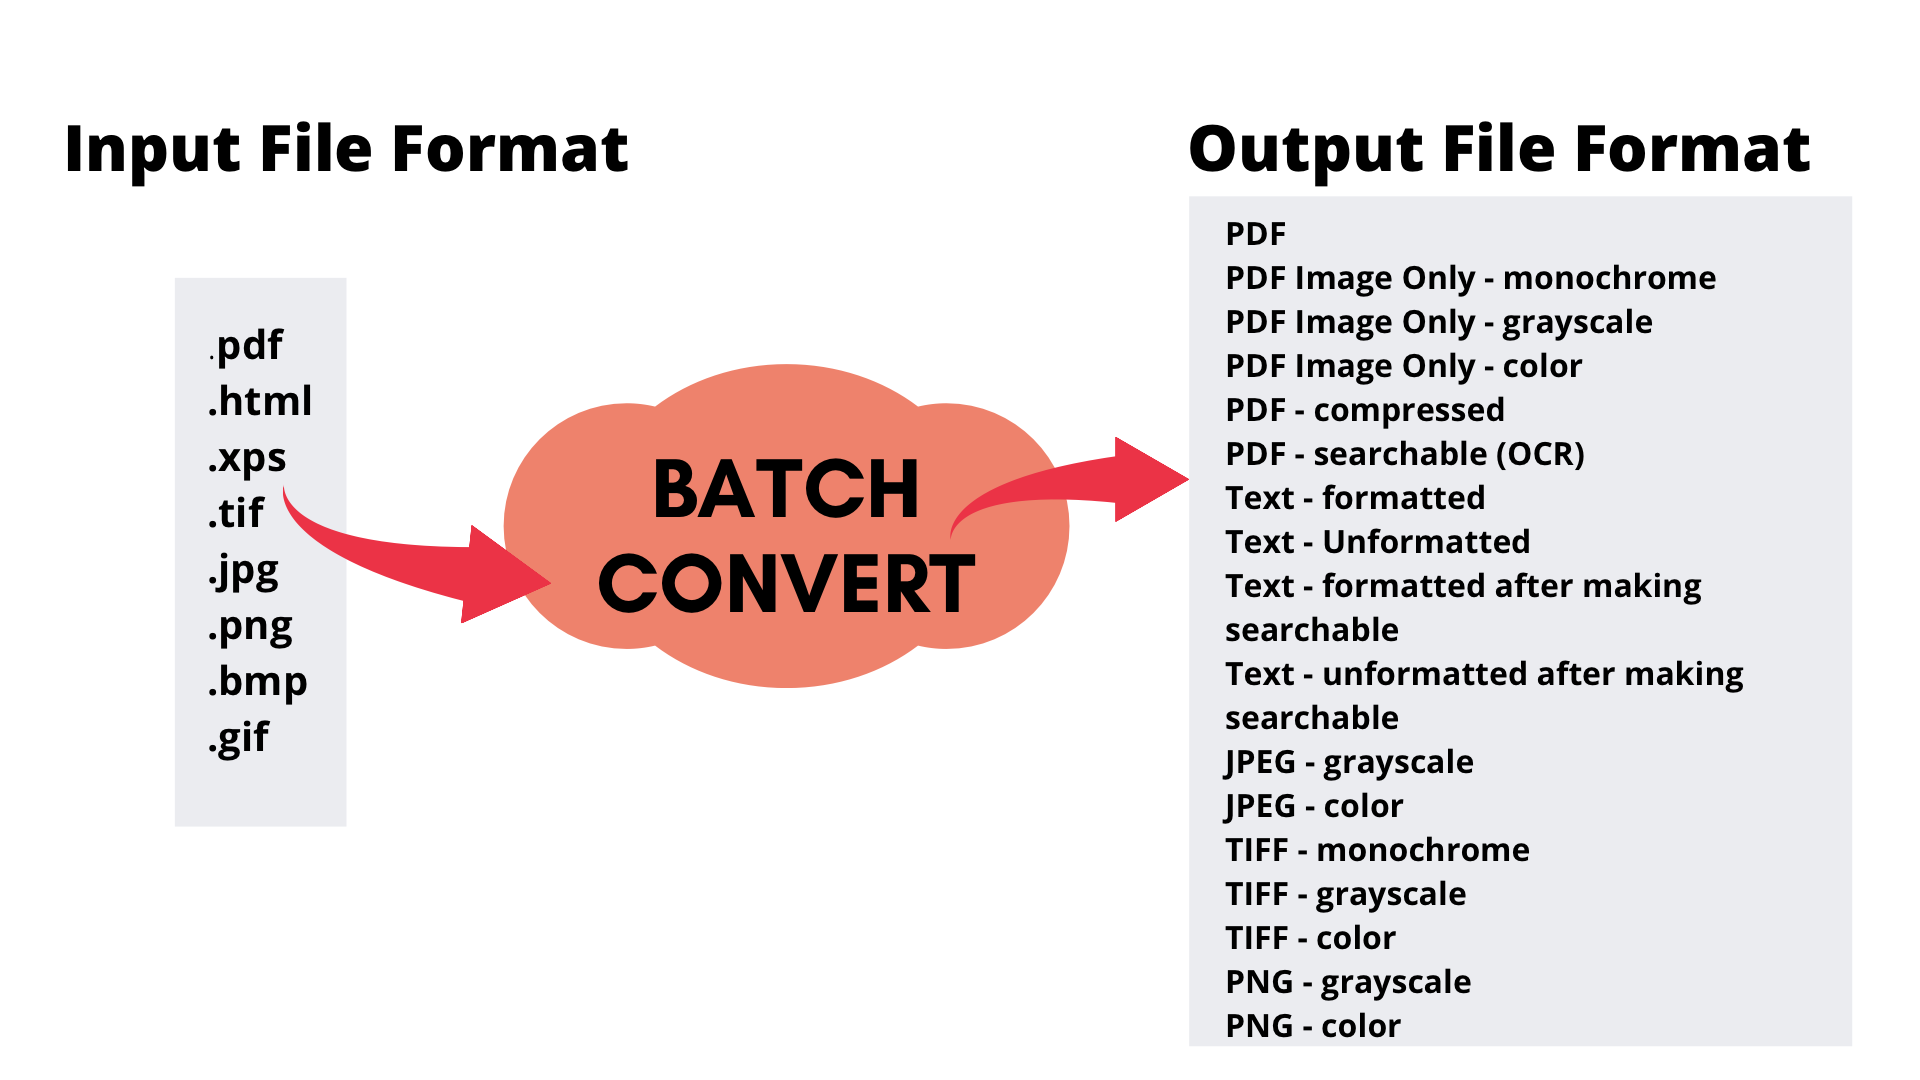
Win2PDF has a new Plug-In available to automatically upload PDF (or image) files to an Amazon Simple Storage Service (S3) bucket. Amazon S3 is a scalable, cloud-based object storage service that is part of Amazon Web Services (AWS). While Win2PDF itself is not cloud-based, it can save files to cloud-based services like Amazon S3, Dropbox, Slack, etc. This S3 Plug-In is a free optional extension to Win2PDF and must be installed separately from the main Win2PDF software.
With the new Configure Amazon S3 Plug-in, users can upload PDF or image files directly to their Amazon S3 buckets after the file has been created without any additional steps. This can be useful for distributing PDFs, modifying on PDFs using cloud based software, or integrating with 3rd party software such as Zapier.com.
To use this new feature, download and install the free Plug-In from our web site here:
https://get.win2pdf.com/plug-in/Win2PDF-S3-Upload-PDF-Plug-In.exe
When you run the Configure Amazon S3 Plug-In setup program, you will be presented with the following configuration window:
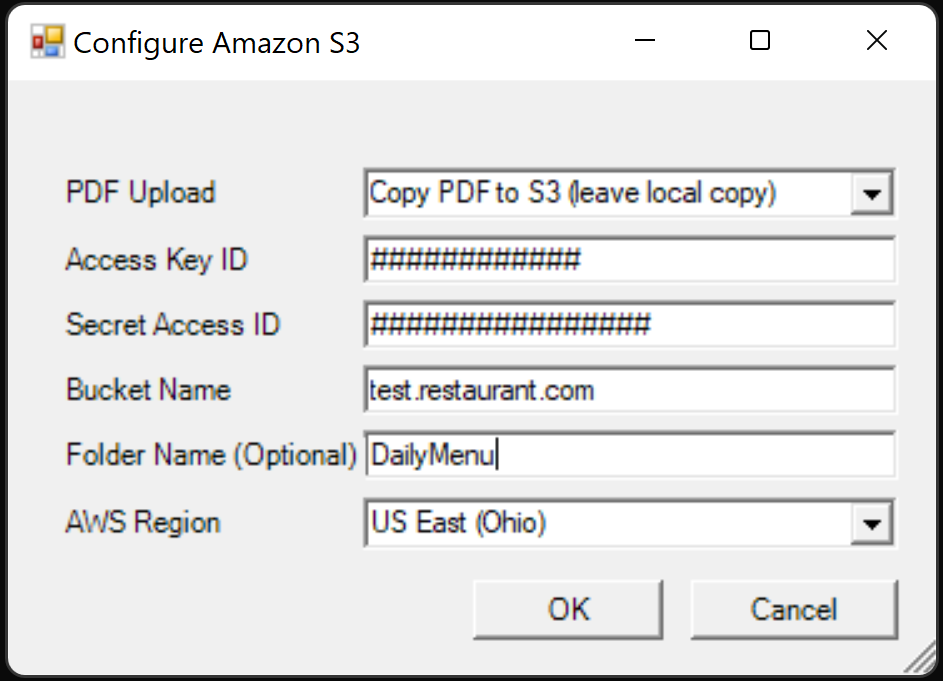
The configuration options available are:
- PDF Upload: Allows you to either Move or Copy the PDF file to S3, depending on whether or not you wish to keep a local copy.
- Access Key ID & Secret Access ID: Your access Key ID and Secret Access ID are part of Amazon’s security credentials to verify who you are and whether you have permission to access the resources that you are requesting. AWS uses the security credentials to authenticate and authorize your requests.
- Bucket Name: A bucket is a container for objects stored in Amazon S3, and needs to exist in your Amazon S3 account.
- Folder Name (Optional): If you wish to upload the PDF file to a specific folder in the bucket, it can be specified here.
- AWS Region: Amazon Web Services (AWS) has the concept of a Region, which is a physical location around the world where data centers are clustered. This setting must match the location of the specified bucket.
Once the Configure Amazon S3 Plug-In has been installed, you’ll have the option to select Send to S3 on the main Win2PDF file save window.
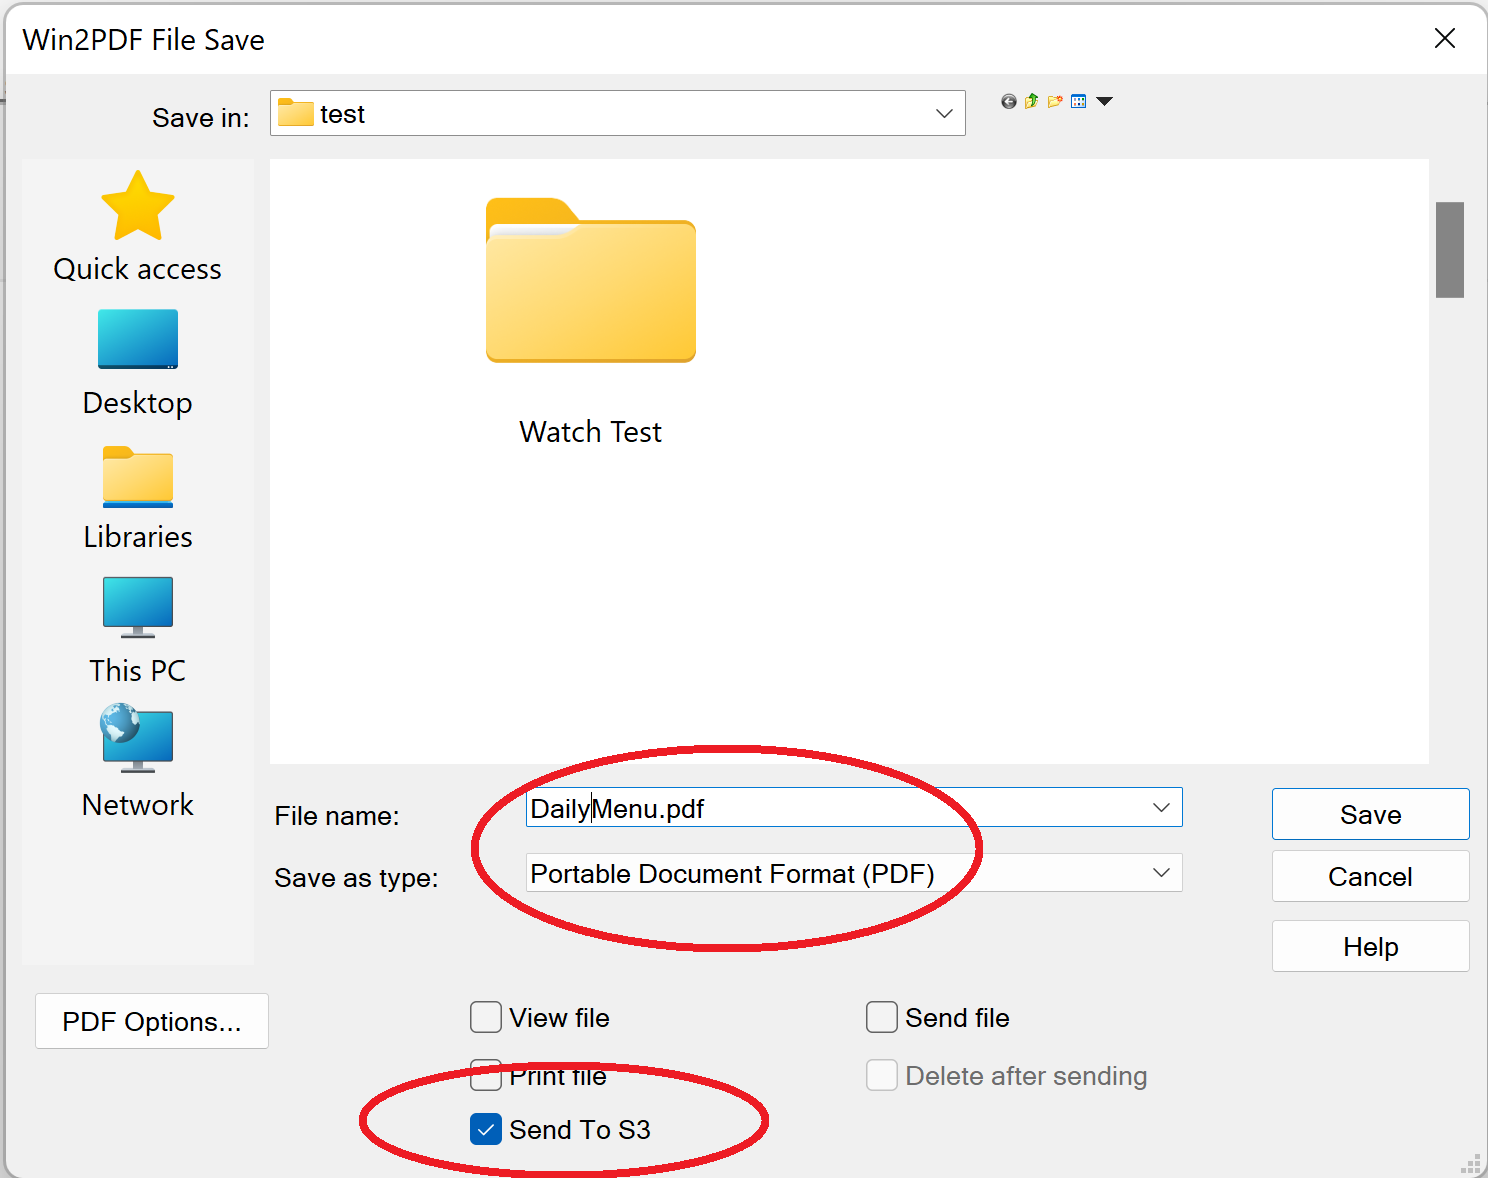
When this option is checked, the file will automatically be uploaded to your S3 bucket (using your configuration settings and access keys) without any further user interaction. If unchecked, it will only create a local PDF file and will not upload the file to your S3 bucket.
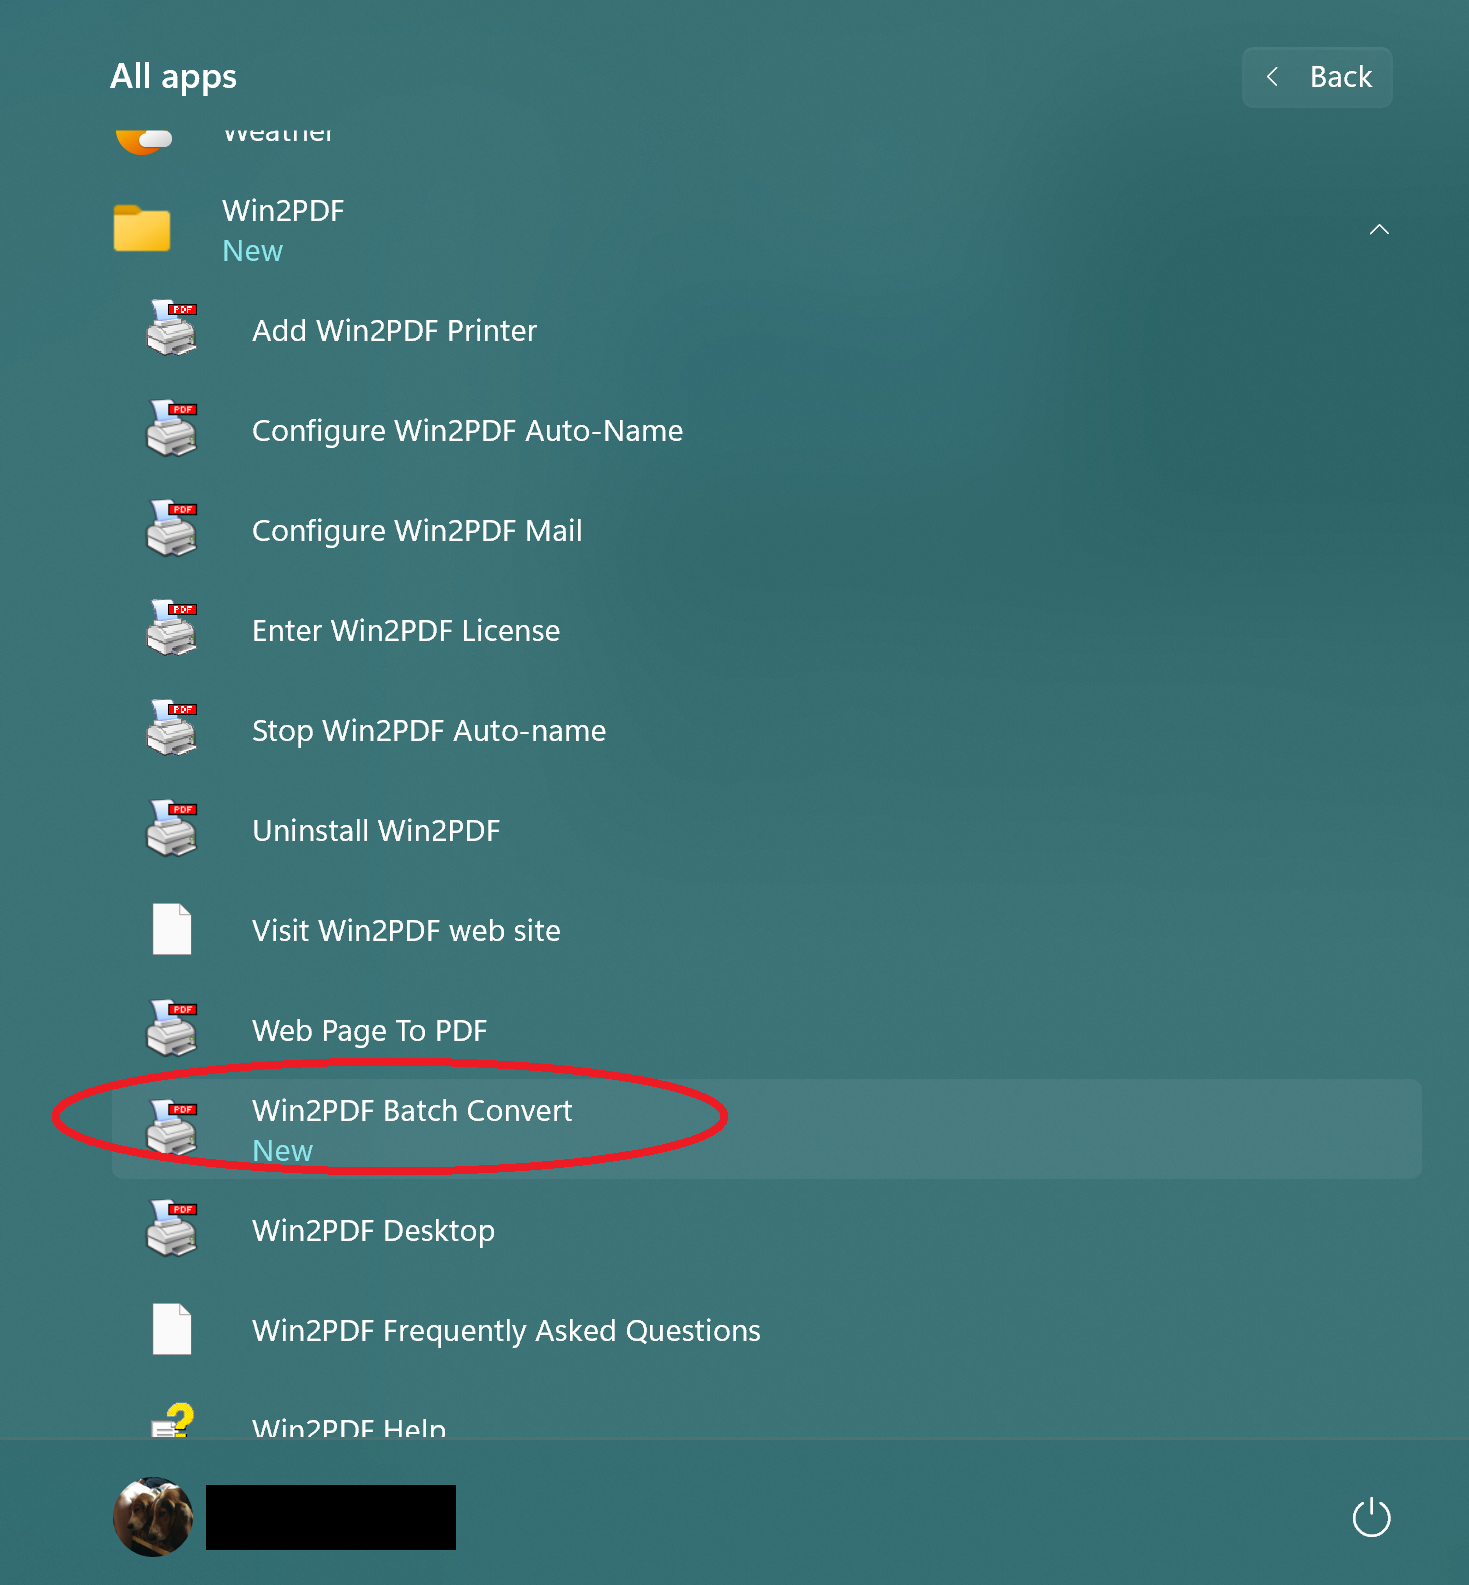
If you need to change your configuration settings in the future, you can return the Configure Amazon S3 Plug-In setup screen by selecting it from the Win2PDF Windows Start program group. (Please note you will need to re-enter your security access keys when you return to this screen. This is for security reasons, as the access keys will not be visible once saved.)

Also, we’ve had several blog posts previously that covered the Win2PDF Plug-In capabilities and how it can be used to extend the functionality of Win2PDF to do customer specific tasks or interface with other applications and services. Other Win2PDF Plug-Ins are available on our GitHub repository here:
https://github.com/win2pdf/Win2PDF.Samples/tree/master/plug-in
Like many Win2PDF features, this feature started with a suggestion from a Win2PDF user. Any questions, comments, or suggestions? Let us know.