
As AI chatbots – like Google’s Gemini, Microsoft’s Copilot, OpenAI’s ChatGPT and Anthropic’s Claude – have become more capable, they’re increasingly helpful for learning how to use software tools like Win2PDF, especially when tasks involve multiple steps or lesser-known features. Win2PDF users can take advantage of this by using well-crafted prompts to quickly identify the right feature, command, or workflow for their PDF tasks.
Whether you’re trying to convert a document, reorder pages, automate a workflow, or use one of Win2PDF’s command line options, a clear AI prompt can help you get to the answer faster.

Why AI Prompts Help
Win2PDF has a wide range of features, and the online user guide at http://win2pdf.com/doc and https://pdfblog.com offer extensive how‑to material. But when you’re in the middle of a task, it’s often easier to describe what you’re trying to accomplish and let an AI assistant point you to the right feature or steps.
Just open the Chatbot of your choice (or try several) and feed it prompts using the following guidelines.
How to Write an Effective AI Prompt
The key is to be specific about your goal and the context.
- Describe the task you want to accomplish
Instead of “How do I edit a PDF?”, try something like:
“I want to delete a page from a PDF using Win2PDF Desktop, and then save the results as a TIFF file.”
“How do I convert a folder of PDF files to text using Win2PDF Pro?”
- Include the source and output formats
This helps the AI narrow down the correct feature.
“I have a Microsoft Excel document and want to create a PDF/A version of the file for our database archive. How can I do this using Win2PDF?”
“I need to convert a PDF into a JPG image at a resolution of 300 DPI.”
- Direct the Chatbot to the online documentation for Win2PDF, and be as specific as possible
Directing the chatbot to documentation allows it to scan and integrate the information already available
“I want to convert a single HTML file using the Win2PDF “convertto” command, which is documented here at https://www.win2pdf.com/doc/command-line-convert-to-format.html”
- Add any constraints or preferences
“I need a command line example that works in a command line batch script that can be run from another application.”
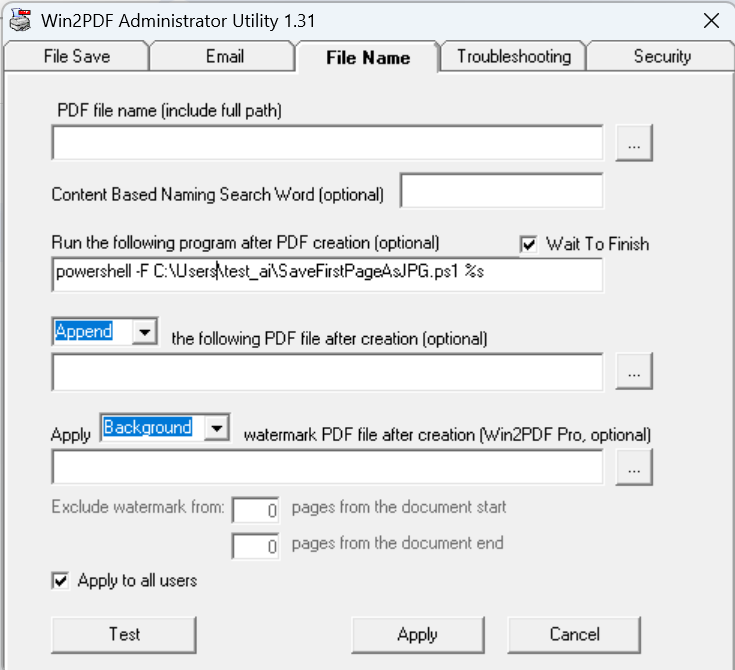
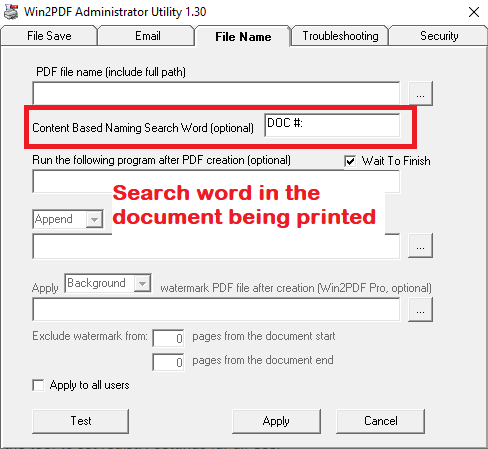
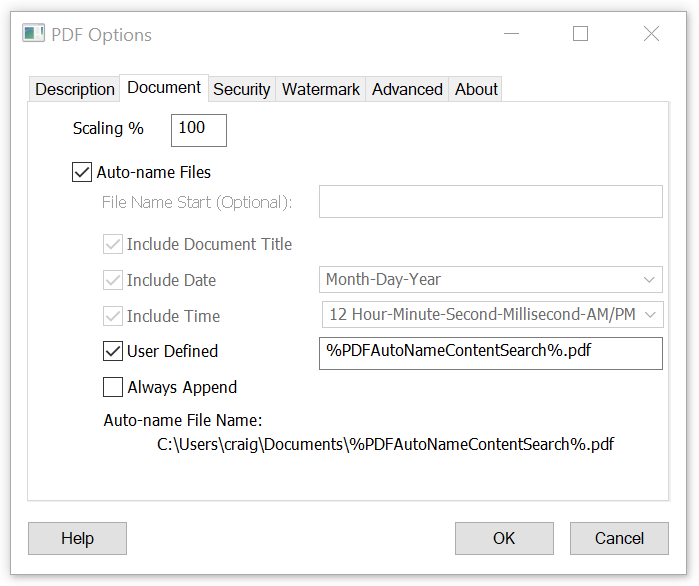
“I want to automatically rename PDFs using a Win2PDF plug‑in, but I need assistance creating this with my specific format requirements.”
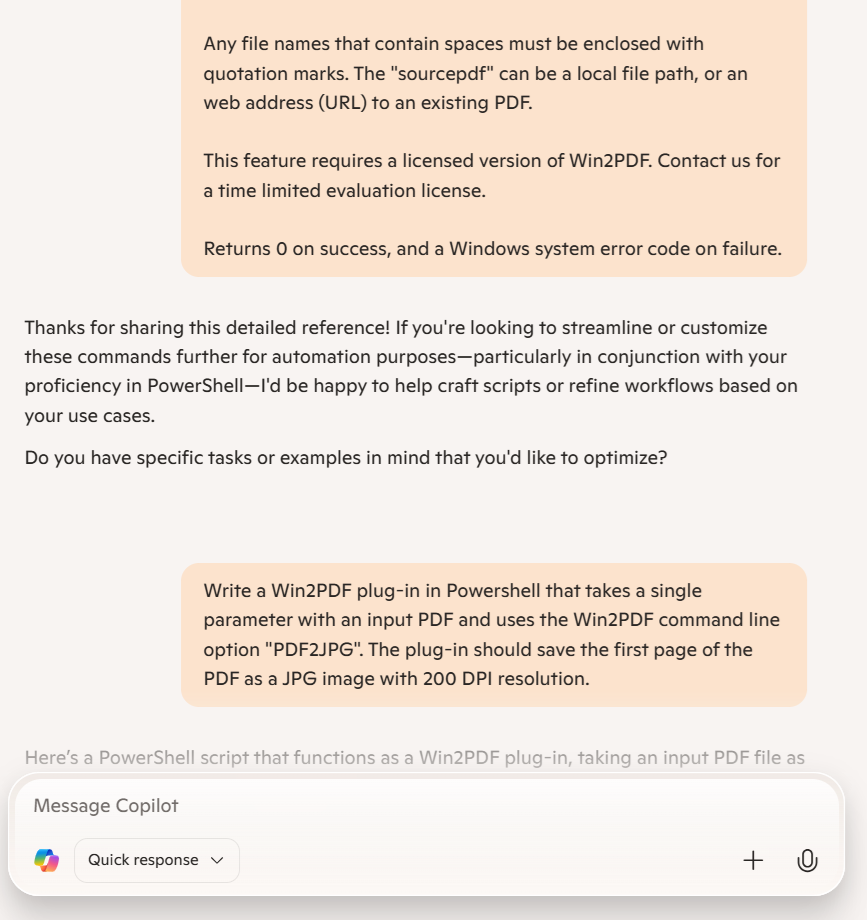
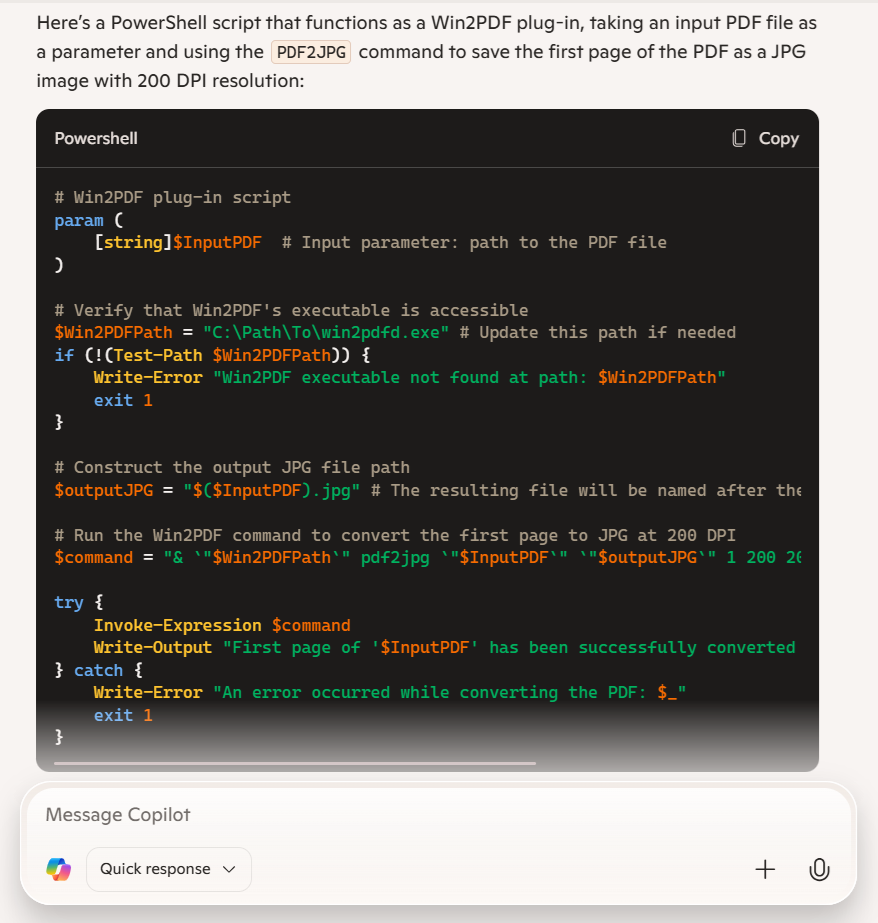
- Ask for examples
AI tools excel at generating sample commands or workflows.
“Give me an example of a EXTRACTTEXT command line that outputs formatted text.”
“Provide a sample registry setting for Default Rename Action.”
Bringing It All Together
AI tools don’t replace the Win2PDF user guide or the detailed articles on pdfblog.com, but they can act as a fast, conversational shortcut. When you describe your task clearly, an AI assistant can point you to the right feature, summarize the steps, and even generate command line examples tailored to your workflow.
Here’s a final example that brings all 5 guidelines together in a single prompt:
“I’m using Win2PDF on Windows 11 and want to automatically rename the PDFs I create. My source files are Word (.docx) documents that I print to Win2PDF, and I want the output PDFs to be renamed using a pattern that includes today’s date and the original filename.
Please use the Win2PDF documentation—especially the Auto‑Rename section at https://www.win2pdf.com/doc/auto-rename.html—to show me which settings I need to change.
I’d like simple steps I can follow, plus an example of a rename format that adds today’s date before the filename. If there are multiple ways to do this, please explain the easiest one.”
This prompt demonstrates all five guidelines:
- Task: automatically rename PDFs
- Formats: .docx document → PDF
- Documentation reference: specific Auto‑Rename page
- Constraints: Windows 11, date‑based naming pattern
- Examples: asks for a sample rename format
If you regularly work with PDFs, combining Win2PDF’s capabilities with well‑crafted AI prompts can save time and help you discover features you might not have known existed.


 First, all of the Win2PDF products make use of the standard