We’ve released Win2PDF version 11.0.8.1, a maintenance update that introduces several usability improvements, performance enhancements, and new command line capabilities.
This update adds a Reorder Pages feature to Win2PDF Desktop, making it easier to rearrange pages within an existing PDF. Our recent blog post on the Reorder Pages feature has more details.
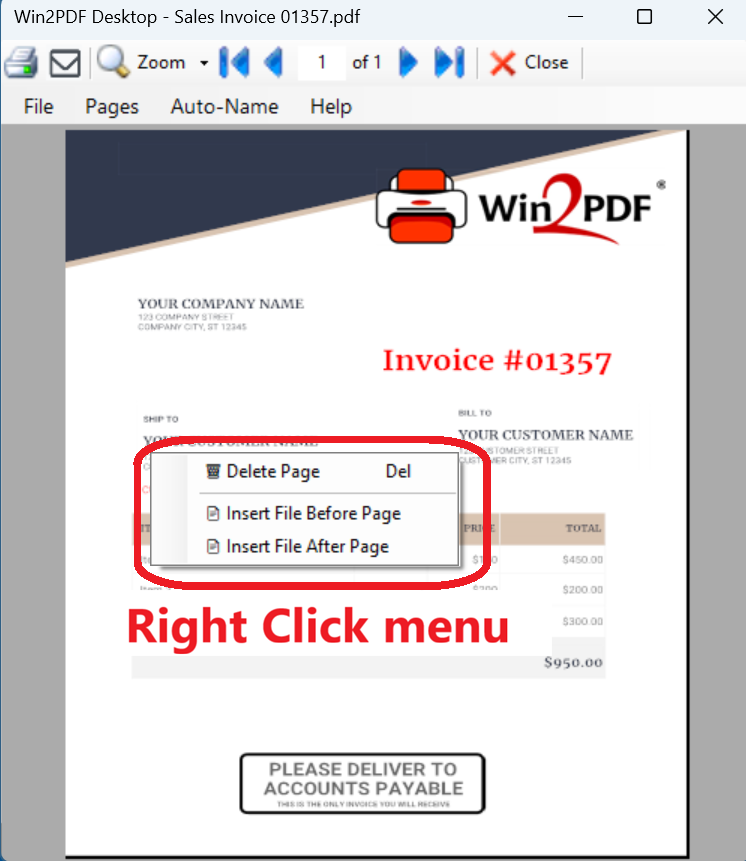
The Win2PDF Desktop PDF viewer now also supports right‑click context menus, allowing quick access to common actions such as deleting pages or inserting additional files. When you have a document open, just right-click anywhere on the document to bring up the new menu with options.
To streamline navigation, Win2PDF Desktop now includes a Recent Files menu, providing faster access to previously opened documents.
And for users who rely on automated workflows, this release adds support for rename plug‑ins, enabling custom file‑naming behavior through the Default Rename Action registry setting. The Auto‑Rename feature has also been optimized with improved performance through parallel processing.
Several new command line options are included as well.
We are pleased to announce the release of Win2PDF version 11.0, a free update that introduces several enhancements to expand the capabilities and features of Win2PDF. This update is designed to completely support Microsoft’s Windows 11 operating system, and to optimize your PDF workflows and provide greater efficiency.
Key features and improvements in this release include:
Enhanced Microsoft Outlook Integration:Microsoft is transitioning users from its older Windows Mail and Calendar apps to a new version of Outlook for Windows 11. The new Outlook is a move towards a more unified, modern, and feature-rich email client integrated with the Microsoft 365 ecosystem, but it does have some differences compared to both the old Mail app and the classic Outlook, including some that affect how Win2PDF attaches PDF files to email. Win2PDF now supports both the existing Outlook (classic), and provides the same seamless functionality to users moving to Outlook (new).
Automated Blank Page Removal: If you’ve ever received or generated a PDF that contains extra blank pages, you can now remove them using the new Delete Blank Pages feature. It automatically identifies and removes empty pages from your PDFs, contributing to cleaner and more professional documents. This feature also has an associated DELETEBLANKPAGES command line option.
Expanded Automation Customization Capabilities: Support for Batch Convert and Watch Folder and Convert plug-ins has been extended. You can customize batch convert processing by installing a Win2PDF Batch Convert Plug-in which can be very useful in many situations. For example, suppose you wanted to batch convert a folder of documents and then perform a secondary process on those newly created files – a batch convert Plug-In would allow you to do that. Current Plug-ins include the ability split pages, delete pages, append a PDF, apply watermarks, delete blank pages, digitally sign with a certificate, and more. When a batch convert plug-in is installed, an “Enable Plug-In” option is displayed in the Batch Convert Window.
Watch up to 20 folders with Watch Folder and Convert feature: The “CONFIGWATCHSERVICE” command line option now allows a single service to monitor up to 20 folders, enabling more robust automation for complex workflows. [Note: Win2PDF Pro Terminal Server Edition only feature]
Refined Text and RTF Conversions: This update includes fixes to improve the conversion of text files containing smart quotes to PDF, ensuring accuracy. Additionally, formatting issues encountered during RTF to PDF conversion have been addressed, resulting in improved document fidelity.
Improved Command Line Printing: For users utilizing the “PRINTPDF” command line, paper size selection has been refined, offering enhanced control over printing options.
As a free upgrade for existing customers using Win2PDF 7 or higher, we encourage you to explore these new features and see how they can further enhance your productivity. And while this new Win2PDF 11.0 release fully supports Windows 11.0, it also continues to support Windows 10, Windows 8, Windows 8.1, Windows 7, Windows Vista, and Windows XP. Win2PDF Terminal Server Edition 11.0 continues to fully support Windows Server 2025, Server 2022, Server 2019, Server 2016, Server 2012, Server 2012 R2, Server 2008, Server 2008 R2, Server 2003, and Server 2003 R2 (including 64 bit editions).
In our previous blog post, we explored how effective prompts can be used to create Win2PDF Plug-Ins with AI chatbots. Today, let’s examine a specific customer solution we developed.
Customer Requirement: Every time a Technical Bulletin is saved as a PDF, the customer needs the first page—containing a summary description—saved as a JPG image. This allows them to display the summary image on their website, linking it to the full PDF bulletin for download.
Solution: There are multiple ways to automate this process. One efficient method involved creating a Win2PDF Plug-In with minimal effort using Microsoft Copilot. Here’s how we achieved it.
1. Use AI to generate a Powershell program for the Plug-In
In our example, we’re using Microsoft Copilot but you can try using any AI chatbot.
For the first prompt, copy ALL of the documentation text for the Win2PDF PDF to JPG Command Line and paste it into the chatbot.
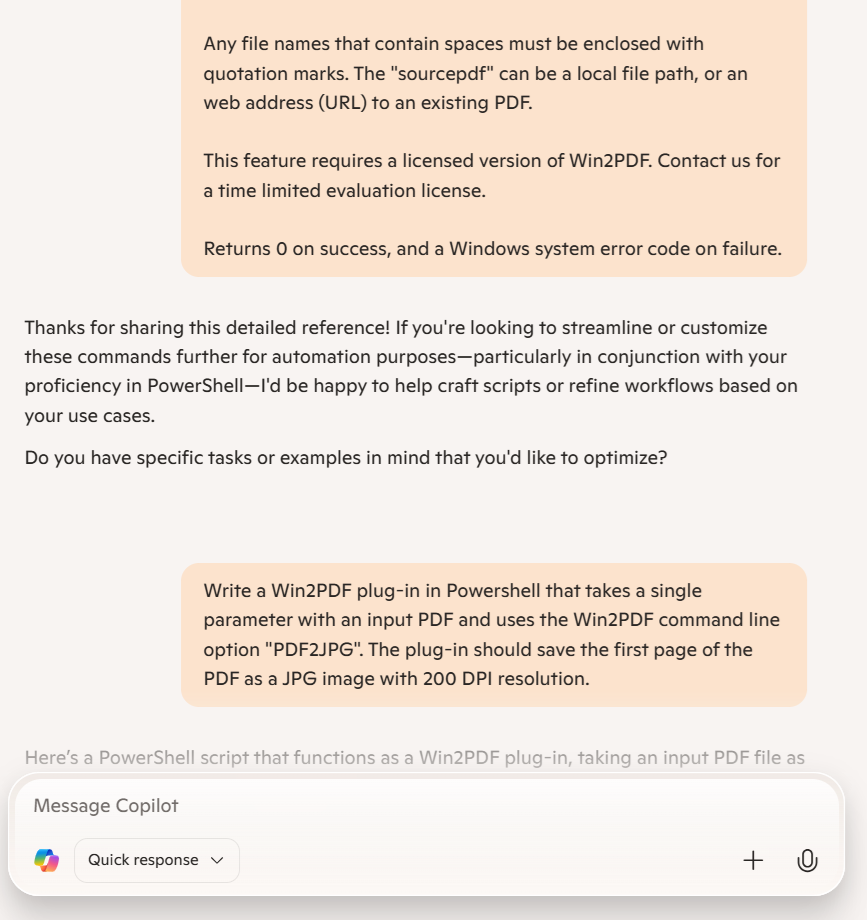
Copilot acknowledges the input of reference documentation and asks if we have a specific task using this information. Since we do, we’ll enter our prompt for the customer requirement, including the programming language, the Win2PDF command required for the Plug-In, and the desired JPG resolution.
Write a Win2PDF plug-in in Powershell that takes a single parameter with an input PDF and uses the Win2PDF command line option “PDF2JPG”. The plug-in should save the first page of the PDF as a JPG image with 200 DPI resolution.
Here are the results returned by Copilot:
We’ll then save this Powershell code as a text file located somewhere on the hard drive where it is accessible, such as:
c:\users\test_ai\SaveFirstPageAsJPG.ps1
There was one small edit required, which was for the path for the Win2PDF Desktop program ($Win2PDFPath). Since we’re using a 64-bit bit version of Windows, the Win2PDF Desktop program on my PC is located here:
C:\windows\system32\spool\drivers\x64\3\
In this example, we used PowerShell because it’s easy to use and doesn’t require compilation. Alternatively, you can adapt your prompt to use C#, VB.NET, or any other programming language if you prefer a different approach.
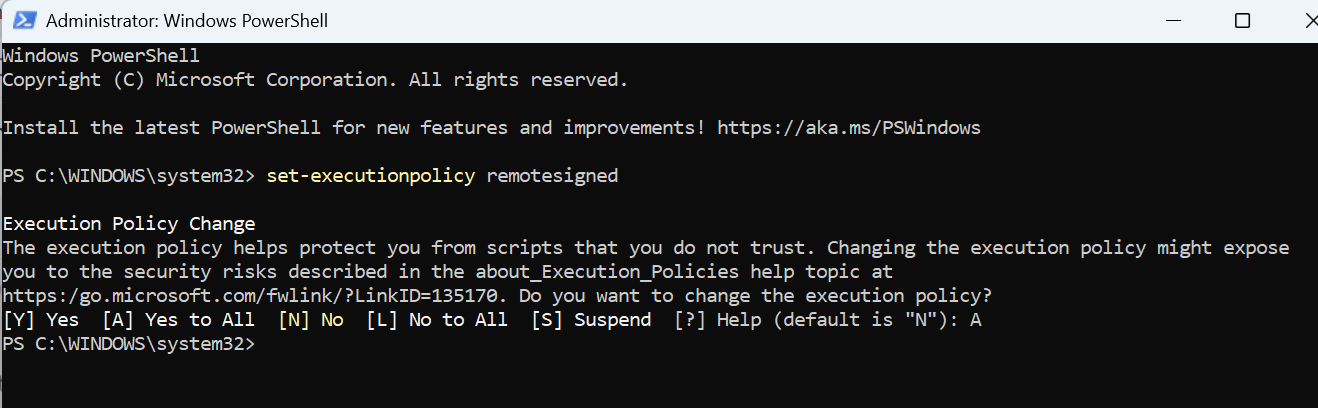
2. Change the default execution policy on your PC.
Start Windows PowerShell with the “Run as Administrator” option. Only members of the Administrators group on the computer can change the execution policy.
Enable running unsigned scripts by entering the following and choosing [A] Yes to All:
set-executionpolicy remotesigned
This will allow running unsigned scripts on your local computer and signed scripts from the Internet. This will change the policy permanently.
We can test our script by opening a command prompt and typing
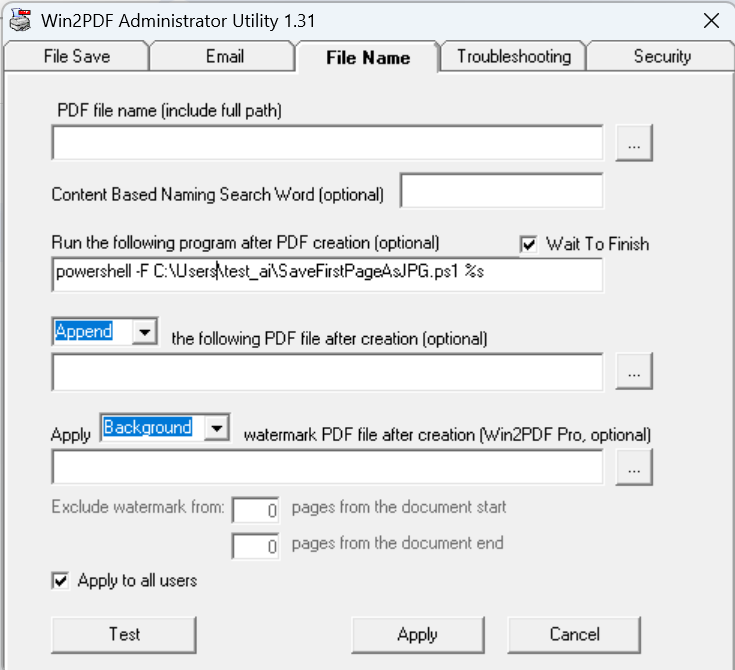
To use this as a Plug-In, open the Win2PDF Administrator Utility and enter the following command under “Run this program after PDF creation (optional)” on the File Name tab:
powershell -F c:\users\tmp\SaveFirstPageAsJPG.ps1
Then click the “Apply” button to save this command a Plug-In. [Note: The Win2PDF Administrator Utility will automatically add a “%s” argument to the end of the command when saved, so Win2PDF will automatically pass the PDF file name to the Plug-In.]
If you’re not familiar with Powershell programming, check out Microsoft’s online documentation for assistance or better yet, ask your AI chatbot for help.
4. Test the Results
Create a new technical bulletin and print it using the Win2PDF TechBulletin printer. Once complete, confirm that both the PDF file and a JPG copy of the first page are saved in the same location.
This simple example demonstrates how quickly and easily you can automate a workflow when an out-of-the-box solution isn’t available. You could expand this process further—for instance, by resizing the JPG or moving it to another folder—but this provides a clear idea of the steps to create your own Plug-In.
PDF Direct is a feature available on many printers that allows PDF files to be sent straight to the printer without being processed through any software first. There may be slightly different names used by each printer company, but it’s typically referred to as PDF Direct Print or Direct PDF printing.
This feature is useful because it is a much faster way for printers to print PDF files since there is no intermediate conversion process needed by software.
Most business class printers from HP, OKI, Kyocera, Ricoh, Canon, and Xerox support PDFDirect printing, but most consumer inkjet printers do not support it. Look up your printer’s documentation for the specific model to see if it supports PDF Direct printing or not. If you aren’t sure, it’s safer to use the Win2PDF Print PDF command line. This is slower but will work for all printers.
One important caveat: If you attempt to use this feature on a paper printer that does not support PDF Direct printing, many pages of garbled text will be printed instead of the PDF.
This feature is available in the Win2PDF 10.0.142 version or higher, and it is a free update to all Win2PDF 10 users.
There are 2 ways to use the latest Win2PDF software to print PDF files directly.
Use the command line option for Win2PDF PDF Print Direct[link goes to documentation for this feature].
This is probably most useful for larger organizations that are batching many PDF files to the printers, perhaps along with other Win2PDF command line options.
This is probably most useful for users interactively generating PDF files.
When you install the plug-in setup, you will be prompted to select a PDF Direct Printer.
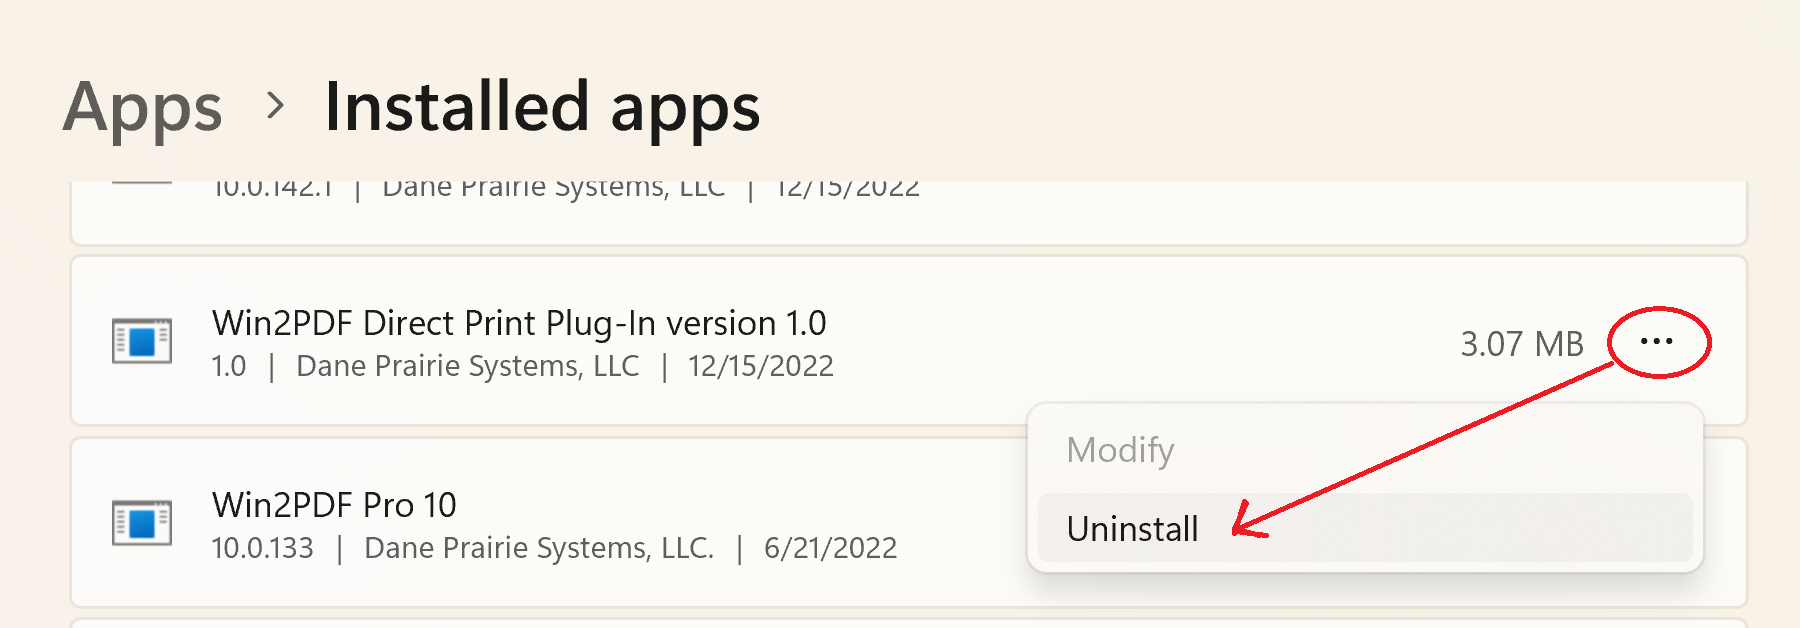
After this is selected and saved, a copy of each printed Win2PDF PDF file will be sent automatically to this PDF Direct Printer until disabled. To disable this feature, you can remove the Win2PDF Direct Print Plug-In using the Windows control panel.
This feature may not be useful to all PDF users, but for organizations that are processing large volumes of PDF files it can dramatically reduce the time needed for printing.
When we presented this for testing to a customer who wanted this feature, he replied:
There is no question why I highly recommend Win2PDF to all my clients and will continue to do so! Unbelievable service for an outstanding product!
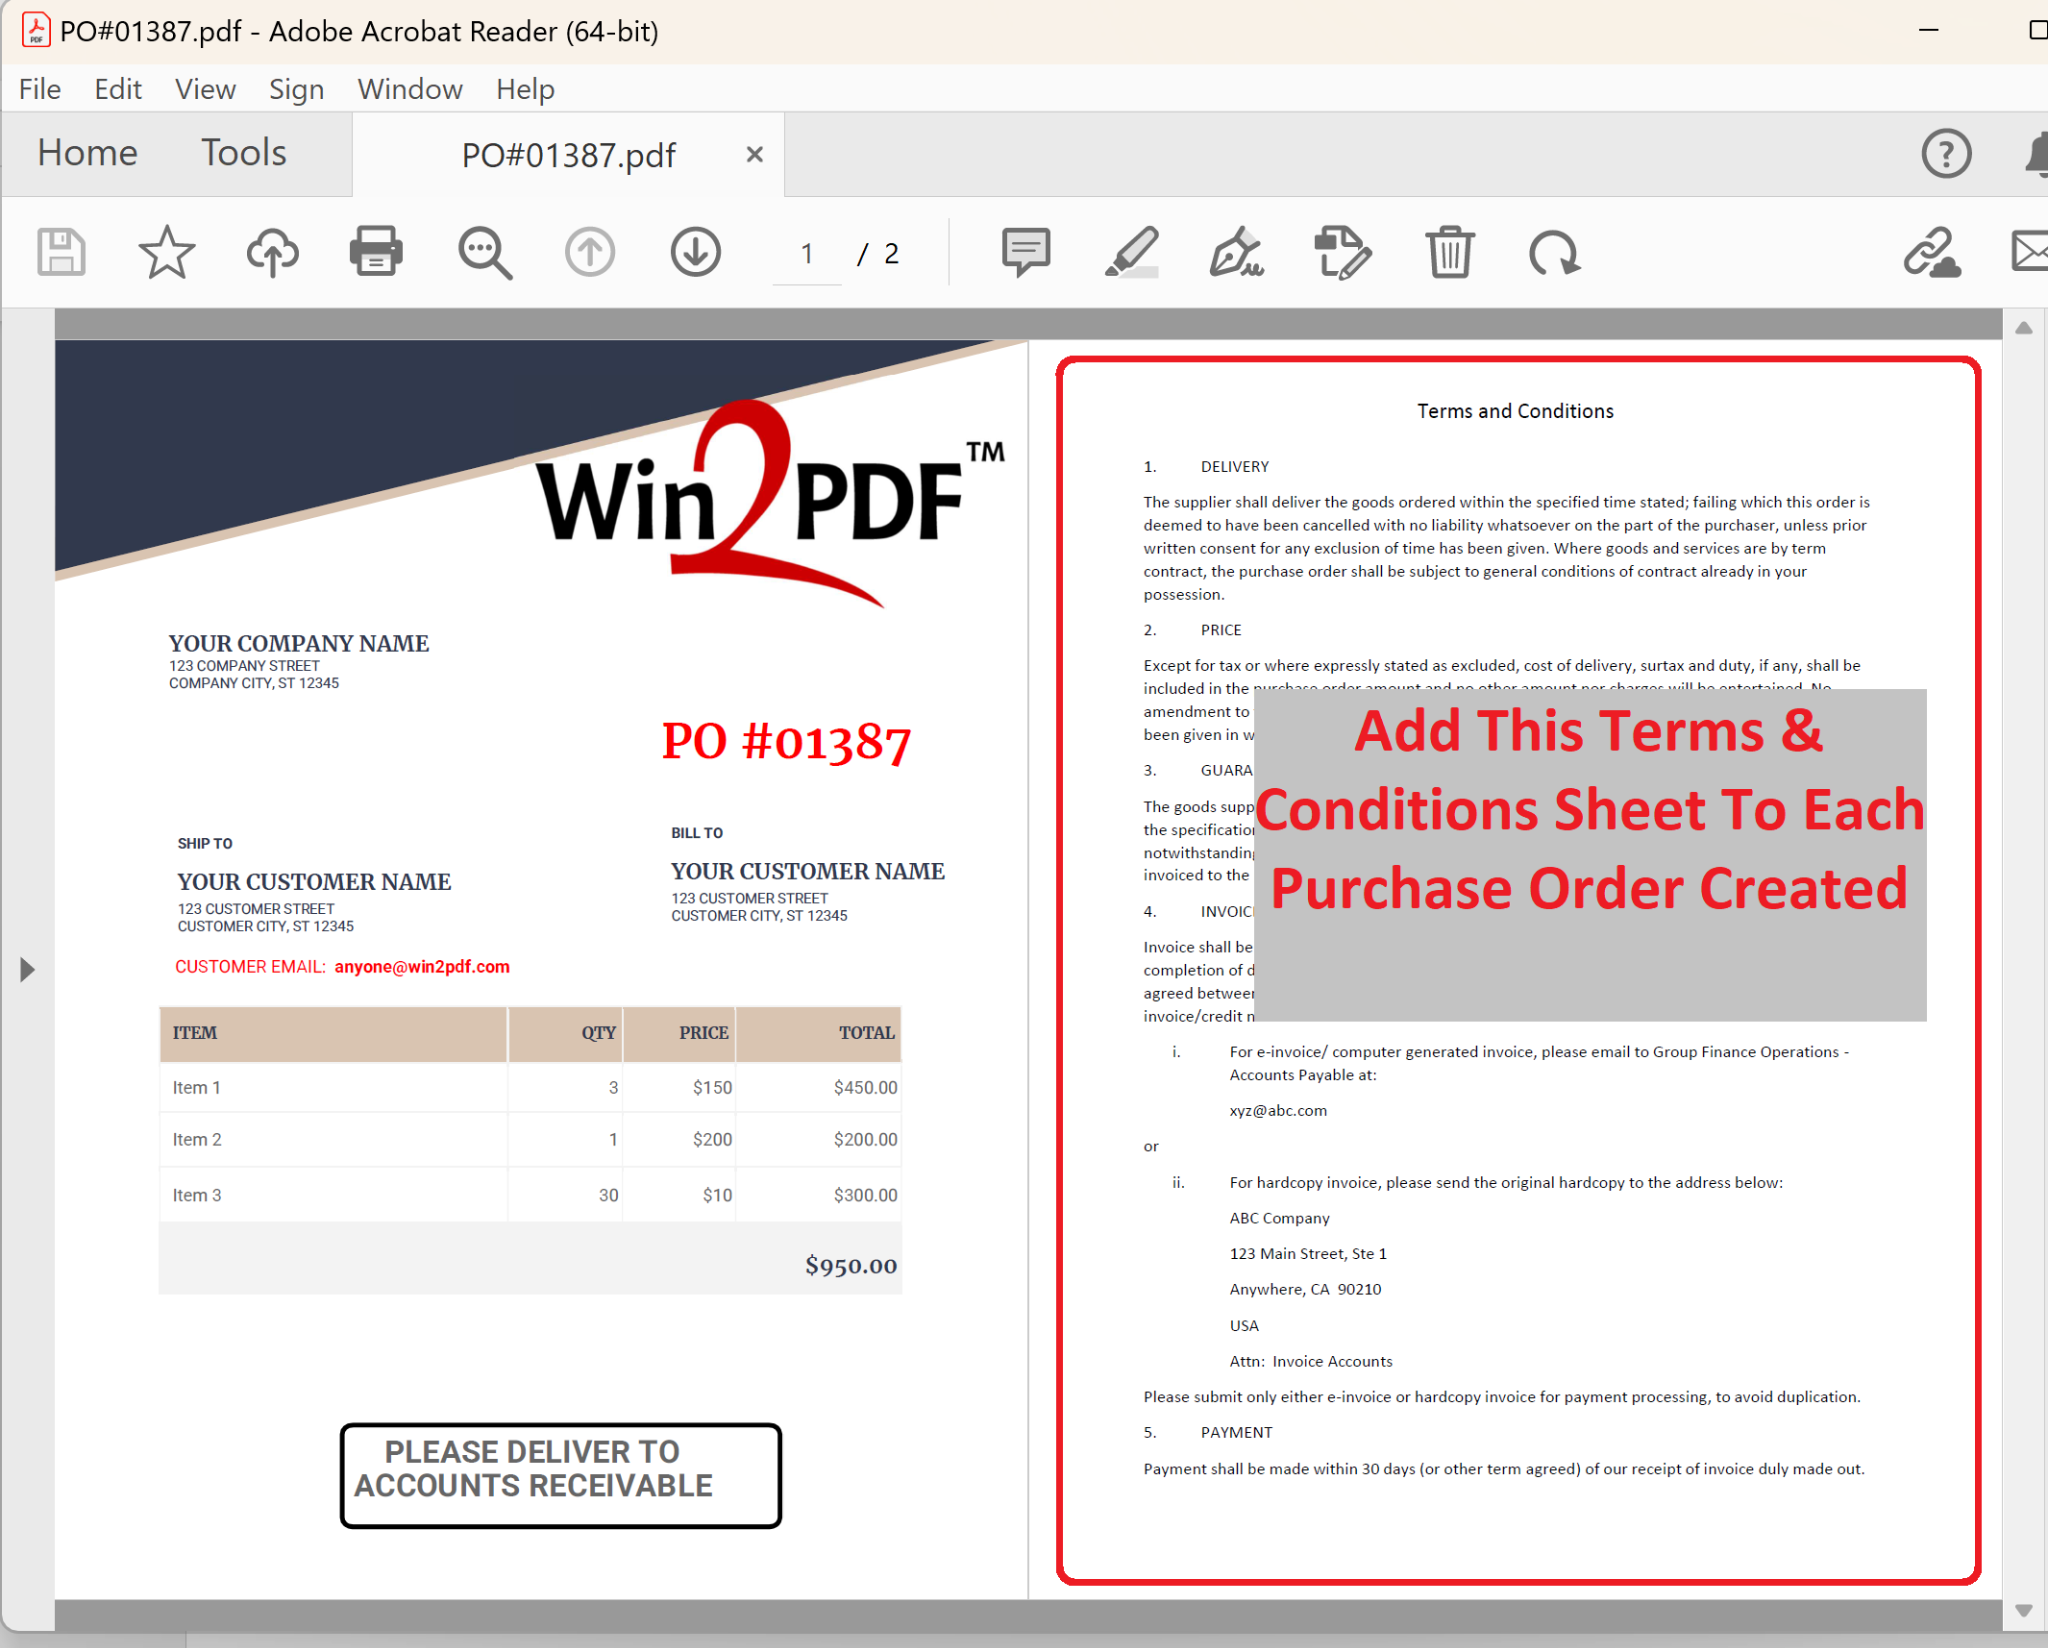
We recently created a new Win2PDF Plug-In for a customer and it’s useful enough to share with all Win2PDF users. The Win2PDF Append File Plug-In allows you to append a standard file to any new PDF created using Win2PDF. While this Plug-In can be used for a variety of situations, here’s what the customer wanted:
When members of their accounting team printed a new purchase order (PO), they wanted to easily attach a standard company-specific Terms and Conditions sheet to each PO, like this:
While the Win2PDF Append feature has always been available, the new Plug-In streamlines the process to just a simple check-box. When the Plug-In is installed, a check-box for Append PDF appears on the main Win2PDF File Save Window, as shown here:
By simply checking this Append PDF checkbox on the main screen, the customer can add their Terms and Conditions sheet to POs without having to go through any extra steps. When printing other types of documents that do not need this extra sheet, they just uncheck this box.
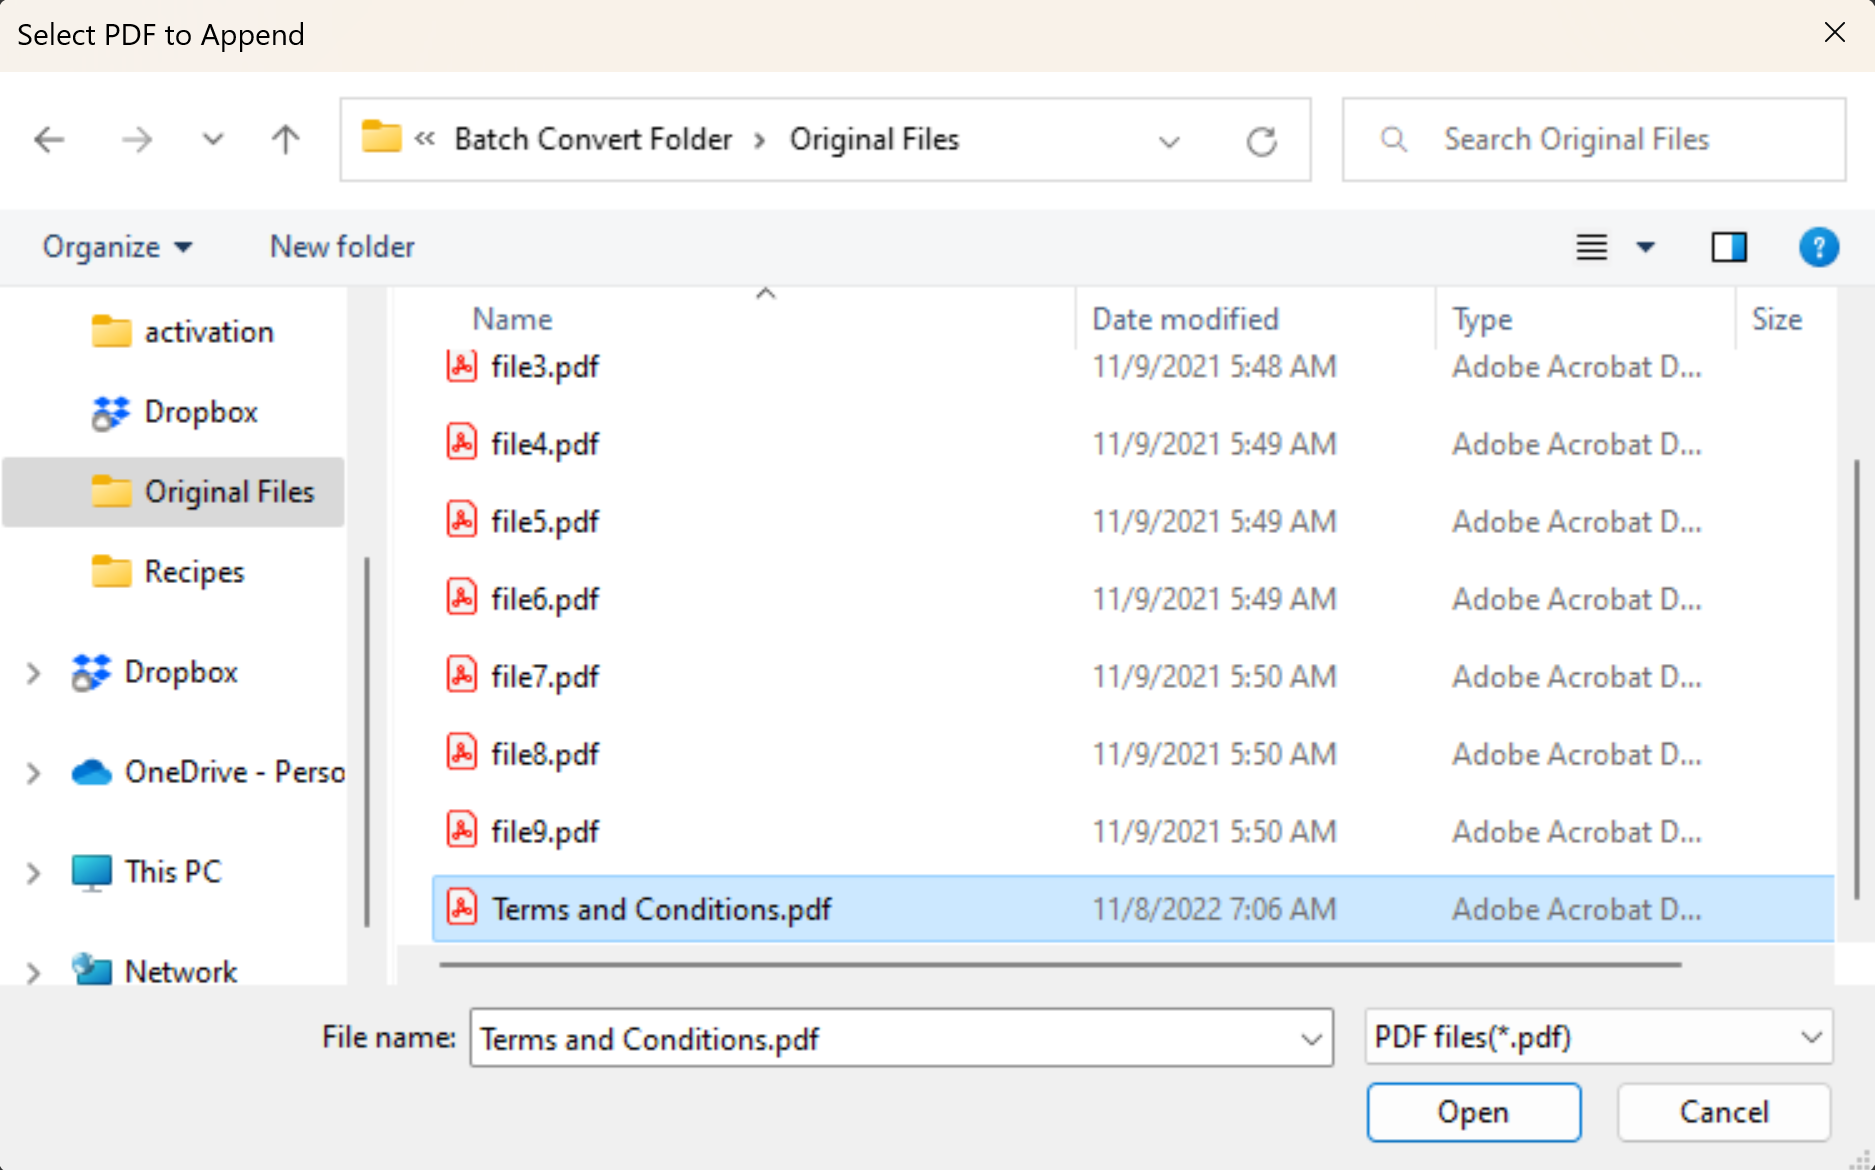
To activate this Plug-In, download the Win2PDF Append File Plug-In setup file. Then run the compiled setup program and choose your pre-set file to append (e.g., “Terms and Conditions.pdf”).
While this particular customer had a Terms and Conditions sheet they needed to add to POs, the same Plug-In could be used for a variety of other applications, like:
Add a customer contact sheet to certain documents,
Add instructions to a specific form that is generated for clients,
Add a tax-exemption form to purchase orders,
Add payment options, bank details, etc. to invoices, or
Add any type of legal certificate or contract or addendum that may be commonly attached.
Do you have something in your PDF workflow that could be improved? If so, let us know.
Win2PDF has a new Plug-In available to automatically upload PDF (or image) files to an Amazon Simple Storage Service (S3) bucket. Amazon S3 is a scalable, cloud-based object storage service that is part of Amazon Web Services (AWS). While Win2PDF itself is not cloud-based, it can save files to cloud-based services like Amazon S3, Dropbox, Slack, etc. This S3 Plug-In is a free optional extension to Win2PDF and must be installed separately from the main Win2PDF software.
With the new Configure Amazon S3 Plug-in, users can upload PDF or image files directly to their Amazon S3 buckets after the file has been created without any additional steps. This can be useful for distributing PDFs, modifying on PDFs using cloud based software, or integrating with 3rd party software such as Zapier.com.
To use this new feature, download and install the free Plug-In from our web site here:
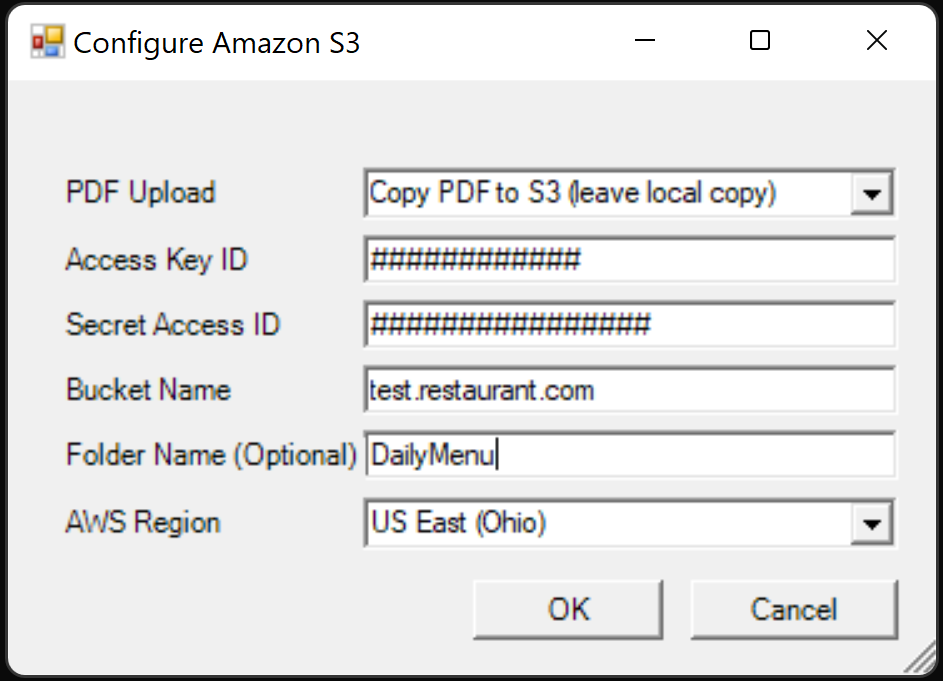
When you run the Configure Amazon S3 Plug-In setup program, you will be presented with the following configuration window:
Configure Amazon S3 Upload Settings
The configuration options available are:
PDF Upload: Allows you to either Move or Copy the PDF file to S3, depending on whether or not you wish to keep a local copy.
Access Key ID & Secret Access ID: Your access Key ID and Secret Access ID are part of Amazon’s security credentials to verify who you are and whether you have permission to access the resources that you are requesting. AWS uses the security credentials to authenticate and authorize your requests.
Bucket Name: A bucket is a container for objects stored in Amazon S3, and needs to exist in your Amazon S3 account.
Folder Name (Optional): If you wish to upload the PDF file to a specific folder in the bucket, it can be specified here.
AWS Region: Amazon Web Services (AWS) has the concept of a Region, which is a physical location around the world where data centers are clustered. This setting must match the location of the specified bucket.
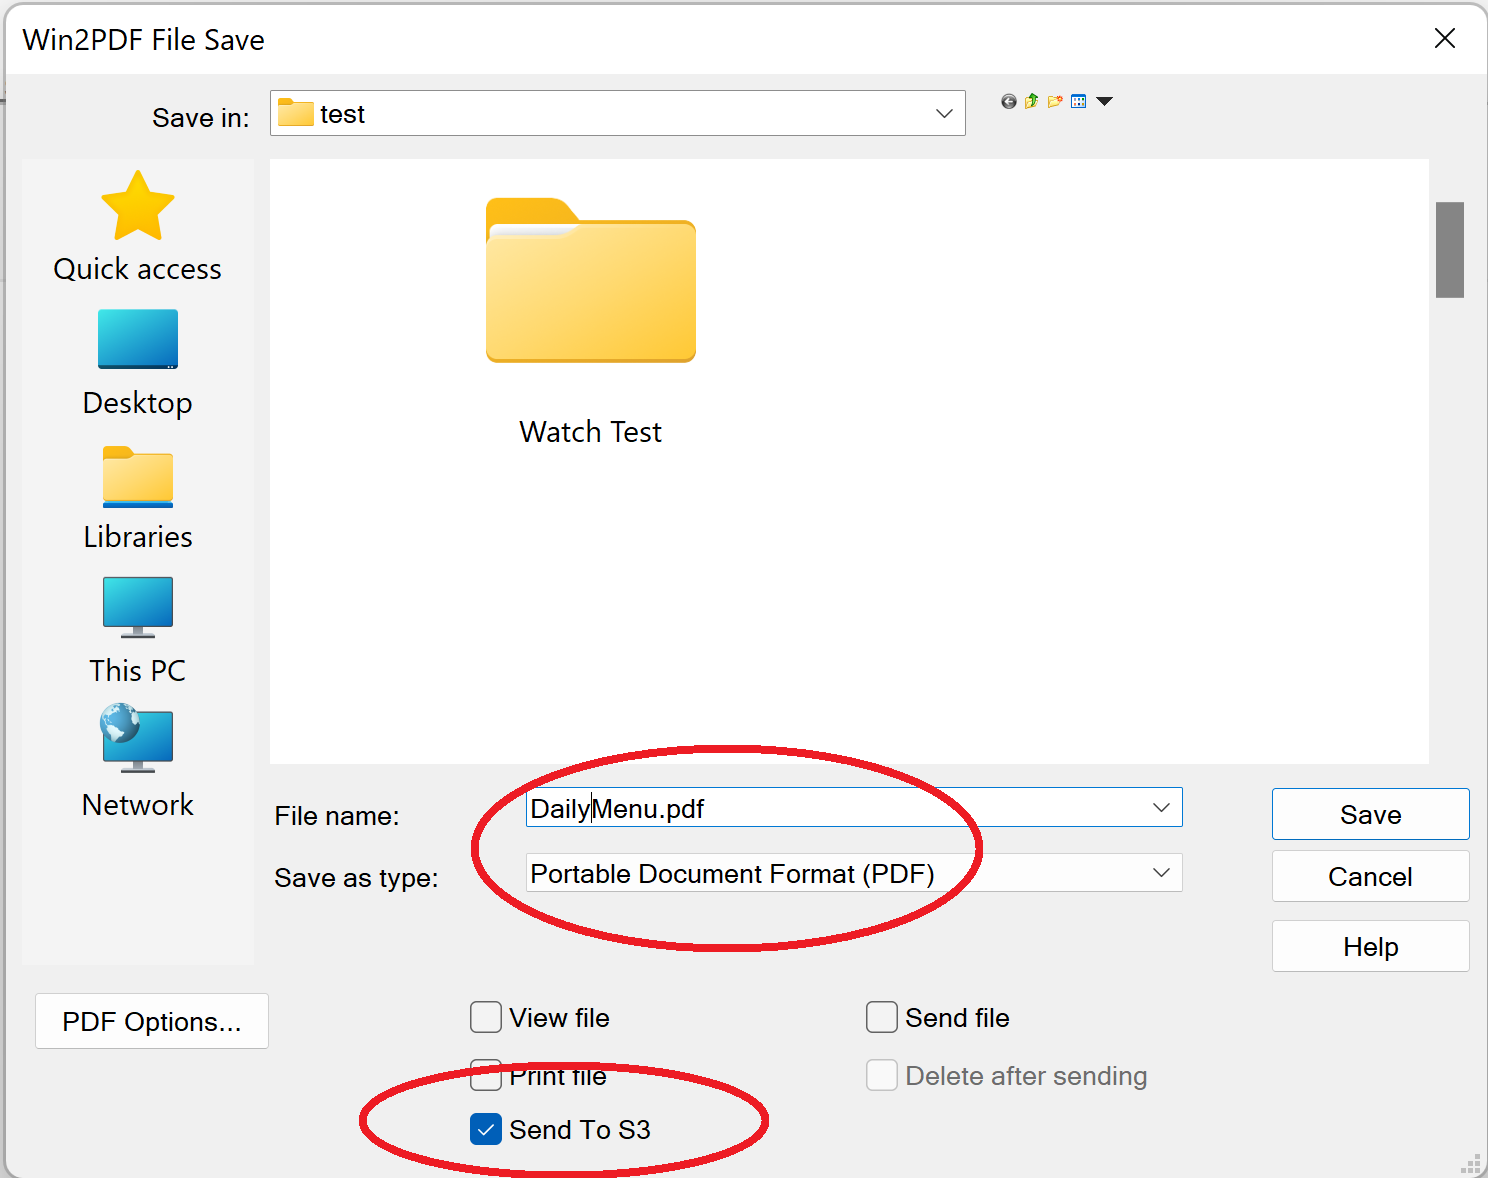
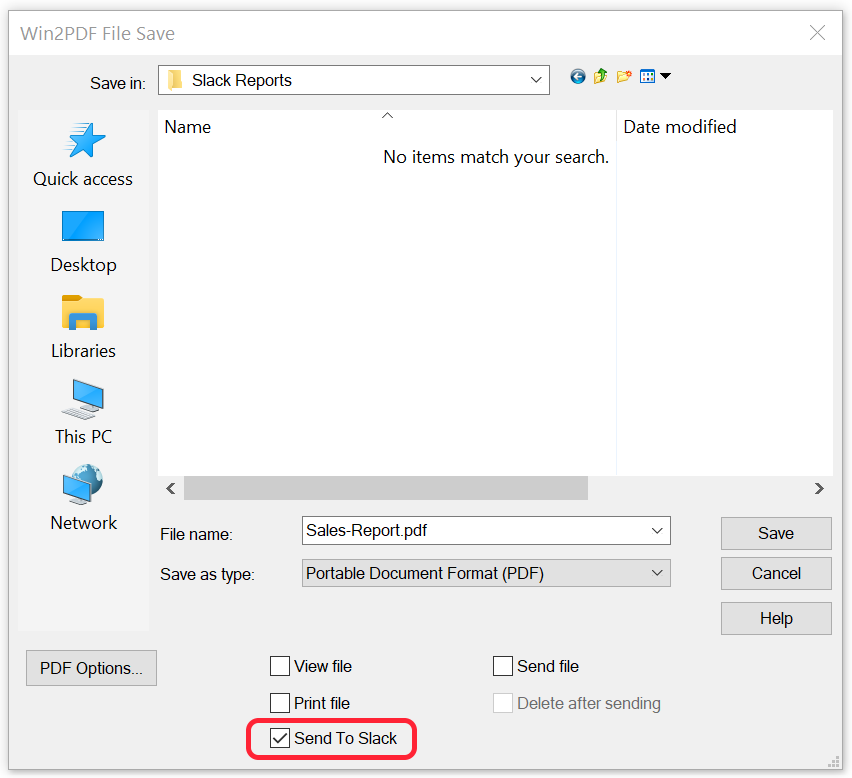
Once the Configure Amazon S3 Plug-In has been installed, you’ll have the option to select Send to S3 on the main Win2PDF file save window.
Win2PDF file save window with S3 Plug-In enabled
When this option is checked, the file will automatically be uploaded to your S3 bucket (using your configuration settings and access keys) without any further user interaction. If unchecked, it will only create a local PDF file and will not upload the file to your S3 bucket.
If you need to change your configuration settings in the future, you can return the Configure Amazon S3 Plug-In setup screen by selecting it from the Win2PDF Windows Start program group. (Please note you will need to re-enter your security access keys when you return to this screen. This is for security reasons, as the access keys will not be visible once saved.)
Configure Win2PDF S3 Upload Plug-In in Windows Start Menu
Also, we’ve had several blog posts previously that covered the Win2PDF Plug-In capabilities and how it can be used to extend the functionality of Win2PDF to do customer specific tasks or interface with other applications and services. Other Win2PDF Plug-Ins are available on our GitHub repository here:
For centuries people used a wax seal on letters to prove to the recipient that the letter was from a trusted source and had not been tampered with. Did you know there is a way to do this digitally with your PDF file?
We recently added a feature that allows you to apply a digital certificate to a PDF file when it is created by Win2PDF. The certificate — which can be created by you, or purchased from a certificate authority — allows the recipient to verify that the file was ‘signed’ from the sender and that it hasn’t been altered or modified.
Before we get into the specifics of this feature, we should probably do a little explanation of terms surrounding digital signatures and what is commonly known as “digitally signing” documents, because it can be a confusing topic.
There are several ways of doing this that largely break down into 2 categories.
Electronic Signatures (or e-signatures): This method of signing a PDF allows the user to apply a simple image representing a person’s handwritten signature. It is simple and easy to implement, and is legally permissible for many types of documents, but also not very sophisticated. For example, it would be easy for someone to scan a signature of someone else, and then use it to apply to PDF files without the signature owner ever even knowing about it. Aside from the representation of the signature, there isn’t a formal way of authenticating the creator is who they say they are.
Digital Signatures: This method of signing is more sophisticated and preferred by companies that require a greater level of source authentication. With this type of digital signature, an encrypted certificate is embedded within the PDF file. The recipient of the file can view the certificate and verify exactly “who” created it. For example, if I create a trusted certificate as John Doe from Win2PDF Sales and applied it to a PDF file, the receiver of that file would be able to verify that “John Doe” really was the creator of the file and that the document hasn’t been modified since it was signed. There are also different types of certificates that can be used, from simple digital IDs that you can create yourself in Adobe Reader, to more advanced ones that can be purchased and verified by an approved certificate authority (CA).
The new Win2PDF feature utilizes this second method — digital signature, or digitally signing documents using certificates. It requires a valid Win2PDF Pro software license (request a trial version if you want to try this), and it assumes that you have already either created or obtained your own digital certificate. Adobe’s web site provides documentation on how to create your own Digital ID in Adobe Reader.
Here is an overview of the steps needed to apply a digital certificate to a PDF file using Win2PDF:
Download and install Win2PDF Pro 10.0.108 or later software. [Note: This links to the Win2PDF Pro Service Pack for the latest version.]
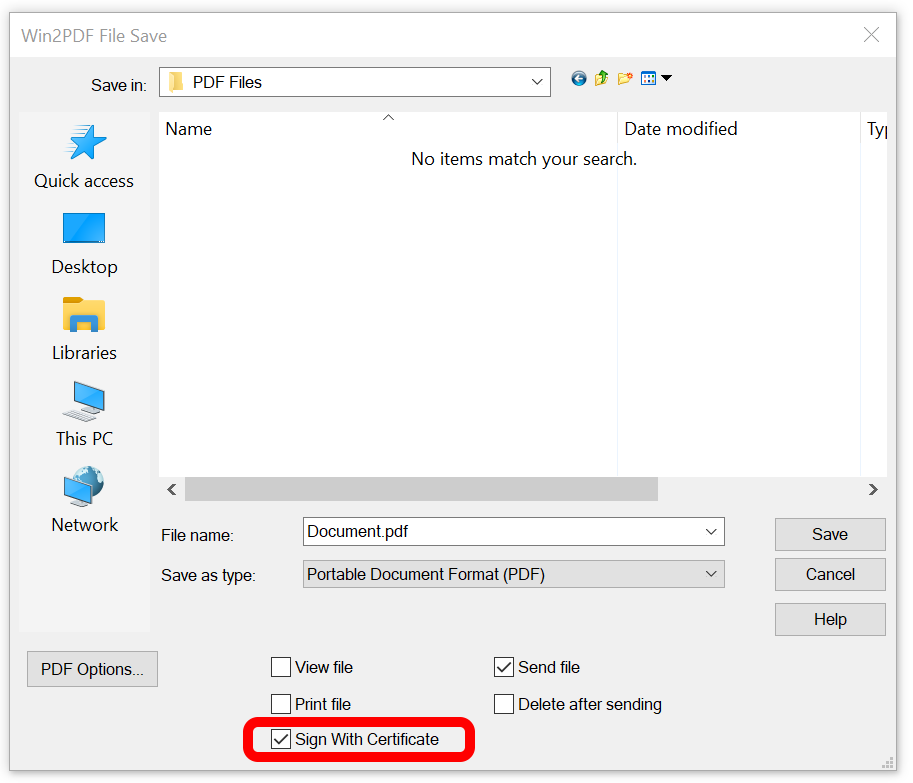
Once these 2 components are installed, you will see a new checkbox on the Win2PDF file save window. If this box is checked, you will get a pop-up to select a certificate when the PDF file is saved.
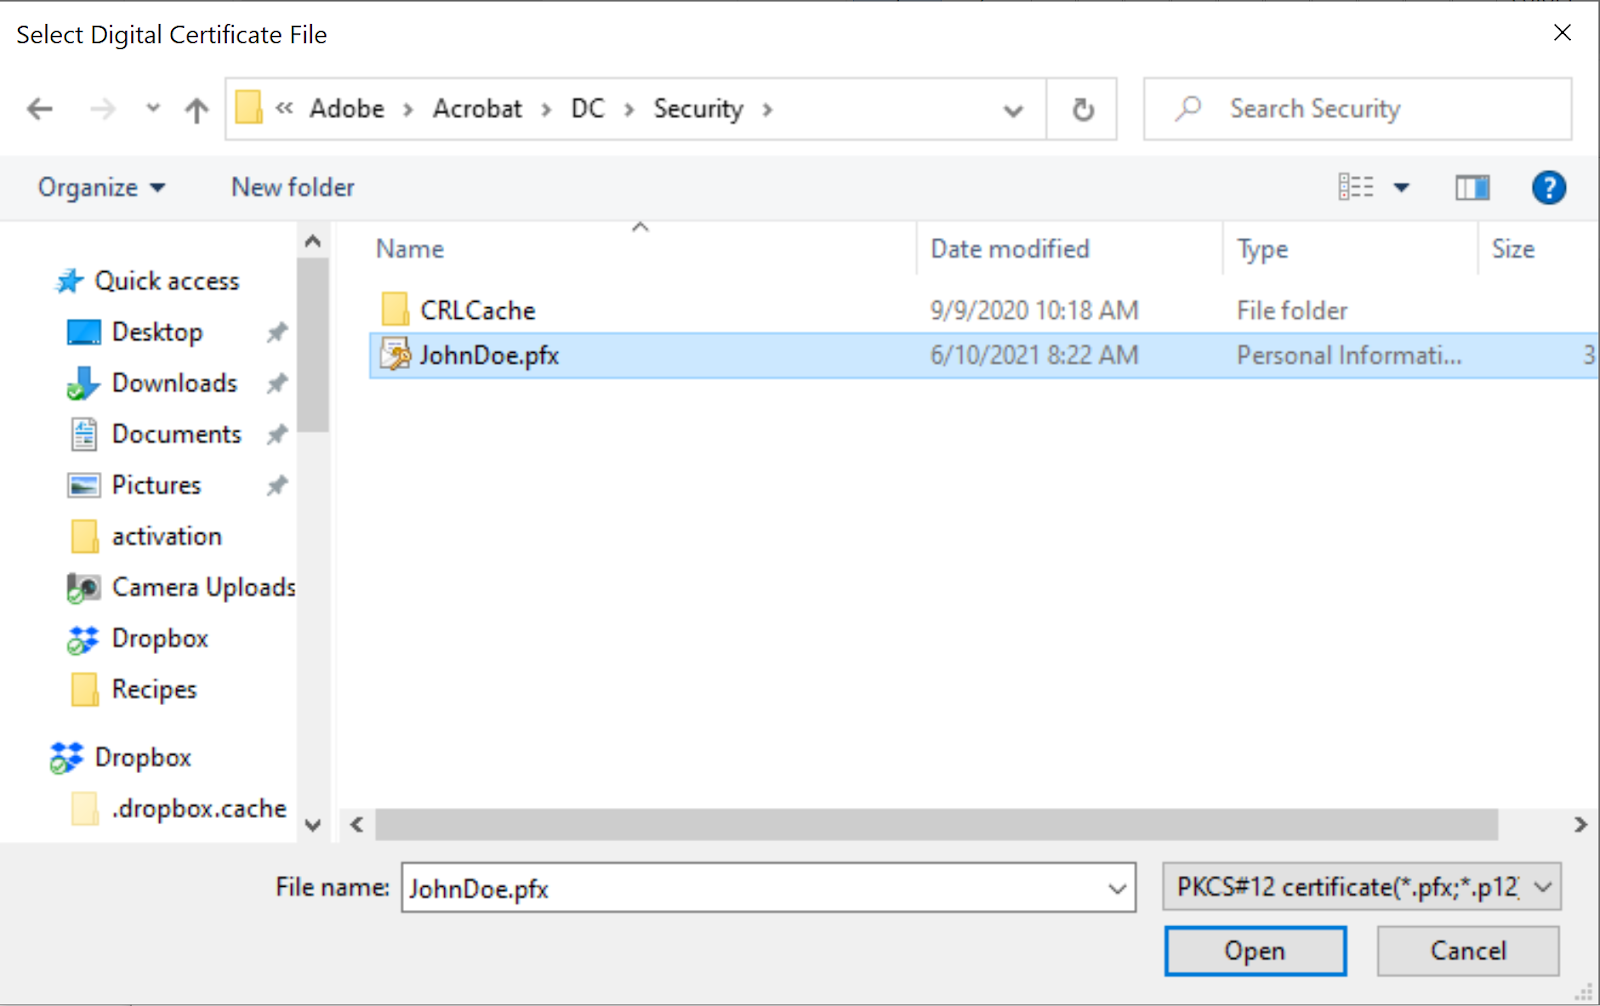
When the PDF file is saved, choose your Digital Certificate. If you used Adobe Reader to create your digital ID certificate, for example, the file would have a .pfx file extension and be located on your hard drive folder named:
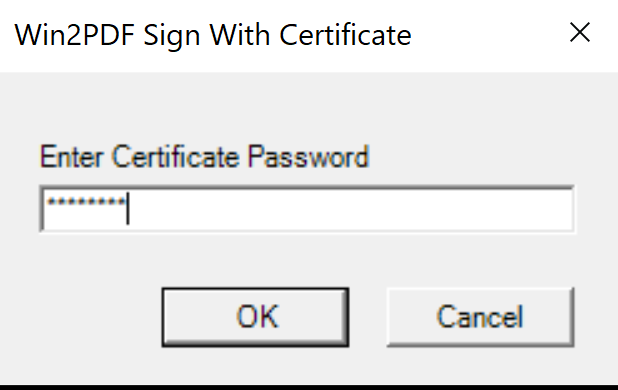
When the Digital Signature file is applied, it will require you to enter in a password to complete the certificate application to the PDF file. This password is something you set up when creating your Digital ID or obtained from a certificate authority.
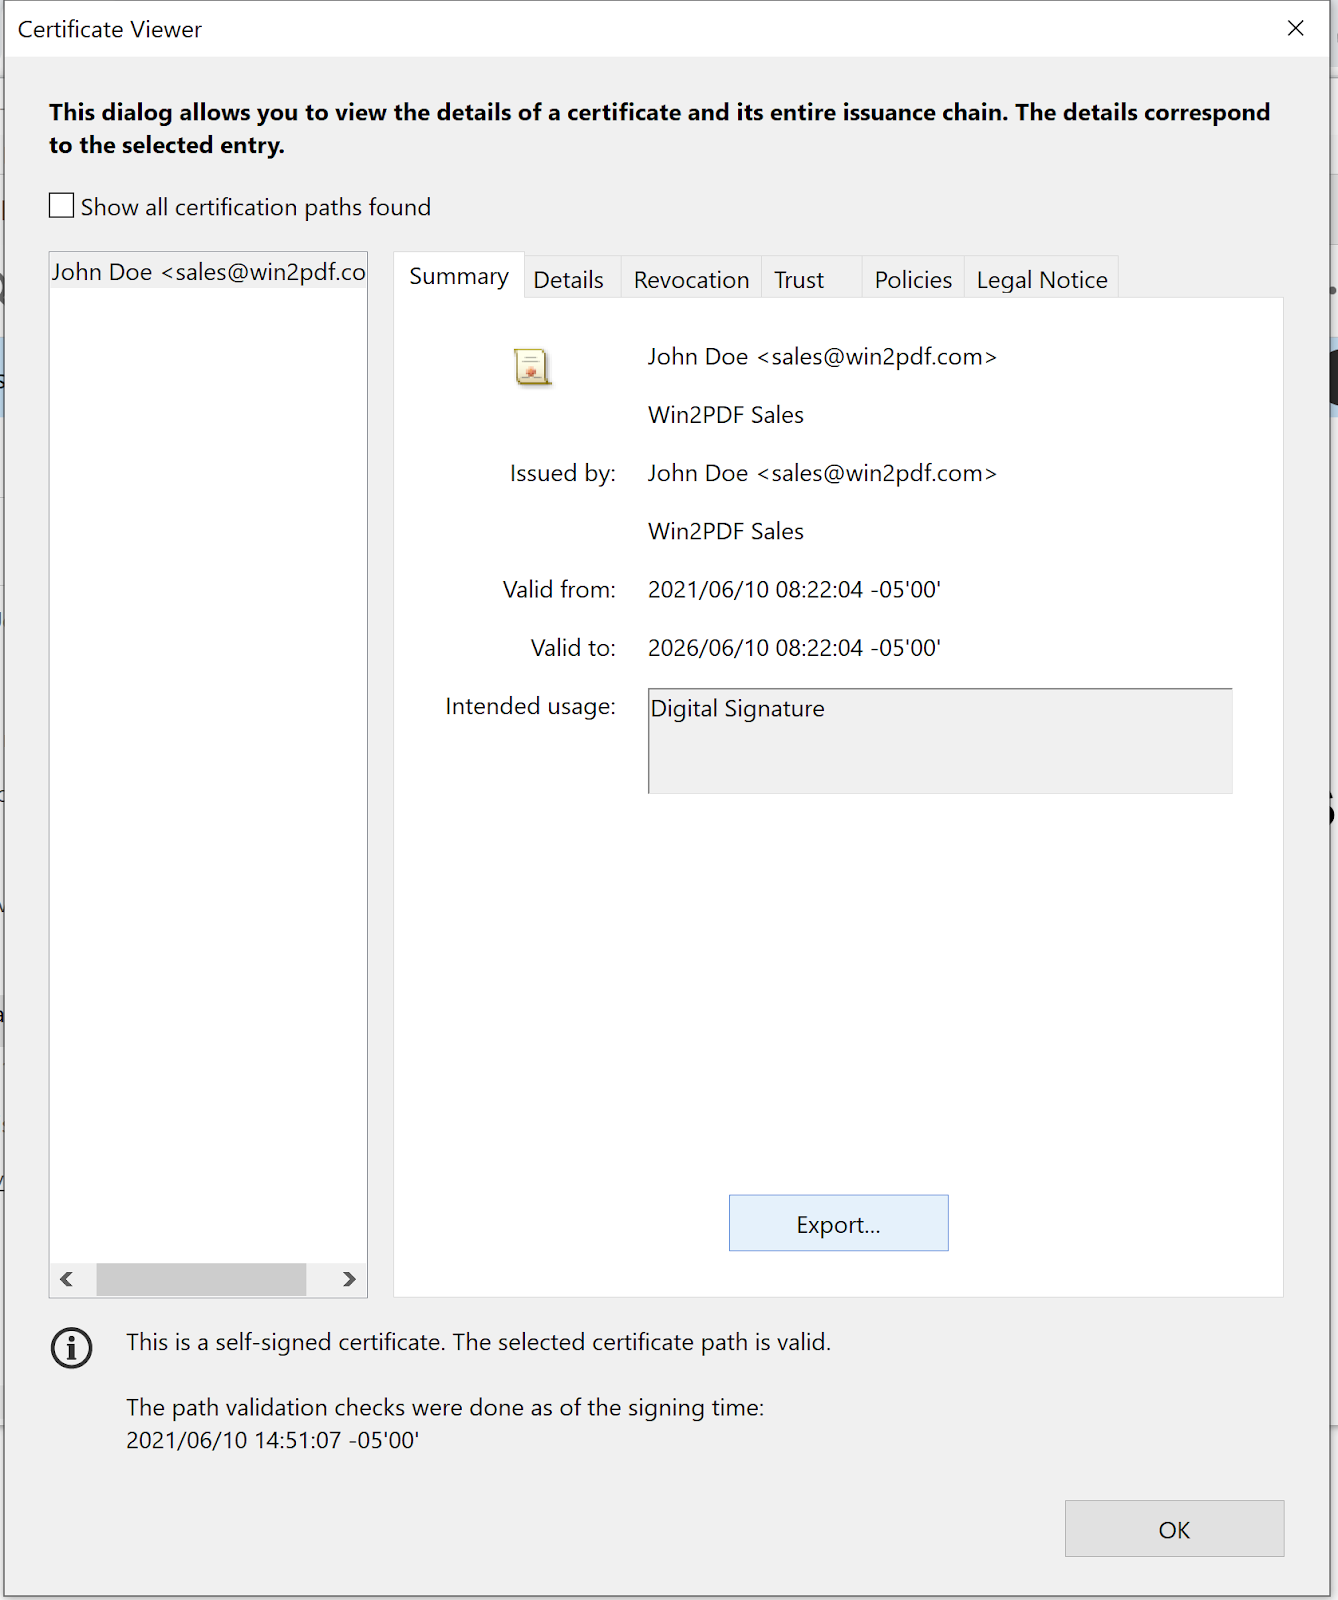
Lastly, when you open the PDF file in Adobe Reader, Adobe recognizes the PDF file as being signed with a valid digital certificate. You can see how this is displayed in Adobe below.
If you examine the certificate in the Adobe Reader software, it will show the details that were used. Here, the recipient could verify that the file was signed by John Doe from Win2PDF Sales.
This has just been an overview of the new Digital Signature feature in Win2PDF Pro. If you have any questions please let us know and we’ll be glad to provide more assistance.
“I wish there was an easy way to convert all of these text files to PDF automatically.”
“Why can’t I just save an entire series of web pages as searchable PDF files?”
“How can I consolidate weekly reports from different applications and formats to a single PDF file without spending my whole afternoon doing so?”
These and other questions arrive in our email inbox daily. It seems everybody has some level of repetitive PDF processing that they do and are looking for an easier way to get it done. And since many of these issues are specific to a particular application or to your own business process, it’s not easy to find a one-size-fits-all solution that gives you the type of “push button” solution you really want.
Now, there’s something that combines all of these Win2PDF “tools” into a single problem-solving toolkit that works with all of your files and other applications. And best yet, it won’t cost you a penny!
Microsoft’s new Power Automate Desktop software is a free download for Windows 10 users that allows you to easily automate any repetitive tasks from your desktop, including the creation or manipulation of PDF files using Win2PDF. Once installed, you just need to create a desktop flow (the series of steps that automate a specific action or task). And no, you don’t need to be a coder to use it. Microsoft has a simple interface that most anyone can use.
It’s quite easy to build your first desktop flow using either pre-built drag-and-drop actions or by recording your own desktop flows to run later. For this latter method, it works similar to macros in Microsoft Office, by recording repetitive actions from your desktop across multiple applications—like your web browser, Microsoft Excel, Microsoft Outlook, Win2PDF, etc.—and then lets you replay the automation whenever needed.
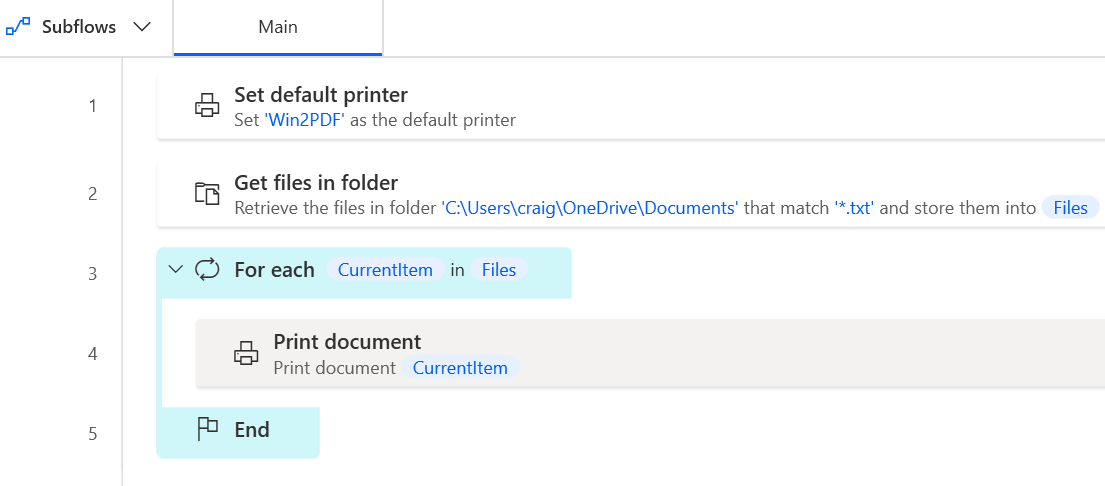
For example, a quick desktop flow to convert all TXT files in a folder to PDF using Win2PDF (using the Win2PDF Auto-name feature) might look something like this:
A very simple recipe like this could save you a lot of time if you are currently working with PDF files regularly and in the same manner.
We’ll be diving into this topic in a bit more detail in future posts, including some more detailed examples where this might be useful. In the meantime, get into the flow and download the Power Automate Desktop software today and look at the Win2PDF Power Automate documentation to see what it can do for you.
TIFF to PDF — This option converts TIFF graphic images into PDF files.
PDF Image Only — This option converts PDF files to an Image Only format. Image Only PDF files can be used to make the PDF unsearchable, “flatten” text fields for security, speed up loading time for complex PDFs, and reduce the PDF file size.
As an example, consider this example we recently solved for a customer. They wanted to merge a scanned TIFF image to an existing text-based PDF file.
In terms of formatting for the batch file, full path names were used so that it looked like this when the batch file is run from the Windows command prompt:
They had been struggling to find a solution to do this one particular document conversion, and the batch file solution not only provided the final document with the formatting they needed, but also provided the flexibility to integrate this into their existing document management process.
As we expand the options available in the Win2PDF Command Line Interface, the ability to do these types of highly customized and automated solutions is becoming easier, especially when coupled with Win2PDF Plug-Ins.
As always, if you have a particular conversion or process need for your PDF files, let us know if we can help.
One of the requests we get is how to take some action after a PDF file is created, and do it automatically. The most common example is to take the PDF file and attach it to a new email message. While Win2PDF has supported this feature since the beginning, many customers want to expand this capability to integrate the PDF files with other applications. And since these processes may be unique to each customer, we’ve expanded our support into a flexible new feature called Win2PDF Plug-Ins.
A Win2PDF Plug-In is simply a small customizable program that can be created, modified, or installed that will give the user an option to take some action with the PDF file afterit has been created.
Here’s one example we’ve created for our own internal software development team using the Slack business communication platform. When we download and install the Win2PDF “Send to Slack” Plug-in, it allows our users to check a box on the Win2PDF file save window and automatically send the PDF file into a specific channel in Slack.
Slack allows teams of users to share comments, images, files, etc. in different channels. [A slack channel is simply a topic-based message board that allows any team members who are subscribed to that channel a way to share and exchange information related to that topic. Examples might be channels like #features or #support or #sales.]
With this Win2PDF “Send to Slack” Plug-In installed and configured, it gives our Win2PDF development team an easy way to share PDF files without using email, and they will all be archived in a common channel for all team members. There are a few one-time steps to configure this Win2PDF “Send to Slack” Plug-In to work with your specific Slack workspace and channel.
This is just the first of many Win2PDF Plug-Ins we have in development, and we’ll also be providing more details in future posts on how users can create their own Win2PDF Plug-Ins, or modify ones that we’ve created.