New Win2PDF Pro TSE Feature: Run Watch Folder As A Service

Continuing our feature posts about the 10.0.154 Win2PDF Update, let’s now take a look at running the Watch Folder as a Windows Service.

Previously, the watch folder needed to be initiated by a user, and an open window needed to be running on the machine for the Watch Folder to work. Now, it can be set up as a Windows Service in the background. This feature is ONLY available in the Win2PDF Pro Terminal Server Edition (TSE) version of the software.

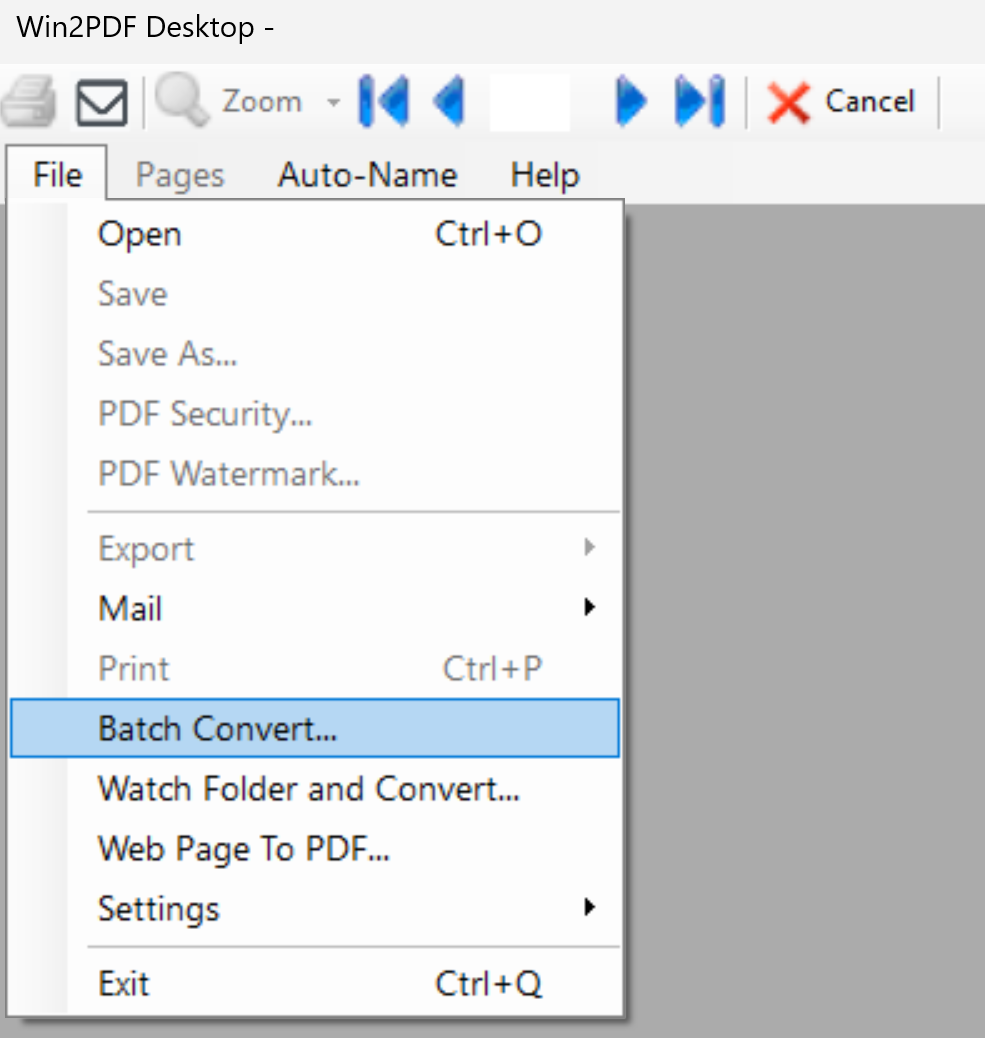
[Recommended: If you haven’t used the Watch Folder and Convert feature in the past, it’s recommended that you start by running the feature interactively by starting the “Watch Folder and Convert” shortcut from the Windows Start menu. This allows you to see any errors as you configure the folder and convert type options.]

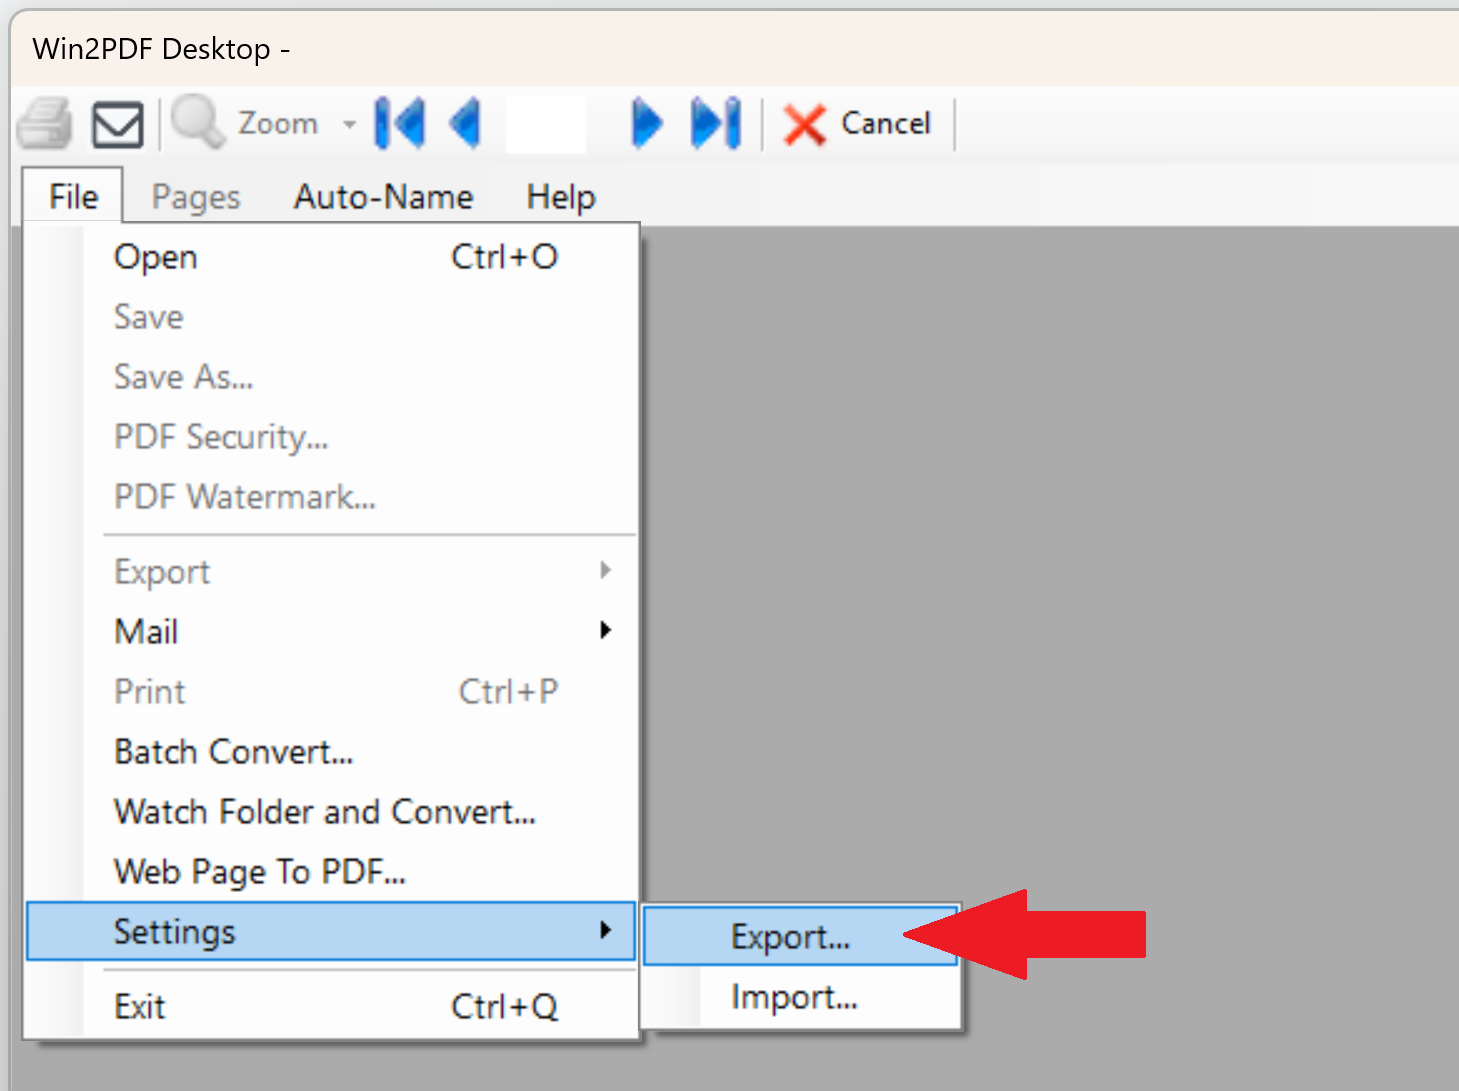
When everything is working correctly when running interactively and you’re ready to run the feature as a service, you should close the interactive Watch Folder window. Next, right click on the “Watch Folder and Convert” shortcut from the Windows Start menu, and choose “Run As Administrator…“.

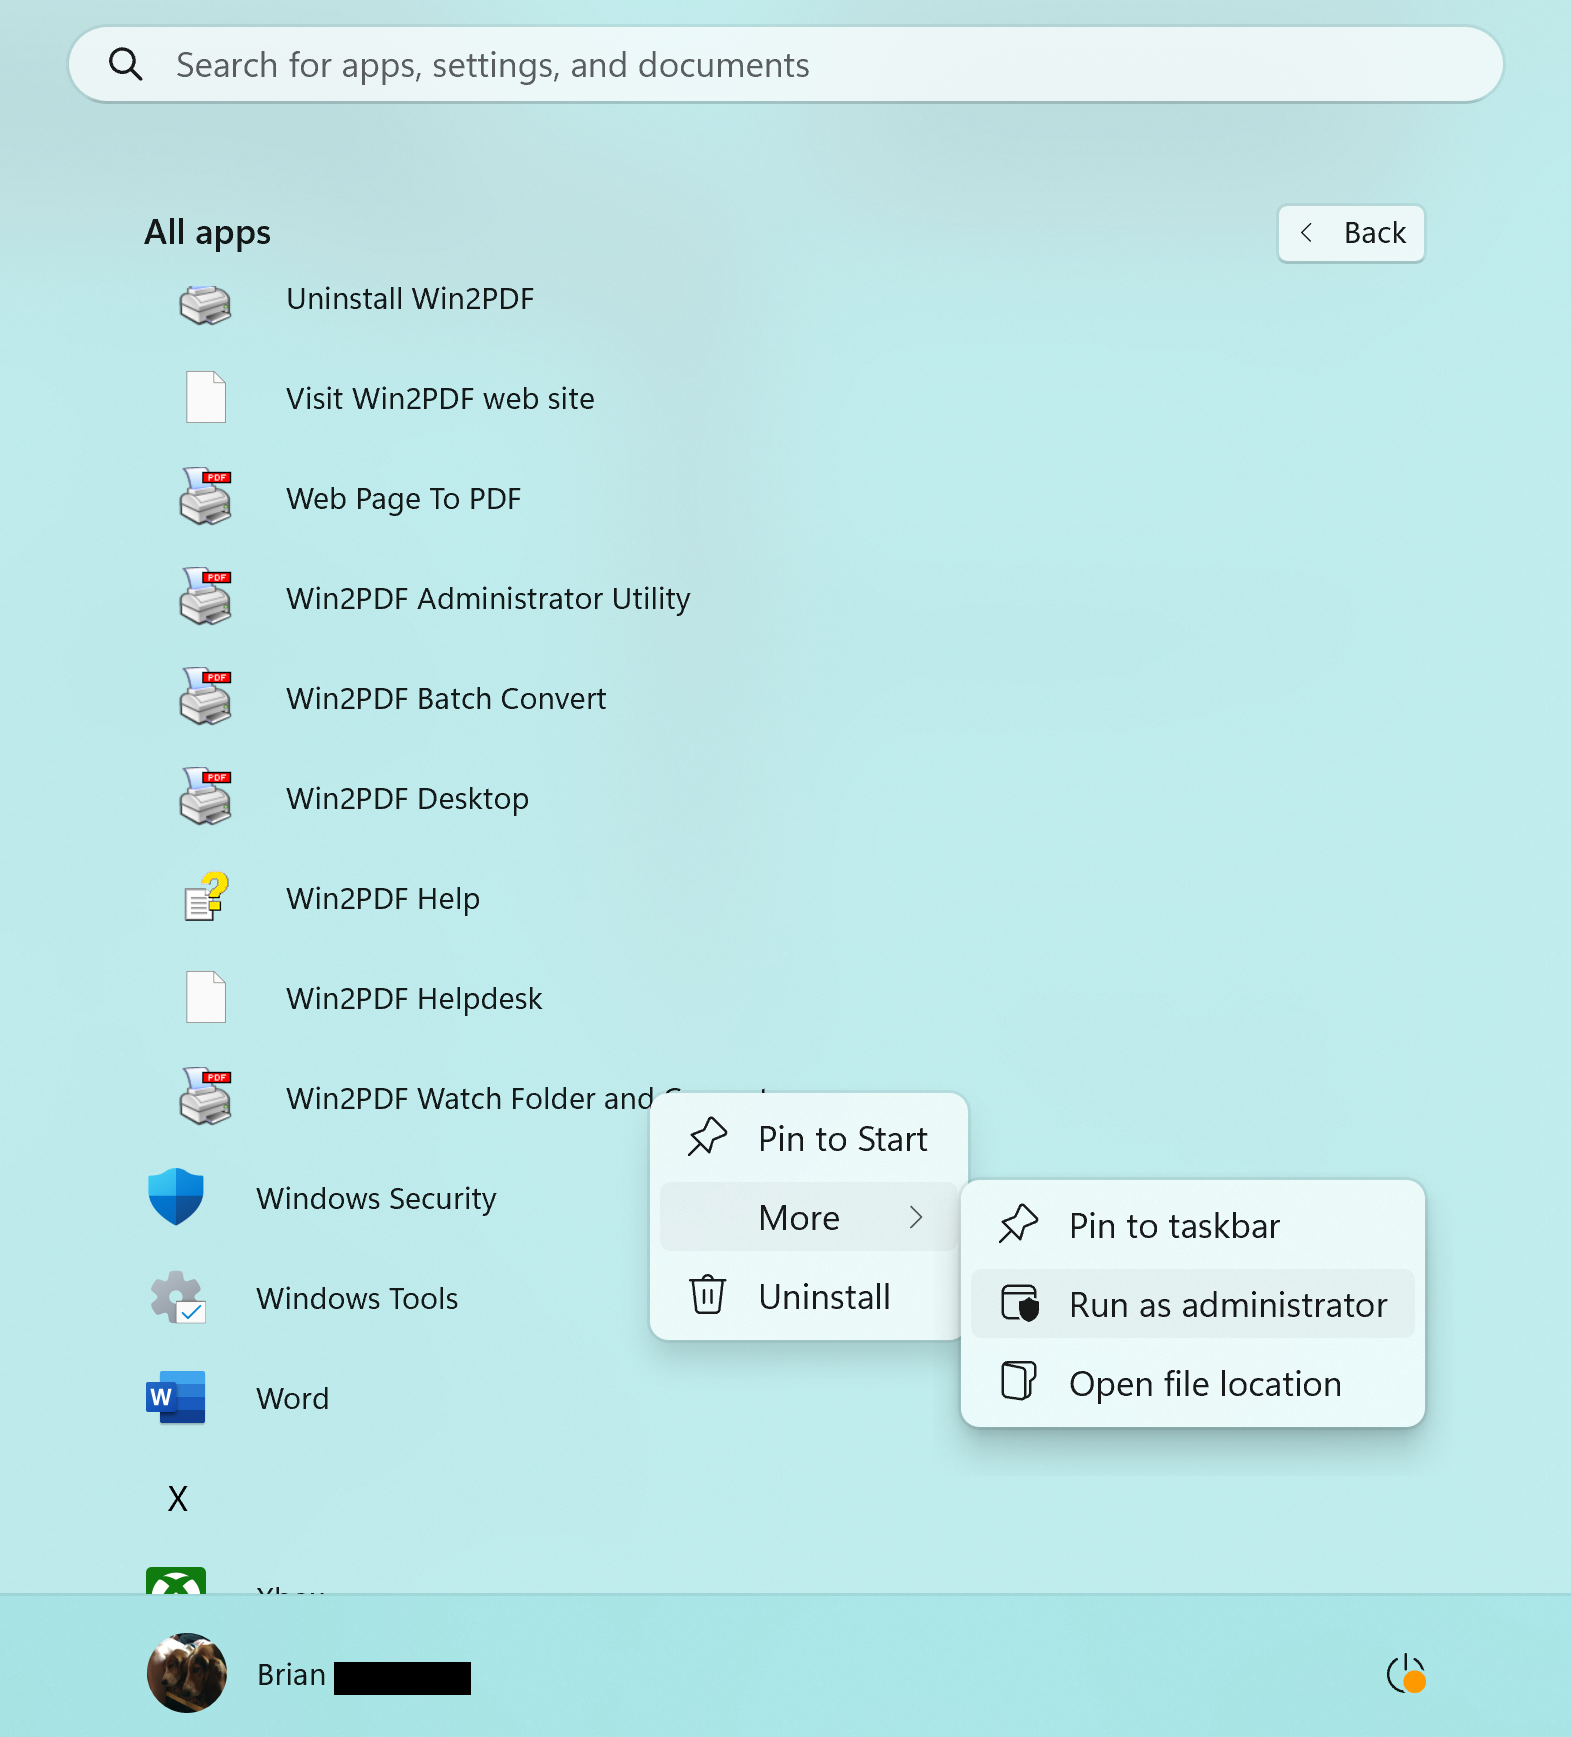
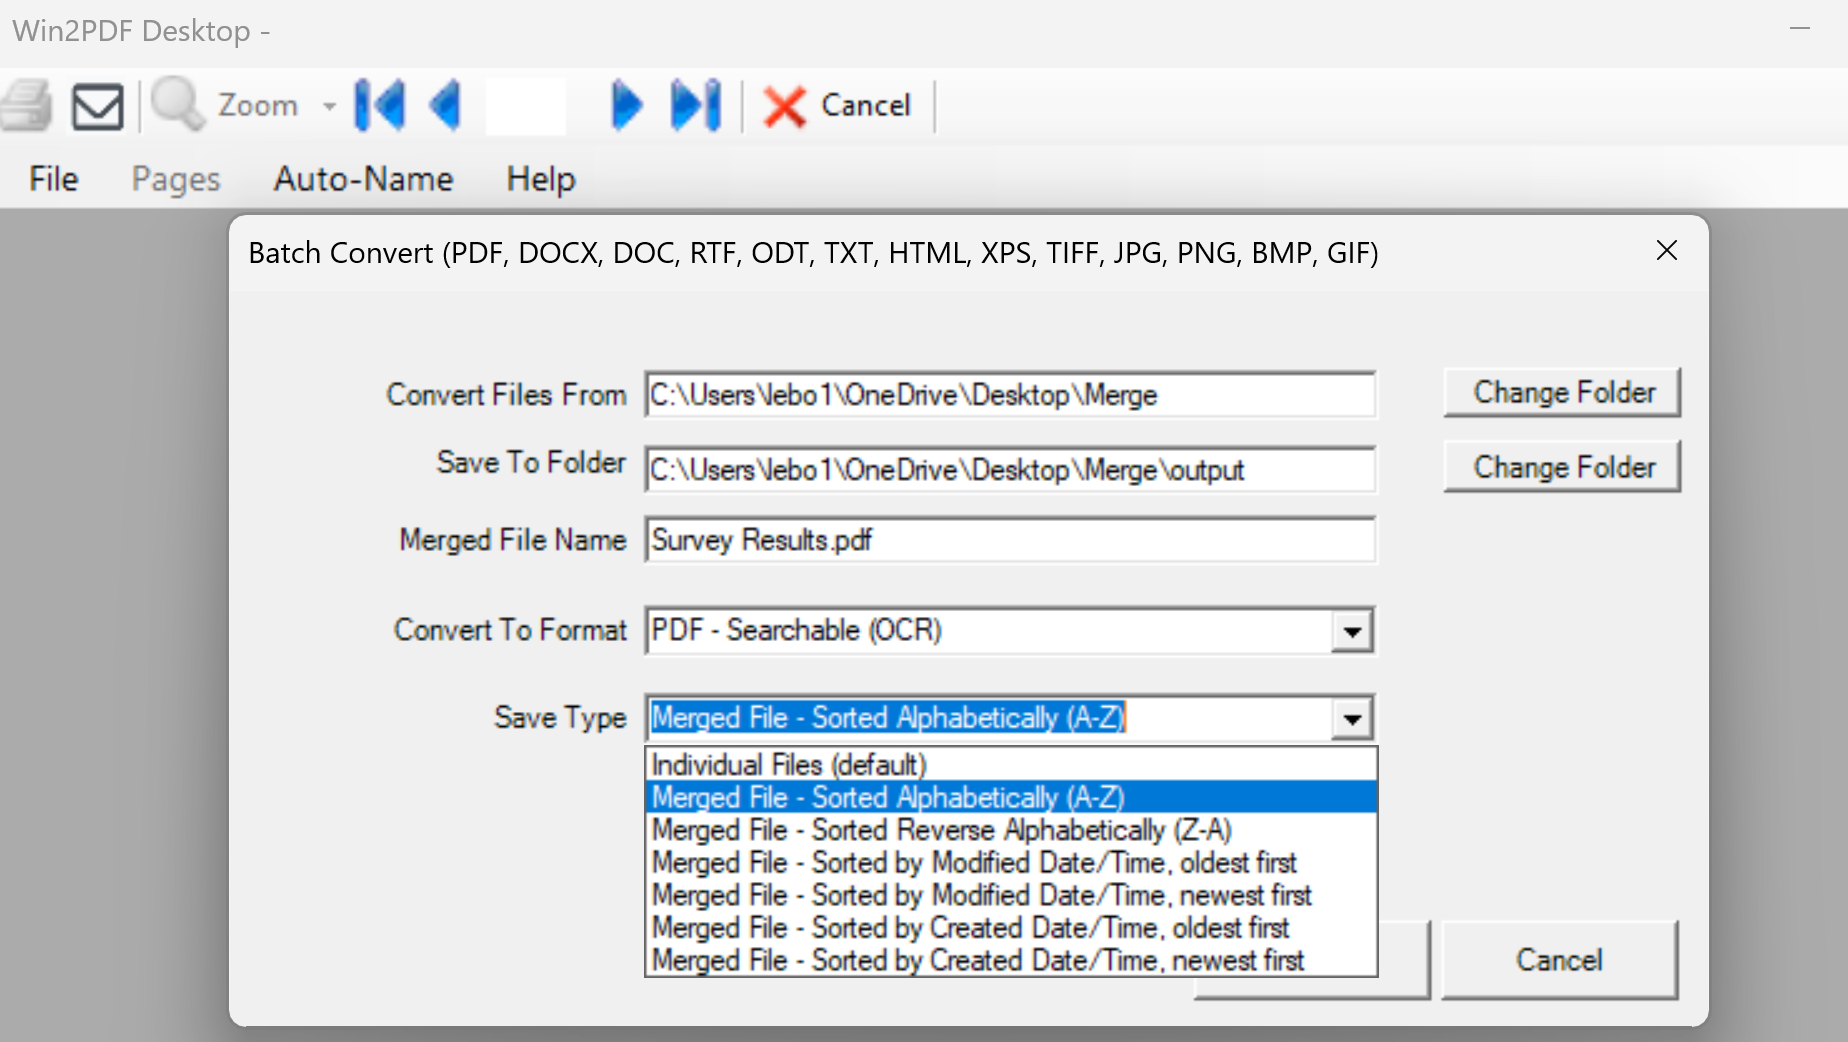
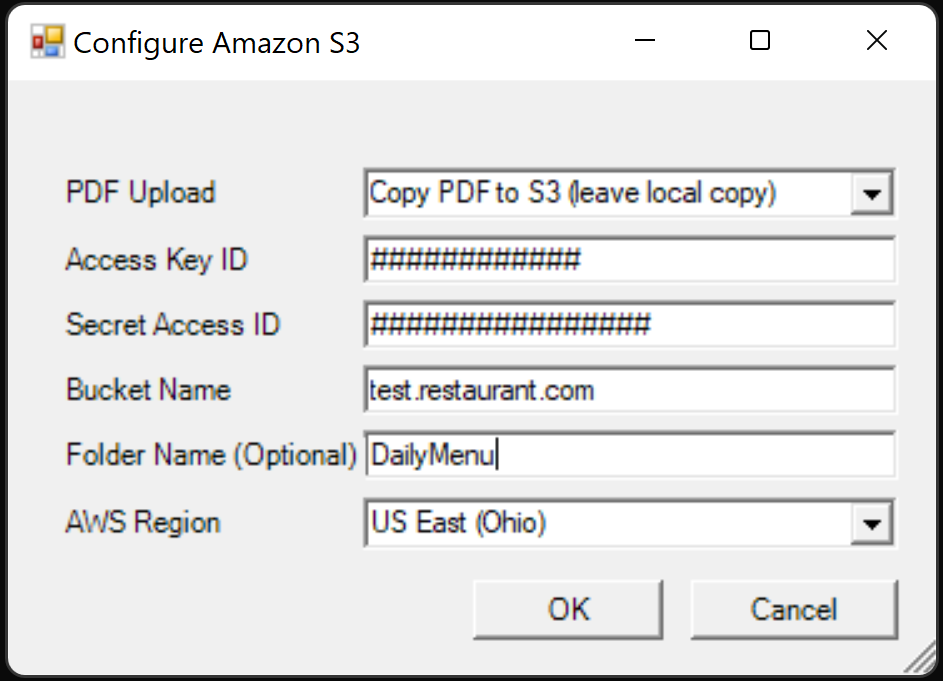
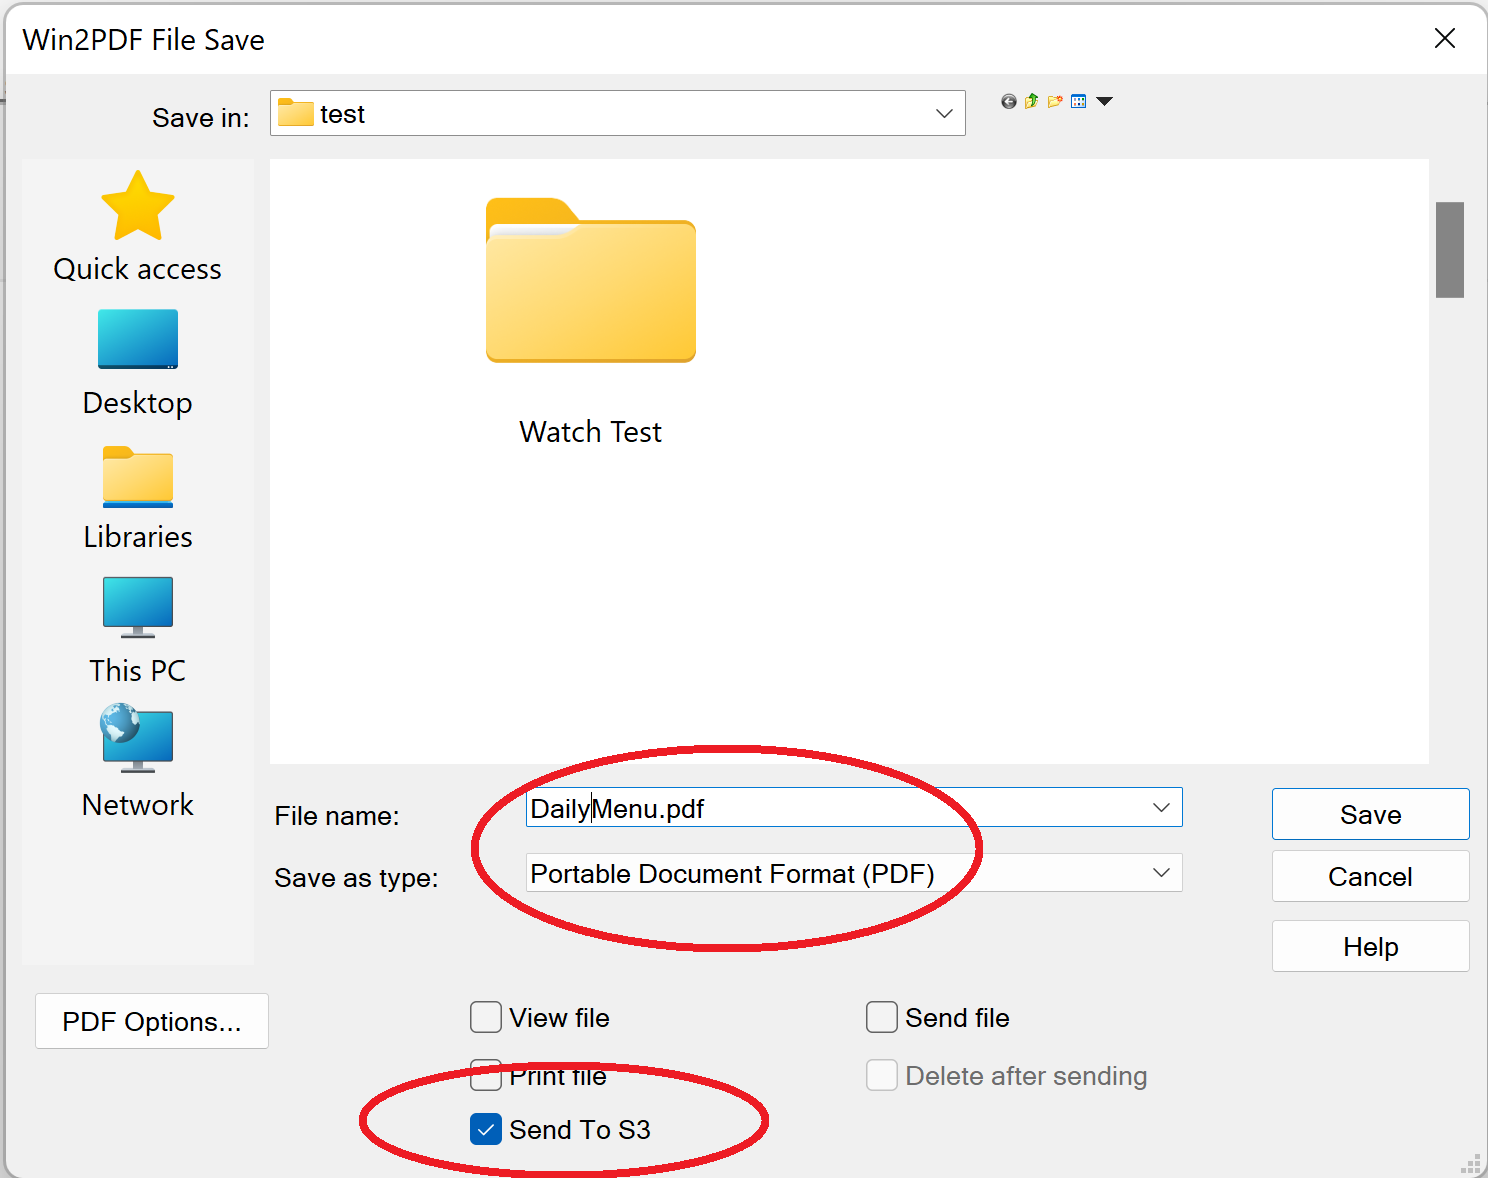
The title of the window will display “Service Config: Watch Folder and Convert“, and this is where you can select your watch folder and conversion format. The last used settings are restored in this Window.

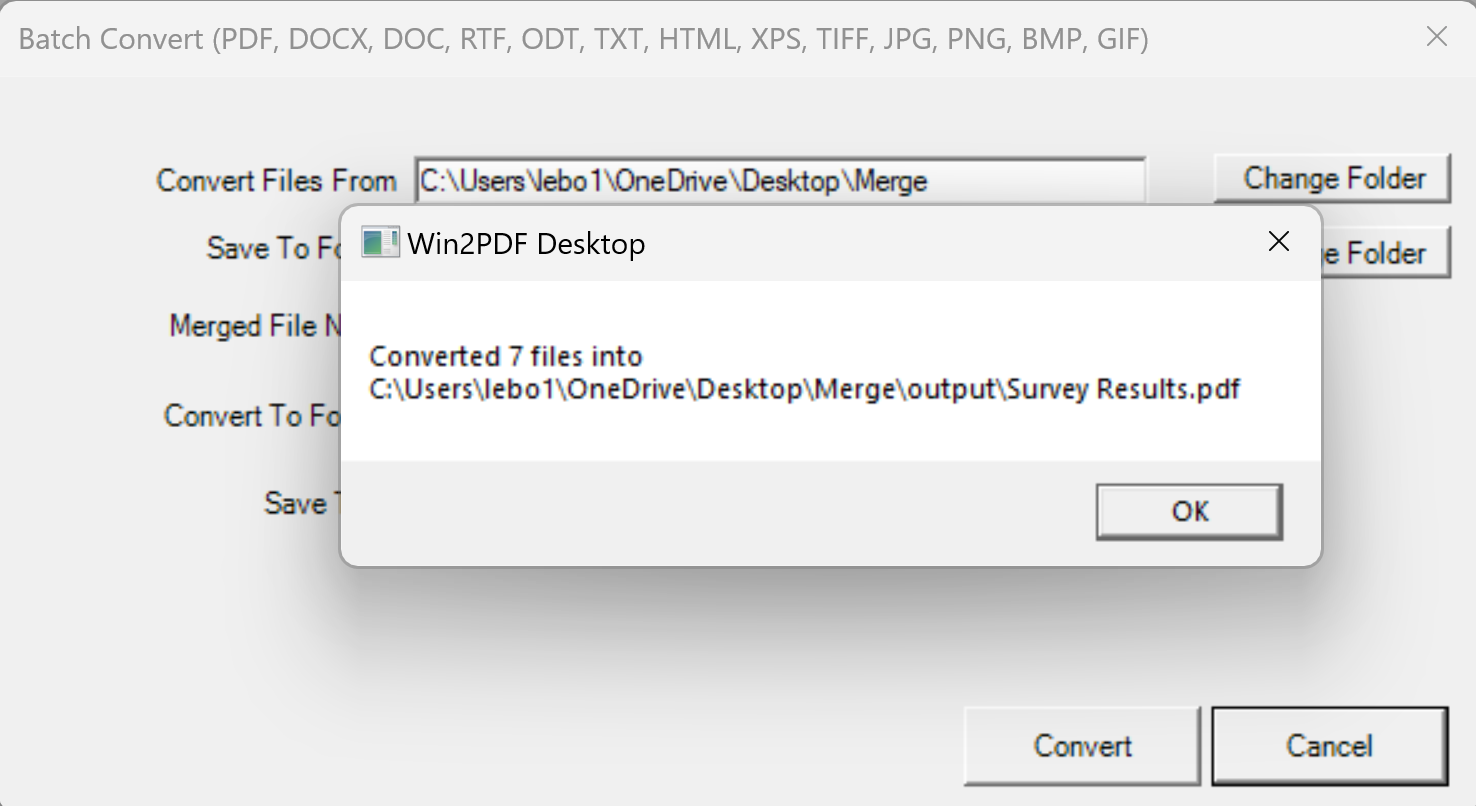
When you click on the Save Config button, Win2PDF installs and starts a Windows service using the settings in this window. The service will automatically start with Windows, and does not require that anyone is logged in to the server. You can verify the service is running by viewing the Services window from the Windows control panel.

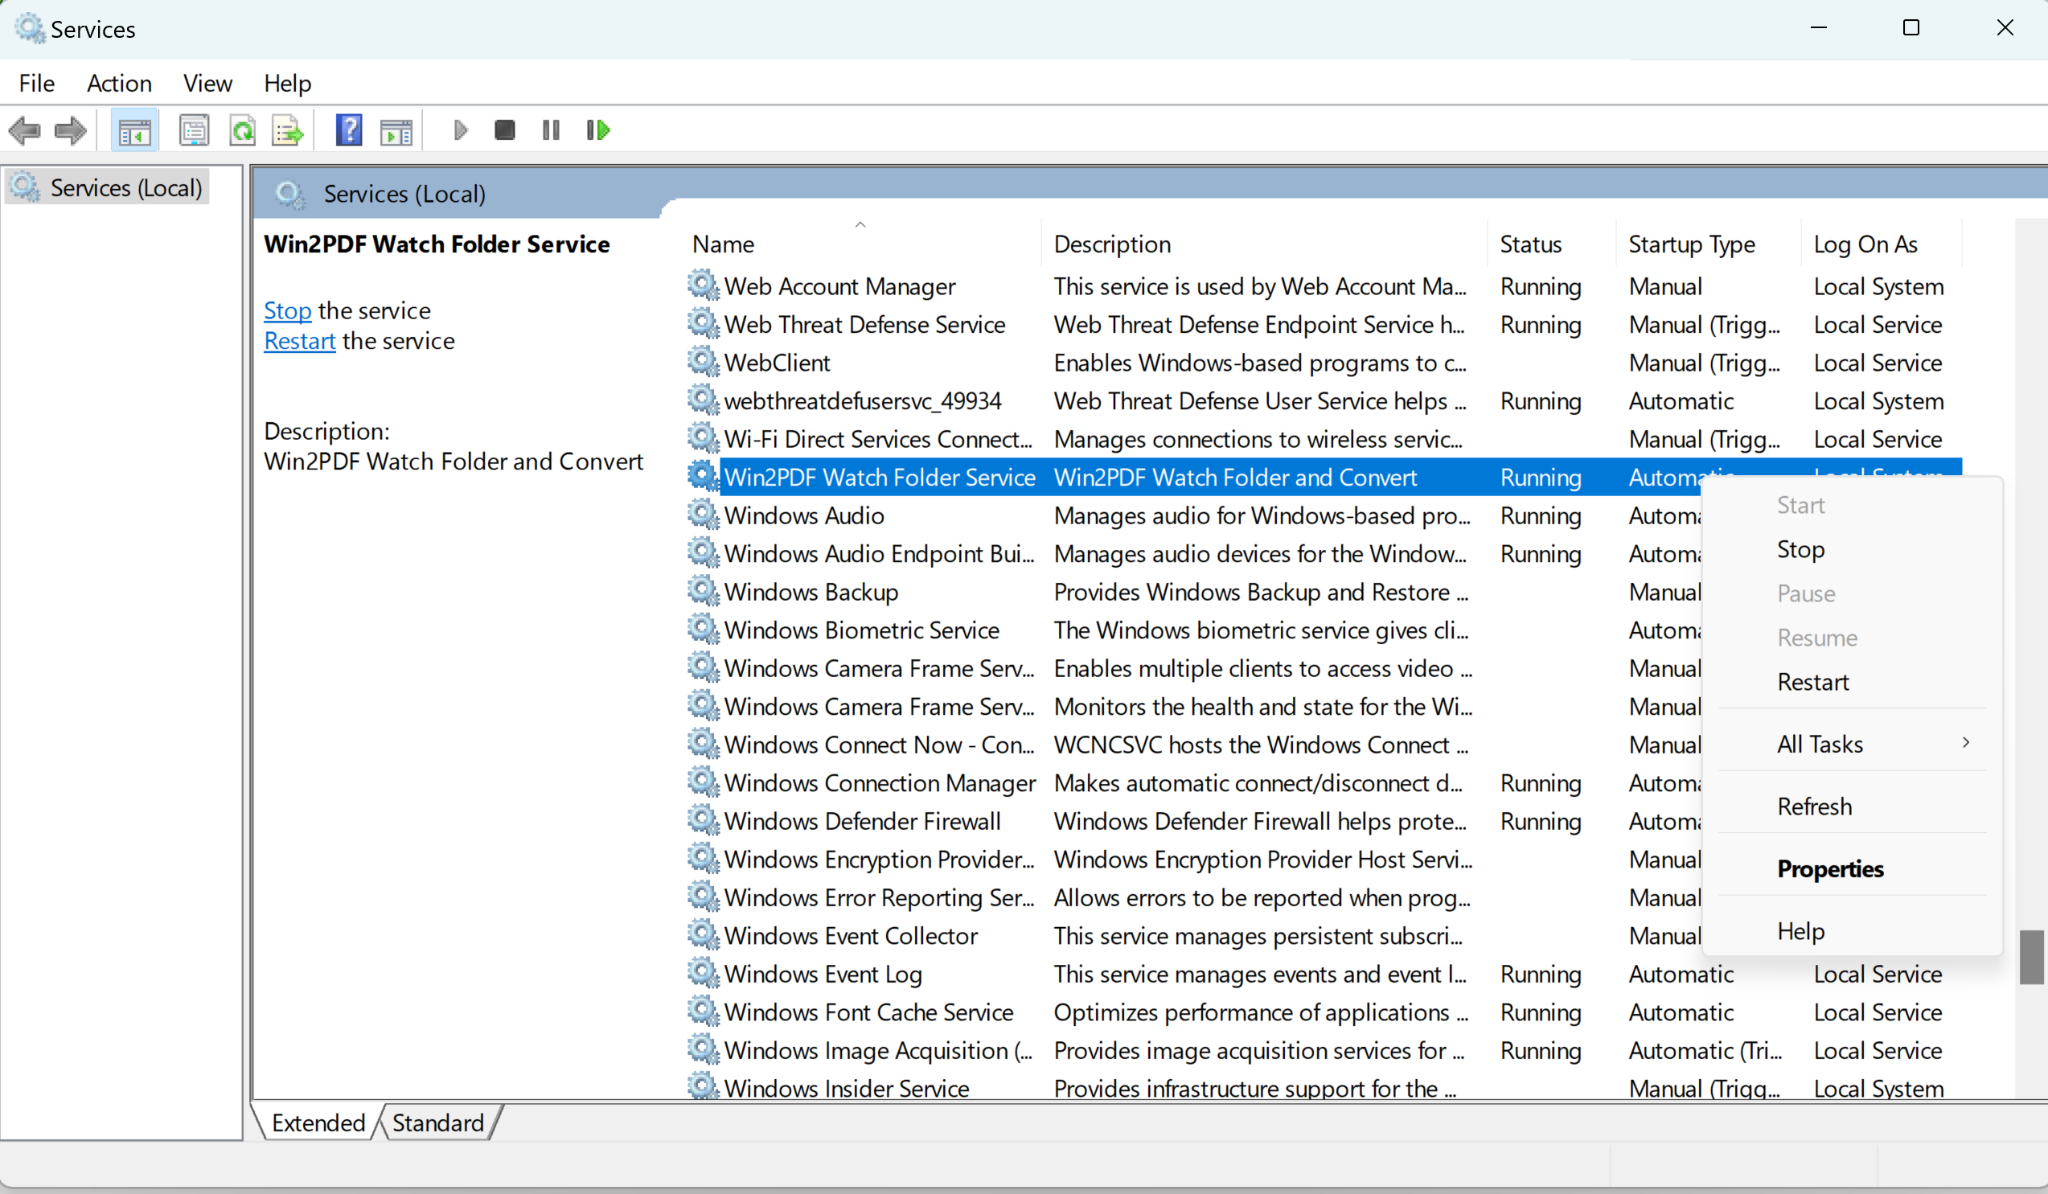
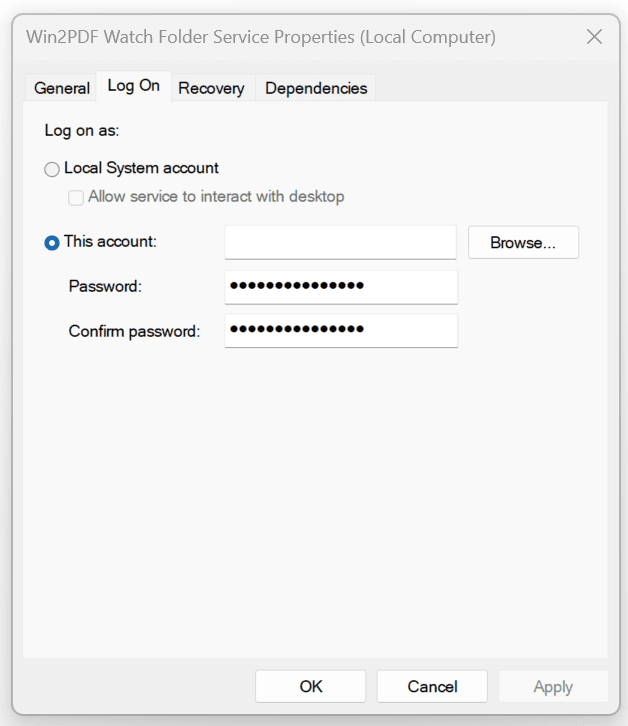
The service runs under the local system account by default. If the “Convert files from” or “Save To Folders” are not accessible from the local system account, you can configure the service to run under a different user using the “Log on” tab of the “Services” applet in the Control Panel Administrative Tools.

If you want to try this feature please request a 30-day evaluation license. Make sure to include that you need this specific feature in your request so we can send you the Win2PDF Pro TSE evaluation version.

New Win2PDF Pro Features: Batch Convert To A Single PDF File

In our previous blog post announcing the 10.0.154 Win2PDF Update, we mentioned a couple of new features that are specific to Win2PDF Pro. Let’s take a closer look at the first.

Batch Convert to a Single Merged PDF File

Previously, the batch convert feature in Win2PDF Desktop converted a folder of files in one format to another folder with a different format. If you had 10 .JPG files, for example, you could create 10 PDF files with batch convert.

However, suppose you had a folder of image files that were scanned pages of a book or document and you wanted to convert them all into a single PDF file, and one that had searchable text?

That’s where the new feature comes in. To use it, you just need to open the Win2PDF Desktop app and choose Batch Convert…

Select the folder that has your original files (Convert Files From). These can be PDF files, image files, or documents in various formats. And select the output folder (Save To Folder), and then choose the Save Type to be “Merged File…” When any of the “Merged File…” options are selected, you will be able to input a Merged File Name for the resulting file.

In our example, we’ll convert a folder of seven .PNG image files (each representing a scanned survey result), and store the results in as a Searchable (OCR) PDF file named ‘Survey Results.pdf’. Note: Any type of PDF output format can be used, but the OCR feature will make sure the results are searchable.

Notice that there are several Merged File options, which allows you to control the order in which the files are merged together. They can be sorted by alphabetical order (based on the original filename), or based on the time the original files were created or modified. When you press the Convert button, you’ll see the following pop-up.

And that’s really all there is to it. In this case, the seven individual image files (pages) in one folder have been saved to a single PDF file, and one that is searchable.

The Win2PDF BATCHCONVERT command line has also been updated to support merging to a single PDF.

Batch Merge PDFs To A Single PDF

In addition to batch converting between formats, you can also batch merge folders of existing PDF files to a single merged PDF. You aren’t limited to only converting between files types, you can also merge multiple PDF files together.

It operates in the same way by opening the “Batch Convert…” window and then choosing a folder of PDF files as the input. Again, you can choose the order of merging based on the file names, or the dates of creation or modification of the files.

You can also combine multiple PDFs into a single merged PDF from the command line using the BATCHCONVERT command.

This has been a frequently requested feature. In prior releases, Win2PDF could only append one file at a time, and we’ve had many customers wanting to merge multiple PDFs together in a single operation. Now you can with one click!

If you want to try this feature please request a 30-day evaluation license for Win2PDF Pro.

Win2PDF Update Adds New Features for Batch Converting, Watch Folders, and Command Line Printing

The newest release of Win2PDF 10.0.154 is now available on the Win2PDF Download site.

New features in this update include the following.

For Win2PDF Pro only:

For Win2PDF Pro Terminal Server Edition (TSE) only:

For all versions of the Win2PDF command line:

  • Added a tray selection option to the command line PRINTPDF command.

For all versions of Win2PDF:

________

This Win2PDF 10 update is a free upgrade for Win2PDF 7 and Win2PDF 10 users. If you would like to evaluate one of the new Win2PDF Pro features (PDF watermark, PDF security, batch-convert, auto-rename, or watch folder), contact us for a free 30 day trial of Win2PDF Pro.

We’ll be providing a more detailed look at these new features in the subsequent blog posts.

Win2PDF 10.0.144 is now available

The latest release of Win2PDF (10.0.144) is now available on the Win2PDF Download site.

The biggest additions to this release are specific to the Win2PDF Pro version of the software, which now supports the ability to batch convert standard word processing documents (Microsoft Word, Open Document Text, and Rich Text Format) to PDF.

Here’s a summary of changes in this new version:

This Win2PDF 10 update is a free upgrade for all Win2PDF 7 and Win2PDF 10 users. If you have an existing Win2PDF standard edition license and wish to use any of the new Win2PDF Pro features, you can purchase a Win2PDF Pro Upgrade.

We’ll be posting more specific information on some of these features next week, with more details on changes to the interface and how these new features can be used. In the meantime, if you would like to evaluate one of the new Win2PDF Pro features (PDF watermark, PDF security, batch-convert, auto-rename, or watch folder), contact us for a free 30 day trial of Win2PDF Pro.

Win2PDF Now Supports PDF Direct Printing

What is PDF Direct printing?

PDF Direct is a feature available on many printers that allows PDF files to be sent straight to the printer without being processed through any software first. There may be slightly different names used by each printer company, but it’s typically referred to as PDF Direct Print or Direct PDF printing.

This feature is useful because it is a much faster way for printers to print PDF files since there is no intermediate conversion process needed by software.

Most business class printers from HP, OKI, Kyocera, Ricoh, Canon, and Xerox support PDF Direct printing, but most consumer inkjet printers do not support it. Look up your printer’s documentation for the specific model to see if it supports PDF Direct printing or not. If you aren’t sure, it’s safer to use the Win2PDF Print PDF command line. This is slower but will work for all printers.

One important caveat: If you attempt to use this feature on a paper printer that does not support PDF Direct printing, many pages of garbled text will be printed instead of the PDF.

This feature is available in the Win2PDF 10.0.142 version or higher, and it is a free update to all Win2PDF 10 users.

There are 2 ways to use the latest Win2PDF software to print PDF files directly.

  1. Use the command line option for Win2PDF PDF Print Direct [link goes to documentation for this feature].

This is probably most useful for larger organizations that are batching many PDF files to the printers, perhaps along with other Win2PDF command line options.

  1. Use the new Win2PDF Direct Print Plug-In [link goes to download page for plug-in].

This is probably most useful for users interactively generating PDF files.

When you install the plug-in setup, you will be prompted to select a PDF Direct Printer.

After this is selected and saved, a copy of each printed Win2PDF PDF file will be sent automatically to this PDF Direct Printer until disabled. To disable this feature, you can remove the Win2PDF Direct Print Plug-In using the Windows control panel.

This feature may not be useful to all PDF users, but for organizations that are processing large volumes of PDF files it can dramatically reduce the time needed for printing.

When we presented this for testing to a customer who wanted this feature, he replied:

There is no question why I highly recommend Win2PDF to all my clients and will continue to do so! Unbelievable service for an outstanding product!

Brian H., Hawaii

Name or Rename PDF Files Based on Content Below a Search Term

In previous blog posts [see 1, 2], we showed how Win2PDF can name (or rename) PDF files based on data contained within a file. This feature has been especially useful for users needing to manipulate invoices, as this twitter user has noted:

Brainsweat. Lots of it. We’ve been talking with a lot of users that are spending a lot of time trying to sort through massive numbers of PDF invoices and renaming them based on content, attaching them to emails, splitting them apart, etc.

We now have a free update (Win2PDF 10.0.141) that expands on the capability to make this happen. Namely, it adds the capability to capture the search field below a search term. Previously it only allowed you to select text that followed after a search term. As many of you may know, it’s not uncommon for the invoice number to reside on a different line, so now both types of searches are possible, as shown below:

To use this feature, you’ll first need to open a sample PDF document in the Win2PDF Desktop App to define the Auto-Name Search Field.

Then, based on the example file shown above, you’d enter in the Content Search Word of “Invoice #”, choose the search direction to be “Search Below”, and it will show you what the found search field is:

After you have defined this search field, you can do a few things.

One, you can use this term to rename a batch of PDF files if they already exist. You simply need to select the Auto-Rename menu option from the Win2PDF Desktop App, and then choose your Auto-Name variables including the “Search Field 1” text as shown below.

Two, instead of renaming existing PDF files, you can set your current printing method to use this Auto-Name method for new PDF files. You’ll just need to go to the Configure Win2PDF Auto-Name Settings page to set up how you’d like the PDF files to be named.

And three, you can use this feature via the command line interface for more advanced users. Previously we used the command line command “getcontentsearch” to find search text that immediately follows the search word. Now we’ve added the “getcontentsearchbelow” command, which finds the search text that is directly below the search word.

Hopefully, this is one additional feature to reduce the amount of brainsweat required for managing your invoices.

PDF Bookmarks, Import/Export Win2PDF Settings & More in Latest Win2PDF Update

If you have changed Win2PDF from the default settings and want to preserve them when you move to a new computer (or group of computers), there is a new feature in our most recent Win2PDF 10.0.140 release that will help. You can now export your Win2PDF settings to a file, and then import that file on a new machine once you have reinstalled Win2PDF.

Win2PDF Desktop Settings Export/Import

This is accomplished through the Win2PDF Desktop Application (shown above). It can also be used from the Win2PDF command line with the EXPORTSETTINGS and IMPORTSETTINGS commands.

The ability to export/import settings can be very useful if you use Win2PDF with multiple printers with different settings; this feature will export/import multiple Win2PDF printers if they are configured.

It is also useful if you have configured Win2PDF with the Auto-name feature, or have made numerous other changes to the standard Win2PDF settings. Once you’ve established your desired settings, you can use this feature to backup your configuration settings, or use it to copy to a group of other machines using Win2PDF (if you wanted all users to Auto-name files in the exact same way, for example).

Also included in this release is support for PDF bookmarks. Bookmarks are a quick and easy way to jump to a certain section of a PDF file with a single click from a bookmarked word or phrase. You can see an example of a PDF file with bookmarks in the following image (using Adobe Reader).

Bookmarks in PDF – Shown in Adobe Reader

You can now add or delete bookmarks using the following command line options:

  • The ADDBOOKMARK command line allows you to specify a title and page number to insert into a PDF file.
  • The ADDBOOKMARKAFTERSEARCH command line allows you to search through a PDF document for a keyword (like “Chapter” or “Invoice”, for example), and then add a bookmark to that section of the PDF file. This is probably the most useful bookmark command because it lets you add bookmarks without knowing what page the anchor text resides on. It makes it easy to create bookmarks on dynamically generated reports with anchor text that may vary when each report is generated.
  • The DELETEBOOKMARKS command line can be used to remove bookmarks from any PDF file.

Lastly, we added the ability to remove a trial license to the Win2PDF Desktop Application through the Help menu.

Win2PDF Desktop – Remove Win2PDF License

This makes it easy to enter a purchased license without having to uninstall and reinstall the software after the evaluation period.

If you would like to evaluate Win2PDF or Win2PDF Pro, contact us for a free 30 day trial.

This Win2PDF 10.0.140 update is a free upgrade for Win2PDF 7 and Win2PDF 10 users.

Microsoft Print to PDF Missing in Windows 7

Many people have tried the limited “Microsoft PDF Printer” capability that Microsoft has made available in Windows 10 and have asked how to use the PDF writer in Windows 7.  The short answer is:  You can’t.  It’s not available in Windows 7.

A couple of months ago we posted that Win2PDF still supports the Windows XP operating system.  The same holds true for Windows 7: All of the features in Win2PDF 10 work the same in both Windows 7 and Windows 10 & 11.

Win2PDF is especially useful for XP and Windows 7 users who need a PDF writer, but what about Windows 10 and Windows 11 users?  If they already have access to “Microsoft Print to PDF”, why would they need Win2PDF?

Many reasons.  Here is a summary of features that are available in Win2PDF that are NOT available in the Microsoft Print to PDF printer.

If your organization uses a mix of different versions of Windows, standardizing on Win2PDF allows you to support all versions from Windows XP through Windows 11.

Win2PDF Pro and Command Line Enhancements Available Now

The latest release of Win2PDF 10.0.136 is now available on the Win2PDF Download site. The biggest feature additions are for Win2PDF Pro. You can now add PDF security and watermarks directly to an existing PDF file (without having to recreate it) in the Win2PDF Desktop App. In addition, there have been multiple enhancements to the Win2PDF command line options (based on customer feedback) and bug fixes.

Here is a summary of the enhancements in Win2PDF 10.0.136:

  • Customer reported bug fixes

This Win2PDF 10 update is a free upgrade for Win2PDF 7 and Win2PDF 10 users. If you would like to evaluate one of the new Win2PDF Pro features (PDF watermark, PDF security, batch-convert, auto-rename, or watch folder), contact us for a free 30 day trial of Win2PDF Pro.

Questions or comments? Contact at [email protected] or through the online Win2PDF HelpDesk.

Amazon S3 Upload Plug-In for Win2PDF

Win2PDF has a new Plug-In available to automatically upload PDF (or image) files to an Amazon Simple Storage Service (S3) bucket. Amazon S3 is a scalable, cloud-based object storage service that is part of Amazon Web Services (AWS). While Win2PDF itself is not cloud-based, it can save files to cloud-based services like Amazon S3, Dropbox, Slack, etc. This S3 Plug-In is a free optional extension to Win2PDF and must be installed separately from the main Win2PDF software.

With the new Configure Amazon S3 Plug-in, users can upload PDF or image files directly to their Amazon S3 buckets after the file has been created without any additional steps. This can be useful for distributing PDFs, modifying on PDFs using cloud based software, or integrating with 3rd party software such as Zapier.com.

To use this new feature, download and install the free Plug-In from our web site here:

https://get.win2pdf.com/plug-in/Win2PDF-S3-Upload-PDF-Plug-In.exe

When you run the Configure Amazon S3 Plug-In setup program, you will be presented with the following configuration window:

Configure Amazon S3 Upload Settings

The configuration options available are:

  • PDF Upload: Allows you to either Move or Copy the PDF file to S3, depending on whether or not you wish to keep a local copy.
  • Access Key ID & Secret Access ID: Your access Key ID and Secret Access ID are part of Amazon’s security credentials to verify who you are and whether you have permission to access the resources that you are requesting. AWS uses the security credentials to authenticate and authorize your requests.
  • Bucket Name: A bucket is a container for objects stored in Amazon S3, and needs to exist in your Amazon S3 account.
  • Folder Name (Optional): If you wish to upload the PDF file to a specific folder in the bucket, it can be specified here.
  • AWS Region: Amazon Web Services (AWS) has the concept of a Region, which is a physical location around the world where data centers are clustered. This setting must match the location of the specified bucket.

Once the Configure Amazon S3 Plug-In has been installed, you’ll have the option to select Send to S3 on the main Win2PDF file save window.

Win2PDF file save window with S3 Plug-In enabled

When this option is checked, the file will automatically be uploaded to your S3 bucket (using your configuration settings and access keys) without any further user interaction. If unchecked, it will only create a local PDF file and will not upload the file to your S3 bucket.

If you need to change your configuration settings in the future, you can return the Configure Amazon S3 Plug-In setup screen by selecting it from the Win2PDF Windows Start program group. (Please note you will need to re-enter your security access keys when you return to this screen. This is for security reasons, as the access keys will not be visible once saved.)

Configure Win2PDF S3 Upload Plug-In in Windows Start Menu

Also, we’ve had several blog posts previously that covered the Win2PDF Plug-In capabilities and how it can be used to extend the functionality of Win2PDF to do customer specific tasks or interface with other applications and services. Other Win2PDF Plug-Ins are available on our GitHub repository here:

https://github.com/win2pdf/Win2PDF.Samples/tree/master/plug-in

Like many Win2PDF features, this feature started with a suggestion from a Win2PDF user. Any questions, comments, or suggestions? Let us know.